Canceling a Request
Let data subjects cancel their own privacy requests, or cancel requests through the API
Data subjects sometimes change their mind after submitting a privacy request. MineOS lets them cancel the request themselves with a secure, one-click link, so your team doesn't need to step in. You can also cancel requests through the MineOS API. For example, you can add a Cancel request button to your own app or website and handle the cancellation from your backend. A canceled request is closed with a Canceled outcome, which is separate from completing or rejecting it.
How data subjects cancel a request
Data subjects can cancel a request in four ways:
- From the email verification success page. When a data subject verifies their request, the success page in your privacy center shows "Changed your mind? Cancel your request." This text is the same for all privacy centers and can't be customized.
- From any email template. You can add the cancellation link to any communication template and choose the wording yourself, for example "Click here to cancel your request." See Adding the cancellation link to a template.
- From an automatic cancellation email. If you use an Autopilot waiting period, MineOS can email data subjects a reminder before processing starts. See Sending a cancellation email.
- From your own app or website. You can add a cancel button to your app, account settings, or support portal. When a data subject clicks it, your backend closes the request as canceled through the MineOS API. See Canceling a request through the API.
For the first three options, clicking the link opens a cancellation page in your privacy center. MineOS closes the request as canceled, and the page confirms the cancellation.
When a request can be canceled
A request can be canceled at any time while it's still open. Deletion requests can no longer be canceled once data deletion has started. Whether a request can still be canceled is checked when the link is clicked, not when the email is sent.
| Situation | What the data subject sees |
|---|---|
| Request is open and can be canceled | Your request was cancelled |
| Request was already canceled by the data subject (for example, the link was clicked twice) | Your request was cancelled |
| Request is already closed, or data deletion has started | Couldn't cancel your request Your request was already processed |
| Link has expired | Couldn't cancel your request This request cannot be cancelled. |
Each cancellation link is tied to one request. How long it works depends on where it came from:
- Links in emails expire 45 days after the email is sent.
- The link on the email verification success page uses the same link as the verification email. It expires 7 days after that verification email was sent.
Adding the cancellation link to a template
The {{cancelRequestLink}} variable is replaced with the data subject's personal cancellation link when the email is sent. You can show the link as a full URL, or attach it to your own wording, such as "Click here to cancel your request."
-
Go to DSR setup > Templates.
-
Open an existing template, or click + New template, enter a name, and click Create.
-
In Content, write your message. For example: Click here to cancel your request.
-
Click the variables button at the bottom of the editor and select Cancellation link. This inserts
{{cancelRequestLink}}into the content.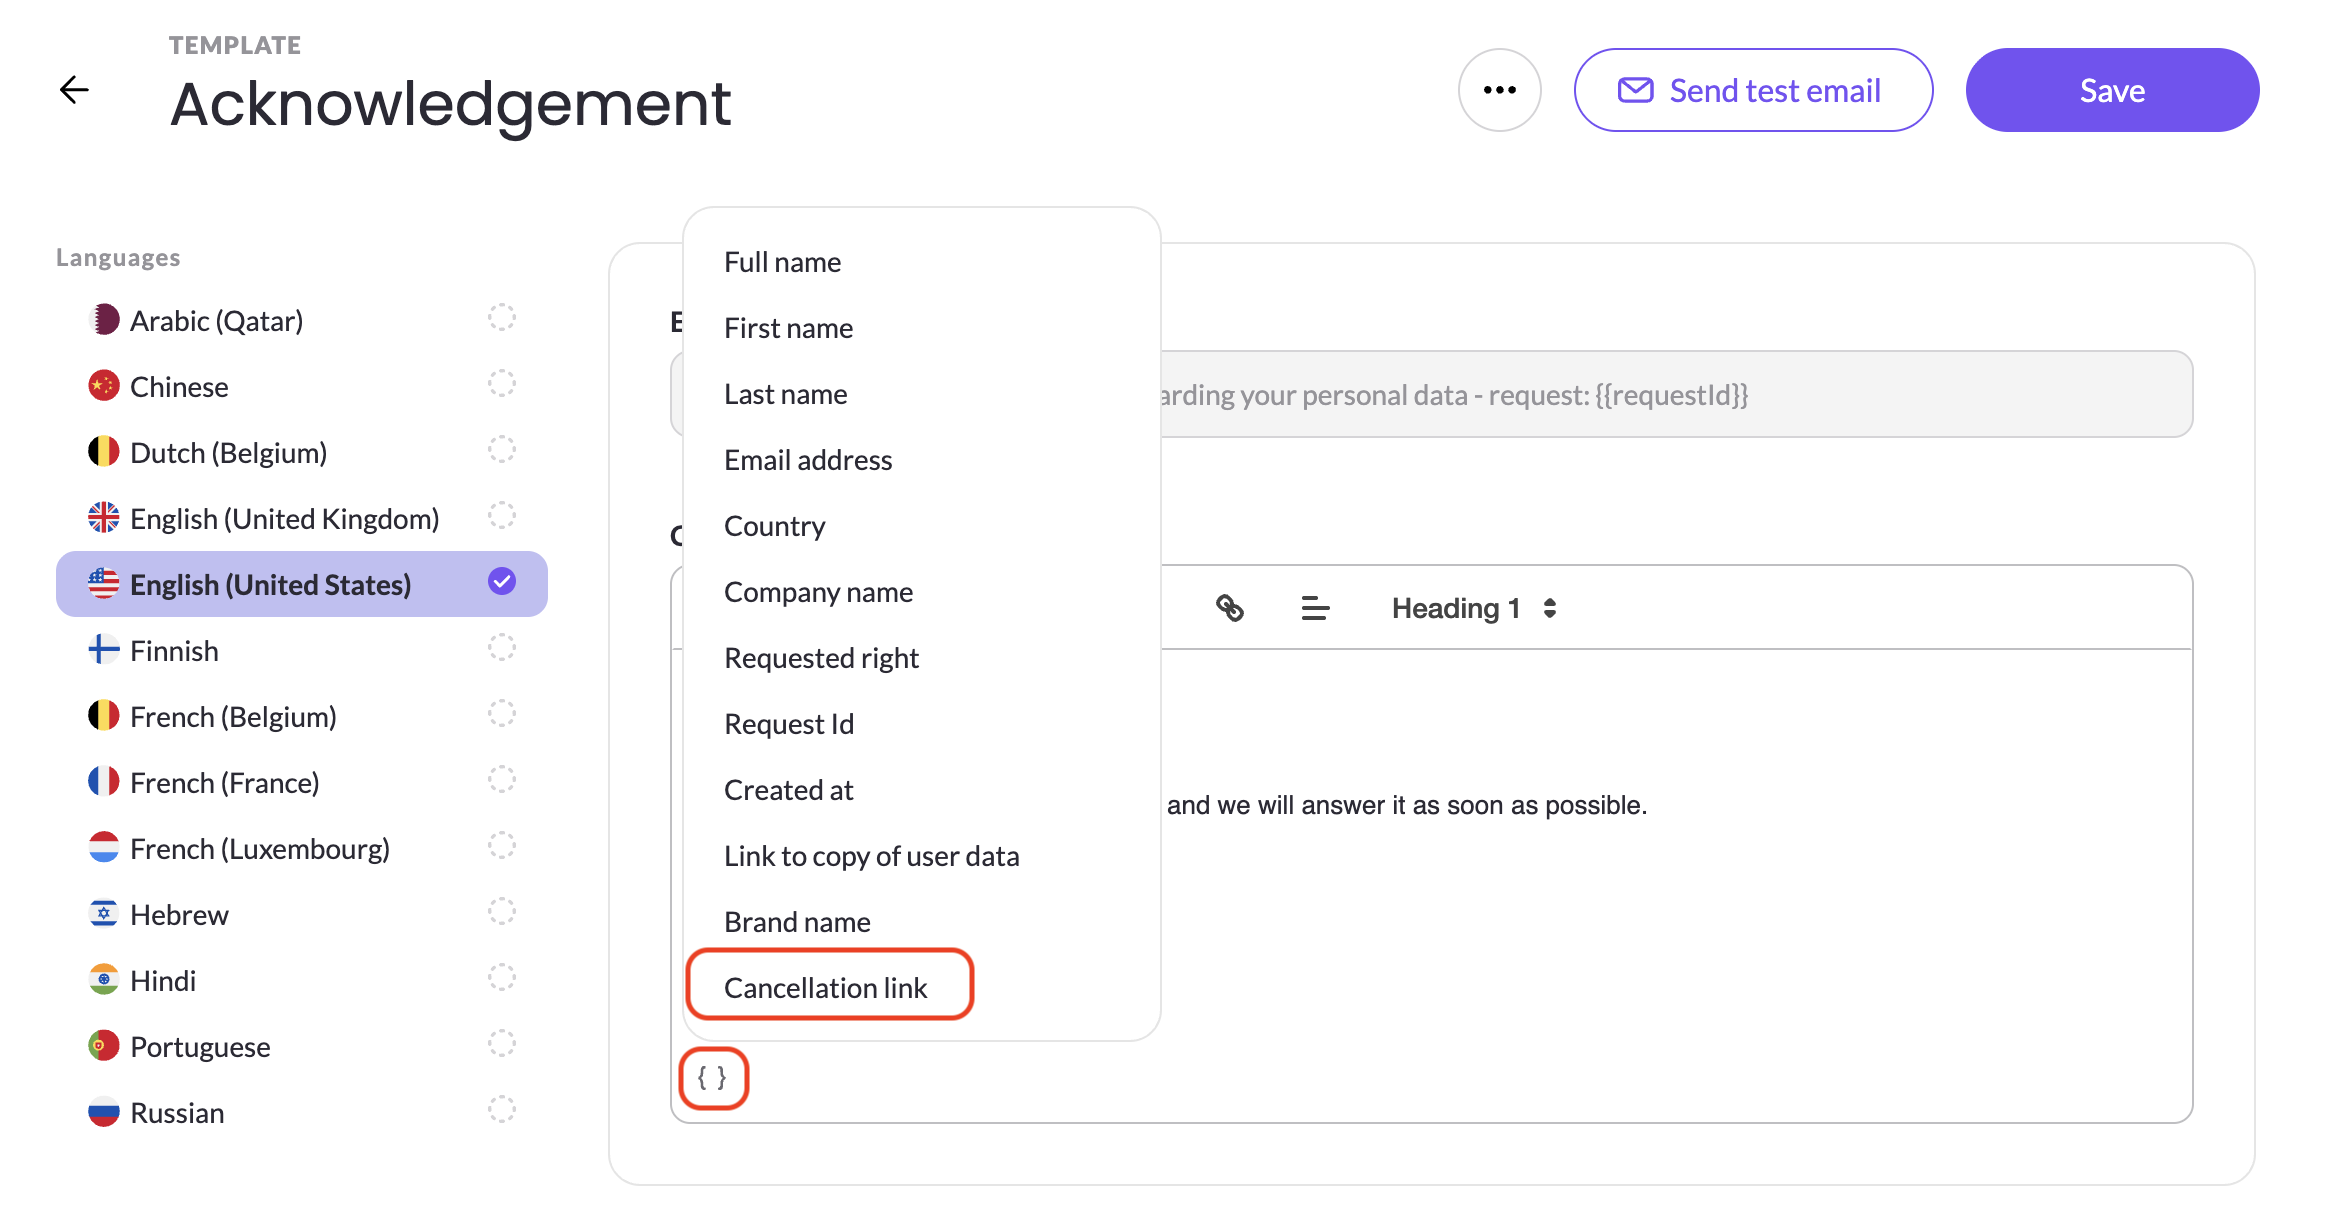
-
To link your own wording instead of showing the full URL:
-
Select
{{cancelRequestLink}}in the content and cut it. -
Highlight the words you want to turn into a link, for example Click here.
-
Click the link icon in the toolbar.
-
In Enter link, paste
{{cancelRequestLink}}and click Save.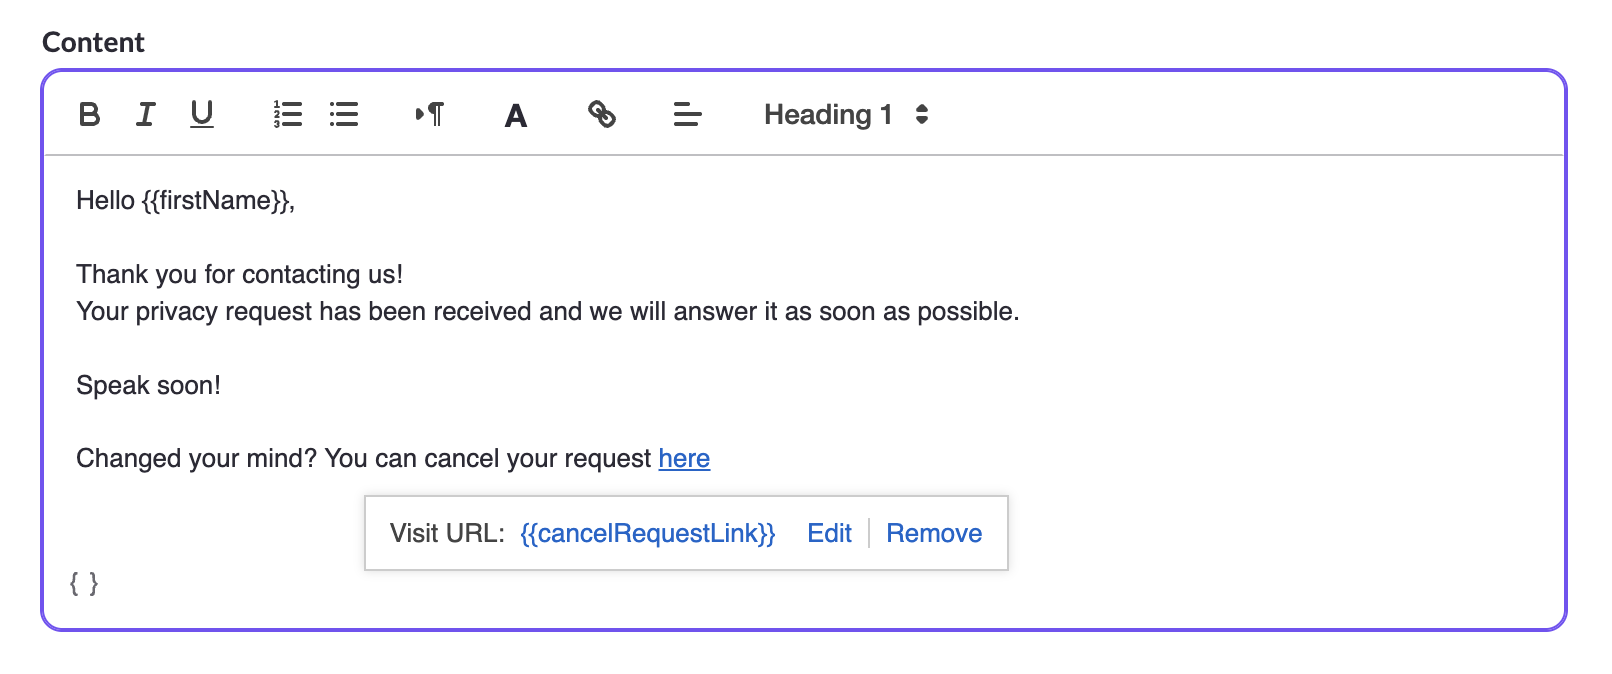
-
-
Click Save to save the template.
The email subject line is set by MineOS and can't be edited in the template.
Sending a cancellation email
The cancellation email reminds data subjects that they can still cancel, shortly before Autopilot starts processing their request. You set it up separately for each privacy right, and it's available only when the Autopilot waiting period is turned on. It's off by default.
- Open the privacy right you want to configure (for example, Delete my data).
- Go to Rules & templates.
- Under Request processing & cancellation, make sure Waiting period is turned on and set to a number of days.
- Turn on Cancellation email.
- In Send the email this many days before the waiting period ends, enter a number of days. It must be at least 1 and less than the waiting period. For example, with a 21-day waiting period and a value of 2, the email is sent 19 days after the request is verified.
- Under Cancellation template, choose the email template to send. To use a different template for each brand, click Set template per brand.
- Click Update to save.
Make sure your template includes the cancellation linkMineOS sends whichever template you select, exactly as written. Add the
{{cancelRequestLink}}variable to the template, as described in Adding the cancellation link to a template. Without it, data subjects get the email but have no way to cancel.
If you turn off Cancellation email, the template and the number of days are cleared. If you turn off Waiting period, the cancellation email is turned off as well.
Tracking cancellations
DSR overview dashboard. Go to Reporting > DSR overview. The Closed Requests chart breaks down closed requests by closing reason, including Canceled. To focus on cancellations, set the Closed Reason filter at the top of the dashboard.
Requests page. The Closed view already includes the Closing reason column, so canceled requests are marked Canceled. To track only cancellations:
- Go to Privacy ops > Requests.
- Click Filter and set Closing reason to Canceled.
- Optionally, click the columns icon and select Closing reason to display it.
- Click Save and name the view, for example Canceled.
Request page.
- Cancellation email. The email appears in the request's message history as an automatic message. It shows the content the data subject received and the time it was sent.
- Cancellation. When a data subject cancels, the request is closed with a Canceled outcome, and the change is attributed to the data subject.
Canceling a request through the API
You can close a request as canceled with the endpoint that closes a request, setting the outcome to canceled. Common uses:
- Support chat. A data subject asks your support team to withdraw their request, and the agent cancels it for them.
- In your app. If you have an app or a logged-in account area, you can add a Cancel request button. When the data subject clicks it, your backend calls the MineOS API to close the request, so they can cancel without leaving your product.
Make the API call from your backend, not from the app itself, so your MineOS API key is never exposed to end users.
Updated 3 days ago