Customize Fields and Page Layout
Create custom fields and arrange them into sections, filters, columns, and views to fit how your team works.
Every inventory item is built from fields — individual pieces of information like Business Unit, Legal Basis, or Vendor Score — organized into sections on the Details tab. You can customize both: create the fields that matter to your organization, and arrange them into whatever sections and order make sense for your team's workflow. These same fields also power table columns and filters across your Inventory, so changes you make here also apply to your inventory's custom views.
Customizing that experience comes down to three things:
- Create and edit fields — from Settings → Data mapping → Fields (also available directly from the layout editor, for convenience while you're already there).
- Choose your page layout — decide which fields appear in which sections, and in what order, using the layout editor.
- Build custom views — combine filters and columns into saved views tailored to how your team works.
Done well, this turns the same underlying fields into different tools for different teams — a compliance view built around legal basis and retention, a procurement view built around vendor risk and contract stage, all from the same set of fields. (For an overview of the Details tab itself, see the article on navigating your Inventory.)
Built-in vs. custom fields
Every field is either built-in or custom. Built-in fields (like Business Unit or Legal Basis) ship with the platform, so you can edit their values but can't rename them or delete them entirely. Custom fields are ones you create yourself, with full control over their name, values, and type. Either type can be added to assessment templates — so whichever you use, the field and its values stay consistent between your Inventory and your assessments.
Creating and editing fields
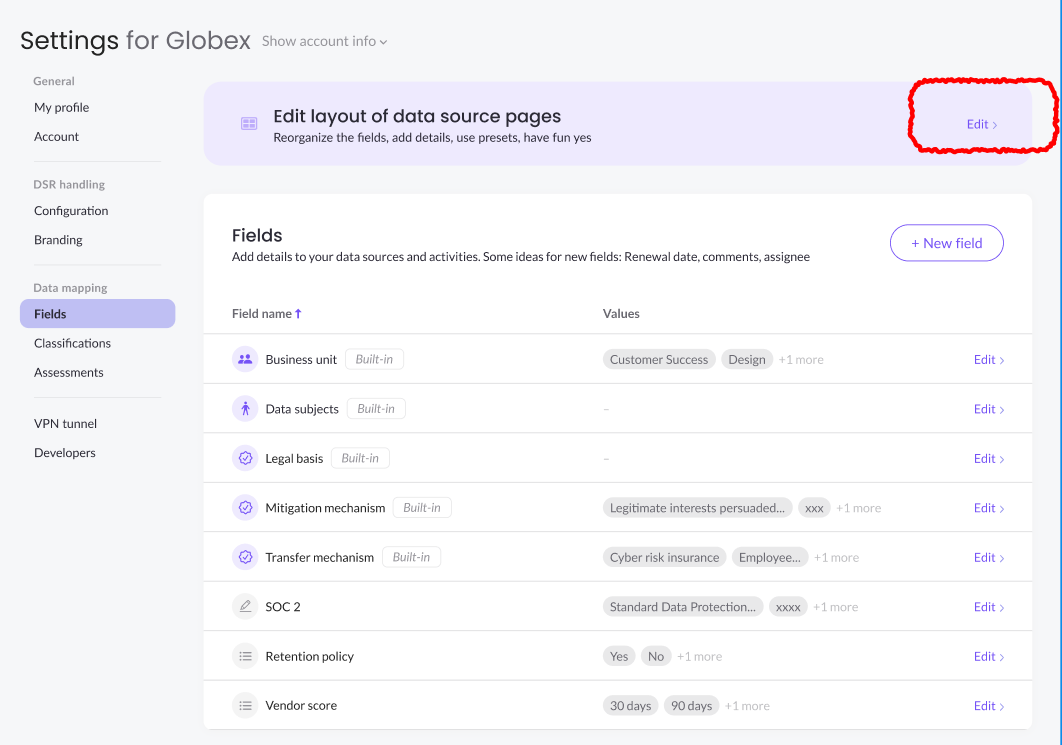
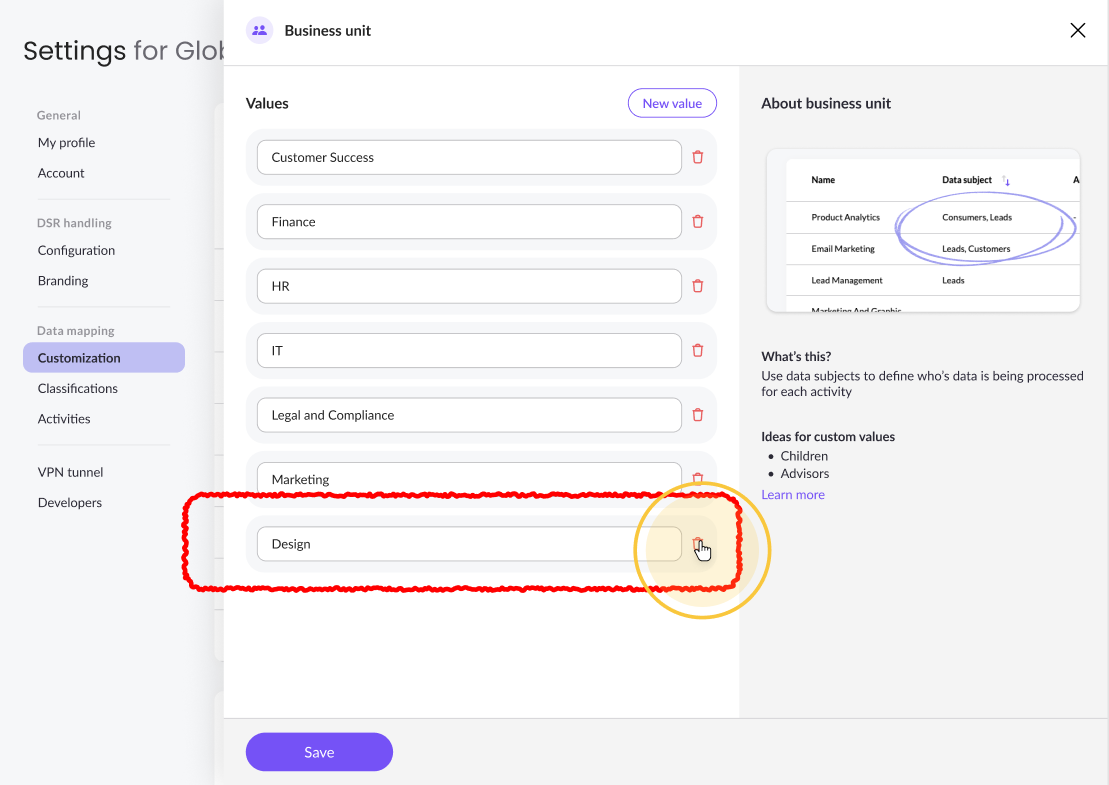
Go to Settings → Data mapping → Fields to see every field available in your workspace. Select + New field to create one, or Edit next to an existing field to update it — the same editing panel is also reachable directly from the layout editor as you build your page.
Each field has:
- Name and description — the description also helps Mira AI give more relevant suggestions when it references this field.
- Type — either Text (free text entry) or List of options (a defined set of values to choose from).
- Behavior — for list fields, toggle Multiple-choice to allow more than one selection, and Use colors to visually distinguish values (useful for fields like risk level).
- Values — for list fields, add or remove individual options using New value.
Choosing your page layout
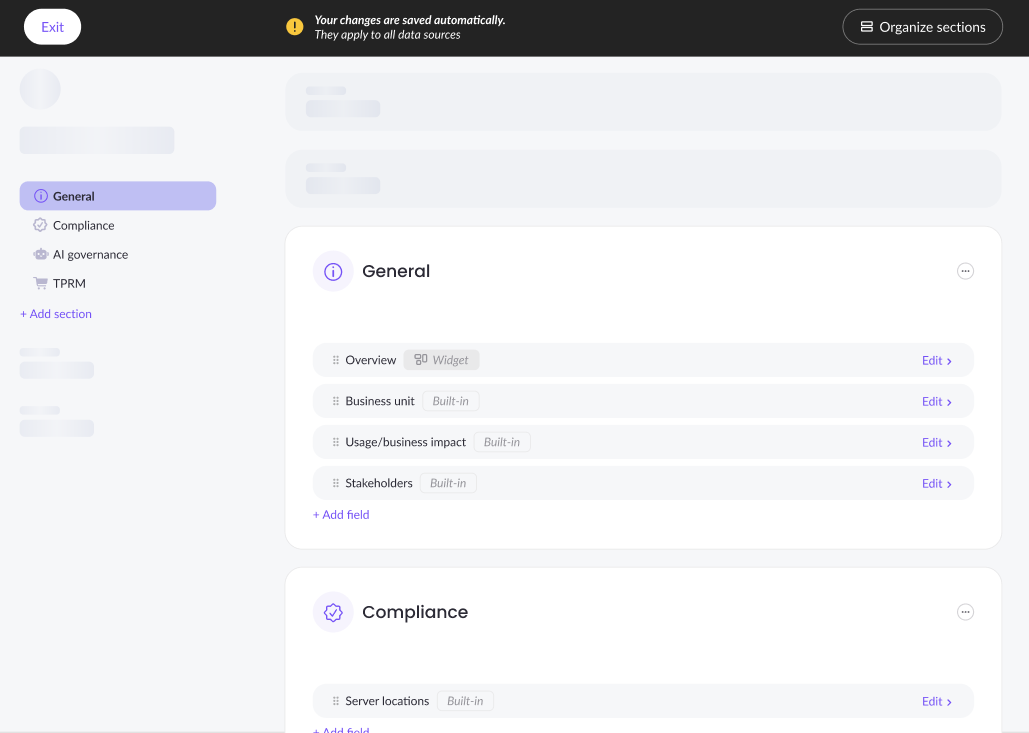
Open the layout editor from the Edit link at the top of the Fields page to decide which fields show up on the Details tab, and how they're organized. Changes save automatically and apply to all data source pages.
Sections
A section is a labeled group of fields, shown in the left-hand navigation of the Details tab (for example, General, Compliance, or TPRM — these are your default fields but are editable). You can:
- Add a new section — either blank, or built from a preset that comes pre-loaded with suggested fields for a common use case.
- Reorder sections by dragging them into place.
- Rename a section or change its icon by selecting the section header.
- Delete a section — note that some default sections can't be deleted due to platform constraints.
Fields within a section
Inside a section, select + Add field to create a new field on the spot, or choose from your Unused fields — fields that exist in your workspace but aren't currently placed in any section. You can drag fields to reorder them within a section, or use Move to section to relocate a field elsewhere. Removing a field from a section doesn't delete it — it simply becomes unused and can be added back later.
Field suggestions
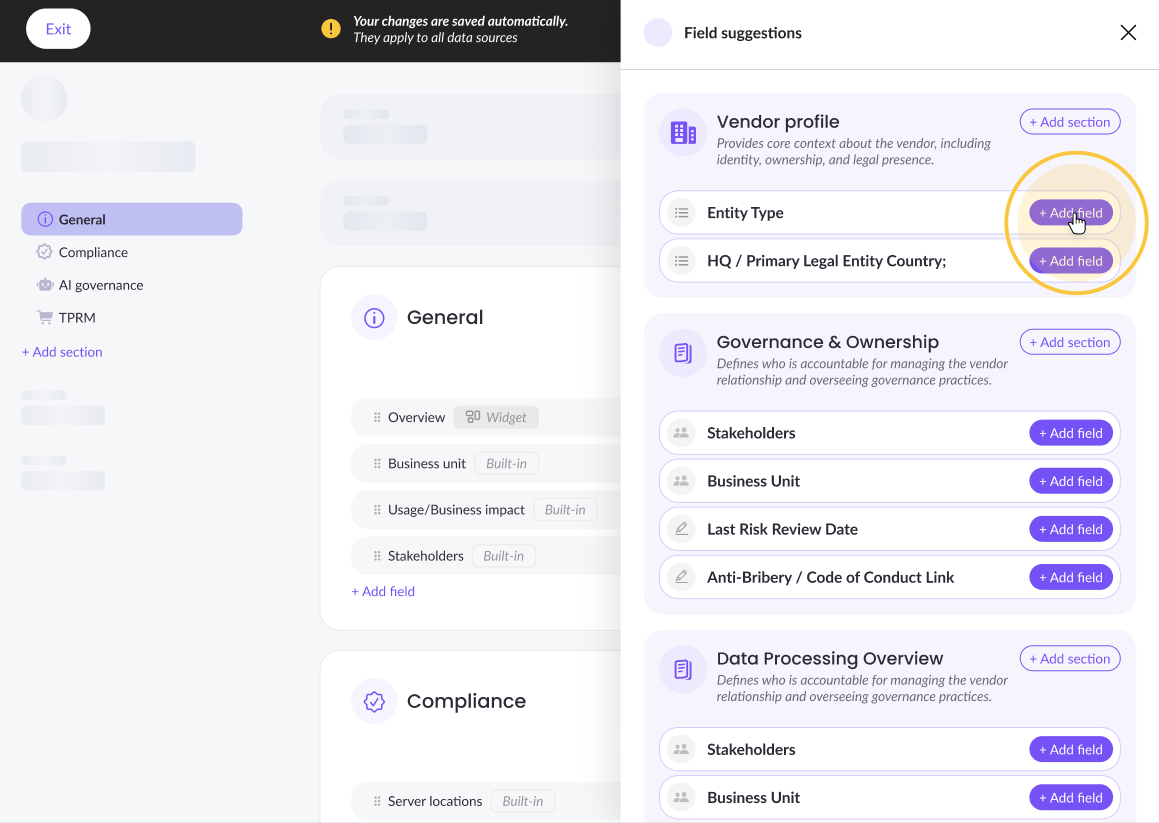
For a faster starting point, the layout editor also offers field suggestions — grouped sets of recommended fields organized by topic (such as Vendor Profile or Governance & Ownership). Select + Add field next to any suggestion to add it directly to your layout, or + Add section to bring in the whole group at once.
Building custom views
Beyond the page itself, fields also power the Inventory table:
- Filter — select Filter on the Inventory table to narrow it by any field, built-in or custom. Filters can be combined, and the button shows a count of how many are currently applied.
- Columns — use the columns selector next to the search bar to choose which fields display as columns, so each team can surface the information they care about most.
- Views — once you've set filters and columns the way you want, select Save to save that setup as a named view, visible to all teammates under Saved views in the sidebar, so anyone can switch between them with one click.
Tips and recommendations
- Use custom fields to cover gaps in default use cases. A "Procurement stage" field lets procurement build their own onboarding pipeline view; a "Shadow IT" field — combined with Vendor Scout research — can surface unsanctioned tools that don't fit any built-in category. The field is the building block; the view turns it into a working use case for that team.
- Write clear field descriptions. Mira AI uses them to give more relevant suggestions when filling in that field, so a specific description pays off beyond just documentation.
- Start from presets and field suggestions when setting up a new section — they're built around common use cases and save you from starting blank.
- Reuse fields across assessments deliberately. Since both built-in and custom fields can be added to assessment templates, decide early which fields you want feeding into assessments — for example, adding a custom "Data Residency" field to both a vendor's Details tab and its risk assessment template keeps that answer in sync everywhere it appears. See the dedicated article on custom fields and assessments for how that works.
Updated 5 days ago