
Mira AI: eDiscovery agent for Documents — Redacting Sensitive Data
Let AI scan a request's files and suggest sensitive data to redact, so you only review and confirm.
When you fulfill a Get a copy / Access request, you often need to remove sensitive information from the files before sending them to the data subject — such as other people's names, employee details, or third-party data. The eDiscovery agent for Documents is an AI agent that scans the files attached to a request, detects the sensitive data types you've configured, and suggests them for redaction, so you only need to review and confirm.
For structured data in databases and SaaS apps, use the eDiscovery agent for SaaS & DB instead.
What the agent does
- Scans unstructured files (such as PDFs, Word, PowerPoint, Excel) attached to access requests.
- Runs automatically after files are collected by an integration or uploaded manually, so suggestions are ready when you open the request.
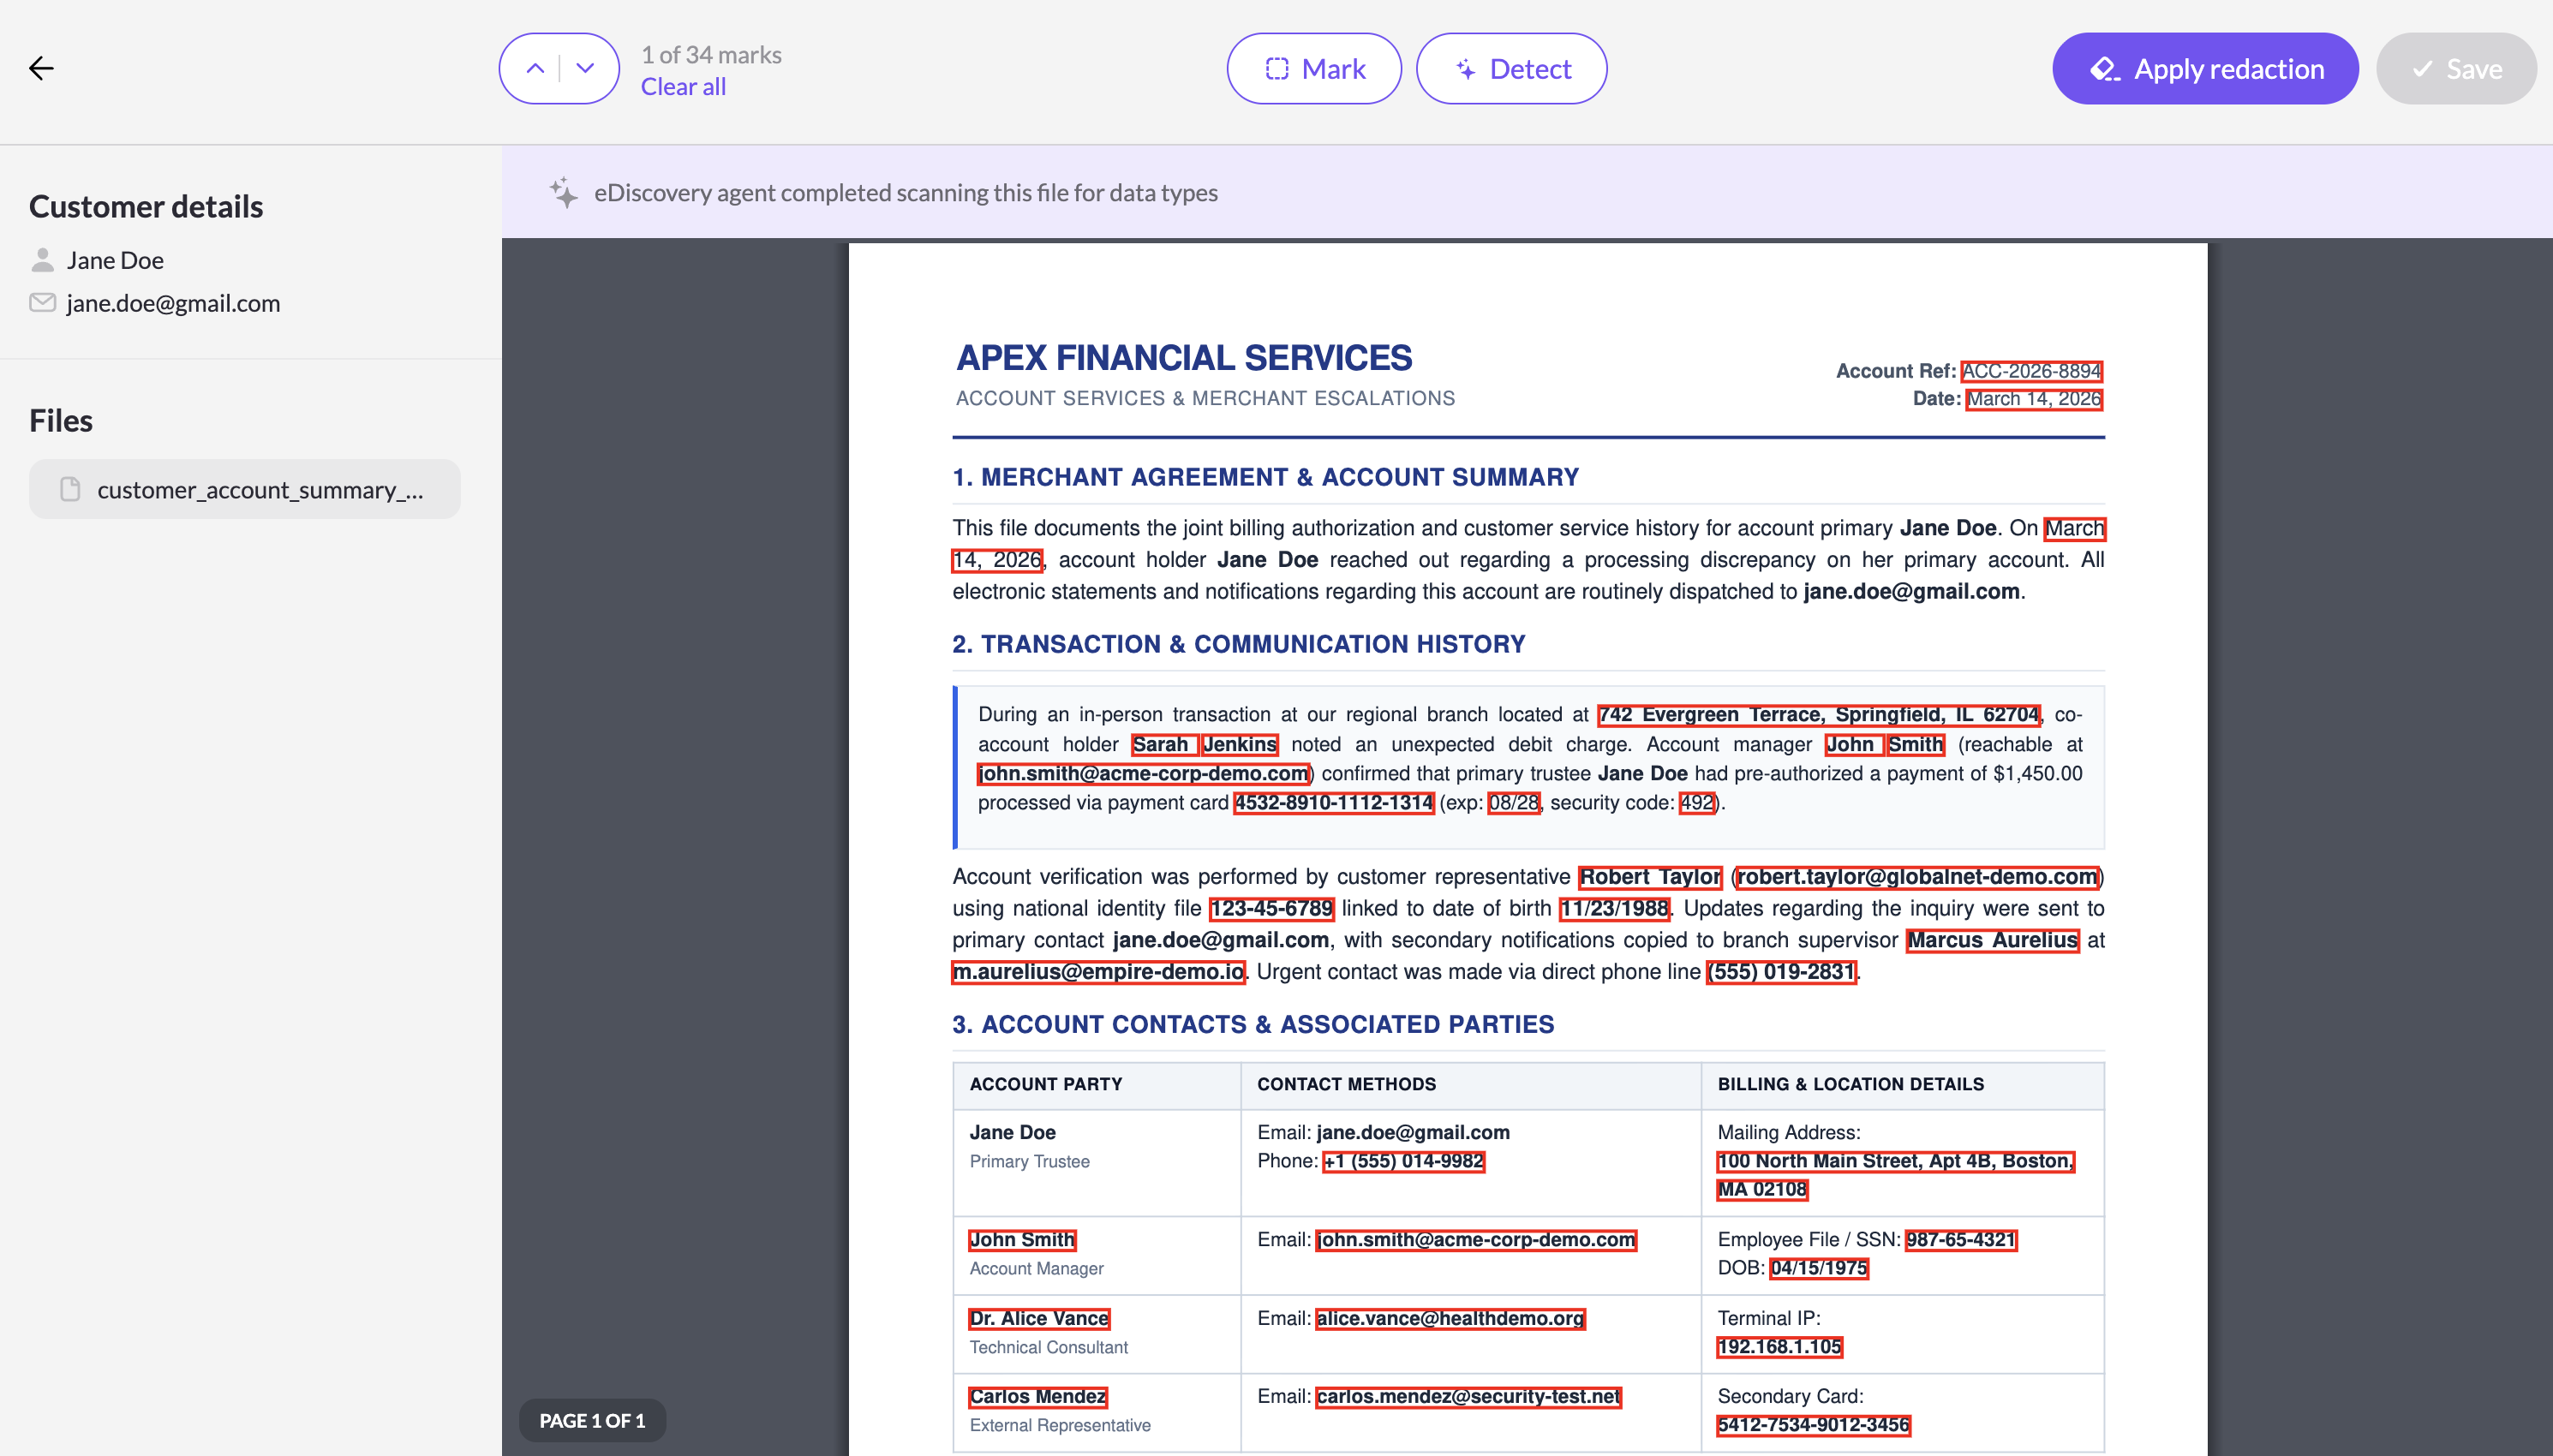
- Marks the data types you've selected — plus any custom patterns — with red boxes in the document viewer.
- Always excludes the data subject's own information (their name, email, address, and phone from the request details), so you never redact the requester's own data.
- Only suggests — you review and confirm every redaction.
Availability
The eDiscovery agent for Documents is available on the Enterprise plan. You enable and configure it from the Mira AI agents page.
Configure which data types to redact & enable the agent
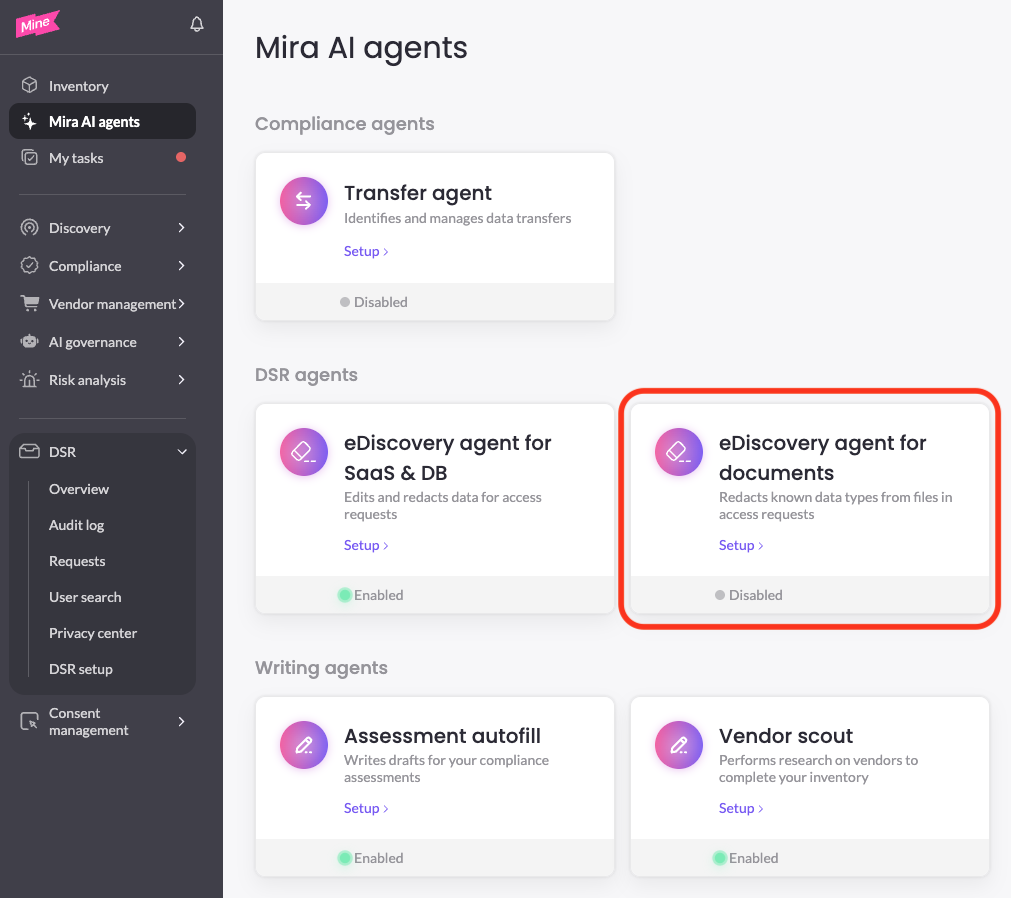
On the Mira AI agents page, open the eDiscovery agent for Documents tile and choose the data types the agent should look for.
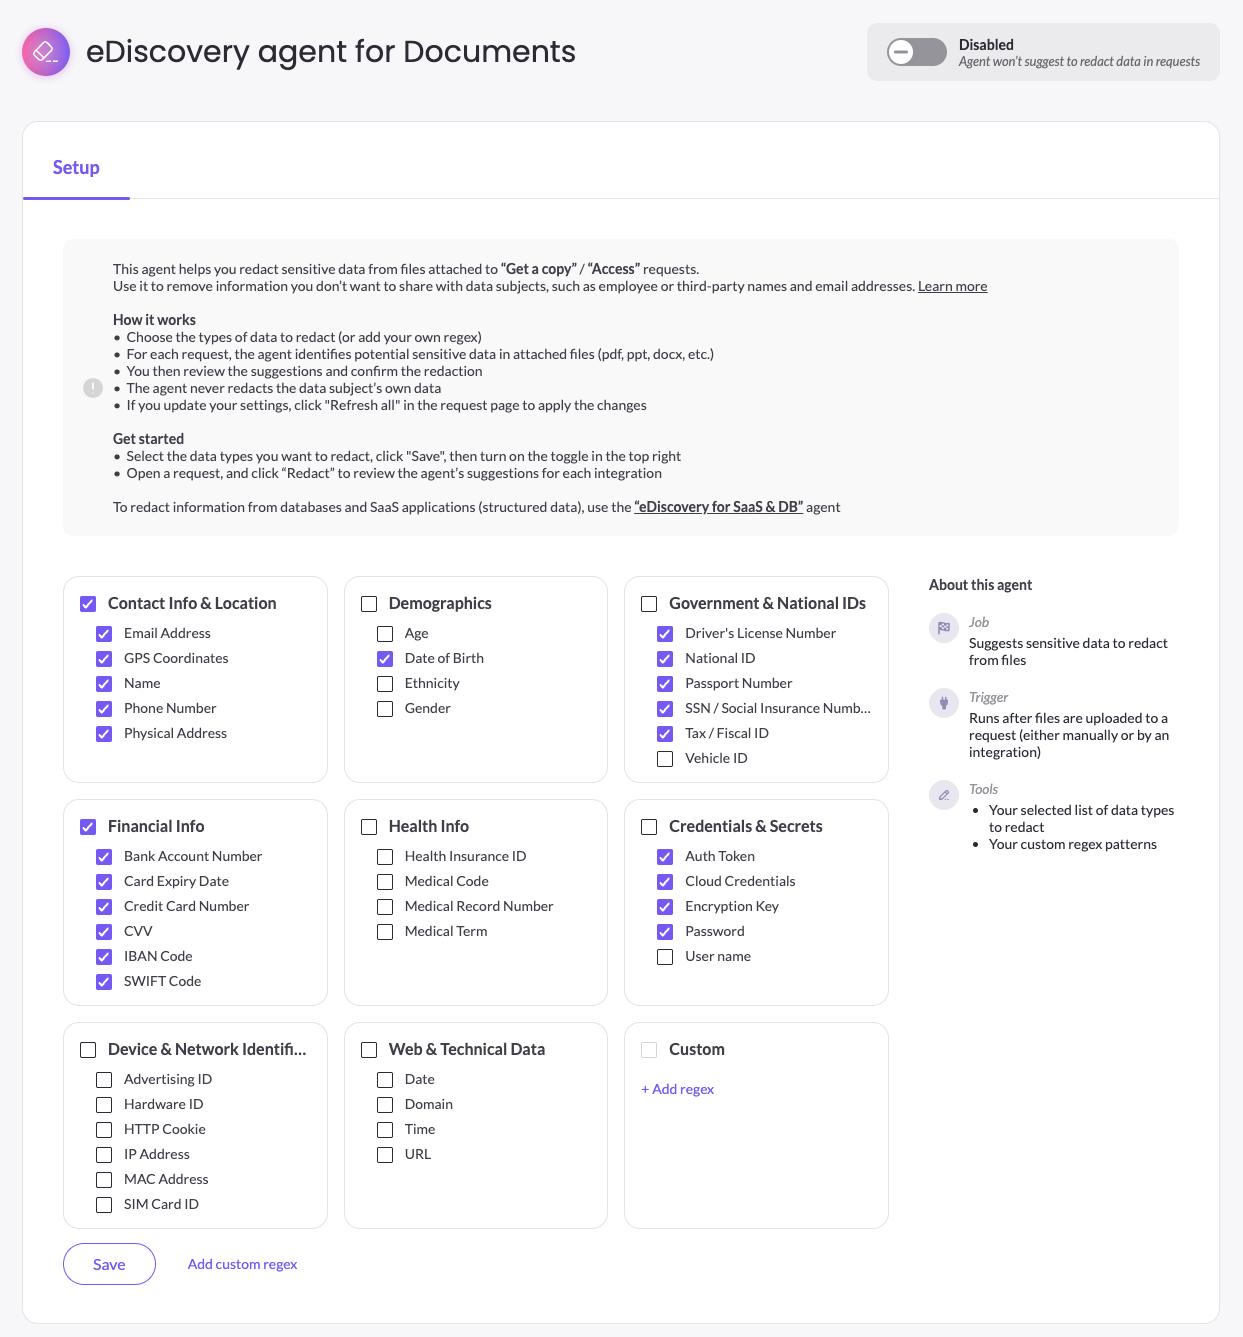
The data types are grouped into categories (Contact Info & Location, Demographics, Government & National IDs, Financial Info, Health Info, Credentials & Secrets, Device & Network identifiers, Web & Technical Data, and Custom). Tick a whole category or individual types. Mine starts you off with a default selection of common types (name, email, phone, address, financial identifiers, national IDs, and more). Hover any type to see what it covers.
Click Save to store your selection. The configuration is saved at the company level (not per brand), and only Admins and Owners can change it.
When you finished configuring the data types and the custom regex pattern (for more info see section below), enable the agent by turning on the toggle on the upper-right.
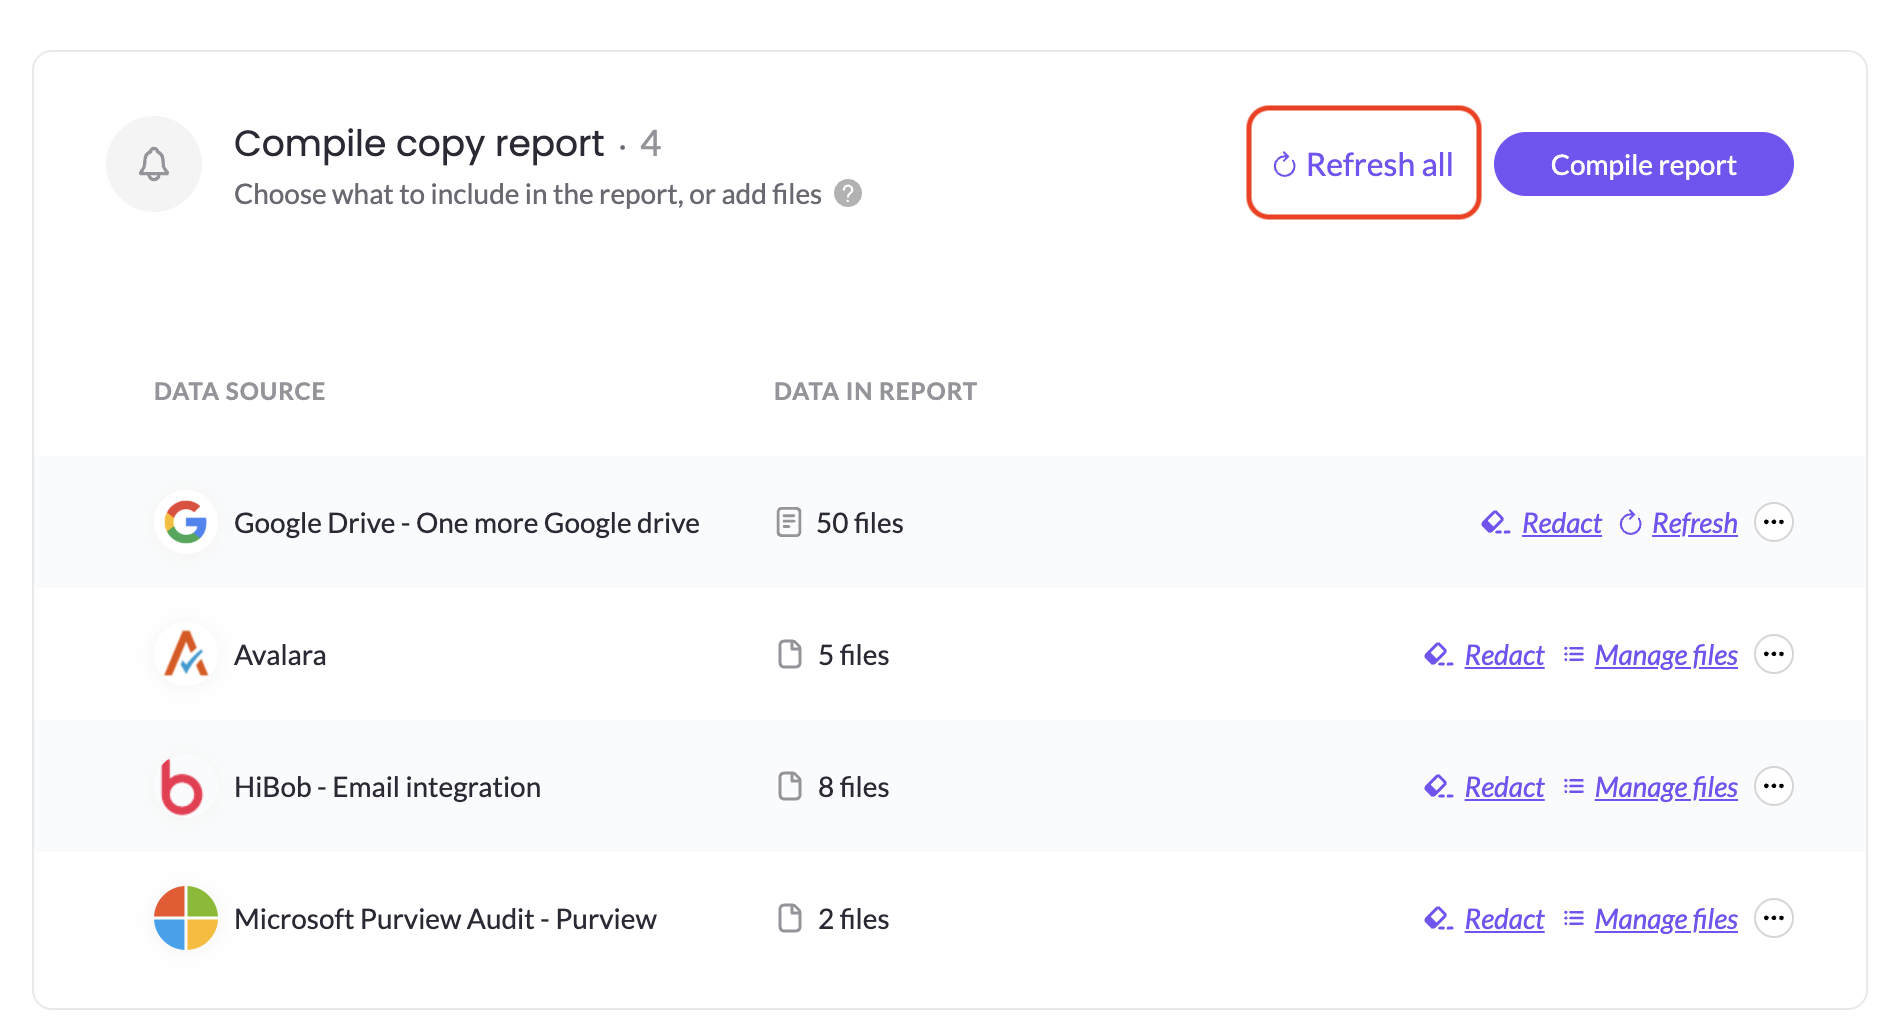
A confirmation explains that the agent runs after files are uploaded to a request; to apply the configuration to requests that already exist, use the Refresh button in each request, this will recollect all files of automatic integration and will re-trigger the agent.
Add a custom pattern (regex)
To catch values that aren't in the standard list — add a custom regex:
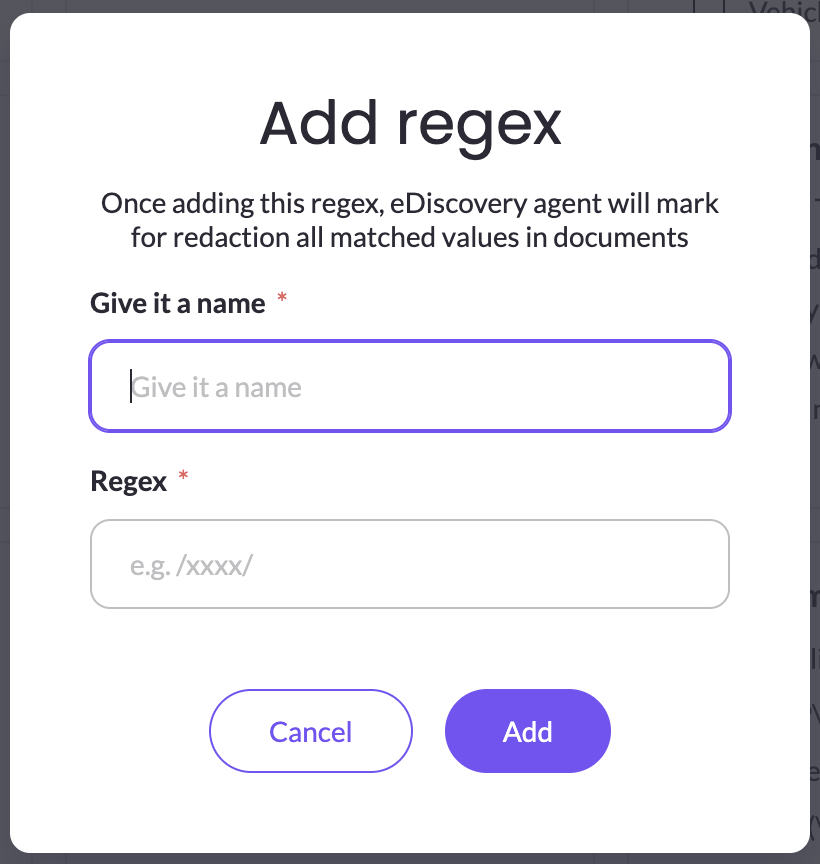
- Click Add custom regex (under the Custom category or next to Save).
- Give it a name and enter the regex pattern.
- Click Add.
The pattern appears under Custom, showing its name with a 3-dot menu to edit or delete it. Names and patterns must be unique — MineOS won't let you add a duplicate name or an identical pattern.
Changing the regex configuration does not automatically re-scan requests that were already collected. To apply new regex settings to such a request, use Refresh all in the request's page.
Regex suggestions and data types suggestions are separate processes, so if the agent matches a value for both a marked data type and a marked regex pattern, you will see in the UI 2 red bounding boxes.
Redact a request's files
Open an access request, then open a collected file in the redaction view by clicking on Redact near each integration in the Request's page in order to enter the redaction tool.
The Redaction tool UI includes:
- Left panel: shows the customer's details and the list of files
- Upper control bar includes the main actions: navigation between suggestions which are marked with red bounding boxes, suggestions clearance, add suggestions manually, detect which data types are presented in the suggestions, redact suggestions and saving the redacted file.
- Agent status bar:
| Status | Banner | Notes |
|---|---|---|
| In progress | eDiscovery agent is scanning for data types. Please wait | All buttons are disabled and a spinner indication appears near the file in the file list. Wait until the agent finishes processing. |
| Successfully completed | eDiscovery agent completed scanning this file for data types | All button are enabled. |
| Failed | eDiscovery agent encountered an error | Mark is enabled to manually mark suggestions. A new Retry button is visible in the banner to re-run the agent. |
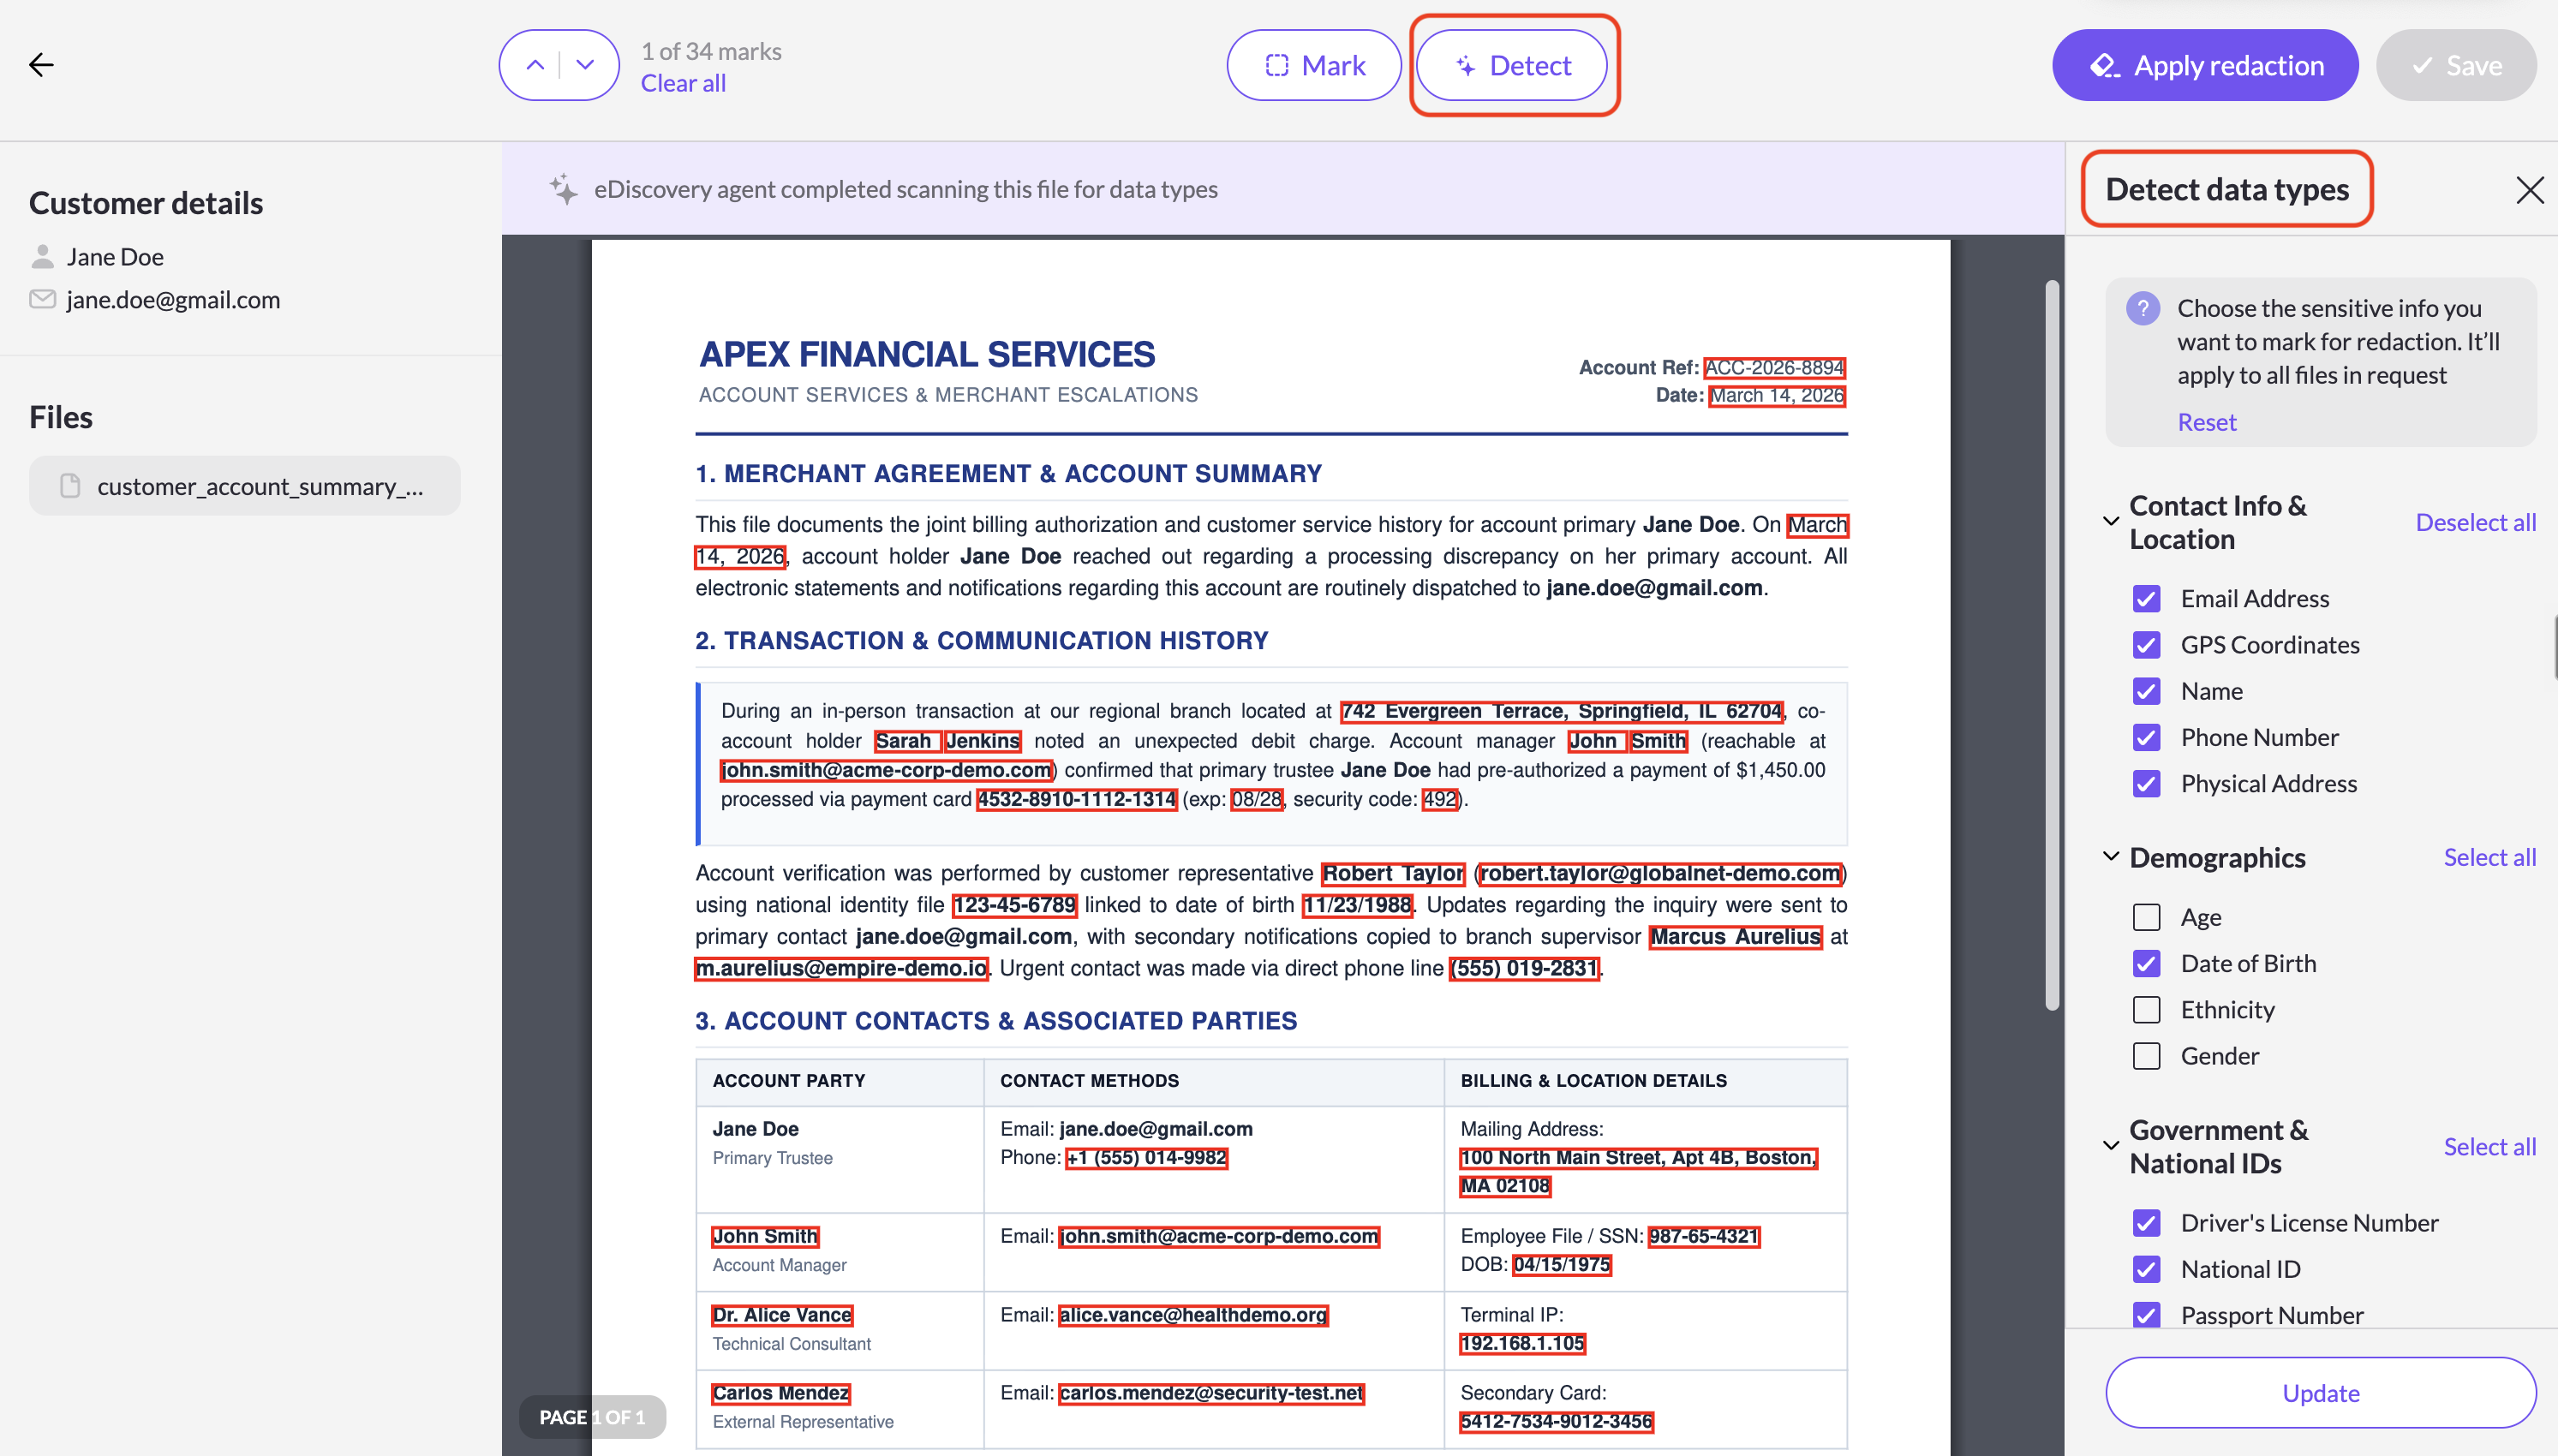
Detect data types — choose what's shown
Click Detect to open a panel of all data types. The ticked ones match your current Mira AI configuration. Tick or untick types to change which suggestions appear — this is a display filter (the agent already scanned for everything), so it applies instantly without re-running the agent. Click Update to save the selection; it applies to all files in this request, not just the current file.
Mark data manually
Click Mark to draw your own boxes — the page prompts you to click and drag to hide sensitive details. To exit selection mode click on Stop selecting, while in selection mode the upper banner changes and other buttons are hidden.
Each manual selection is added to the total selection count, and you always have an option to Clear all suggestions, just note that this includes both the manual marked suggestions and automatically suggested by the agent.


Remove a suggestion
To drop a suggested box, click on the suggestion itself and choose Remove selection (or Keep selection to keep it).

Apply and save
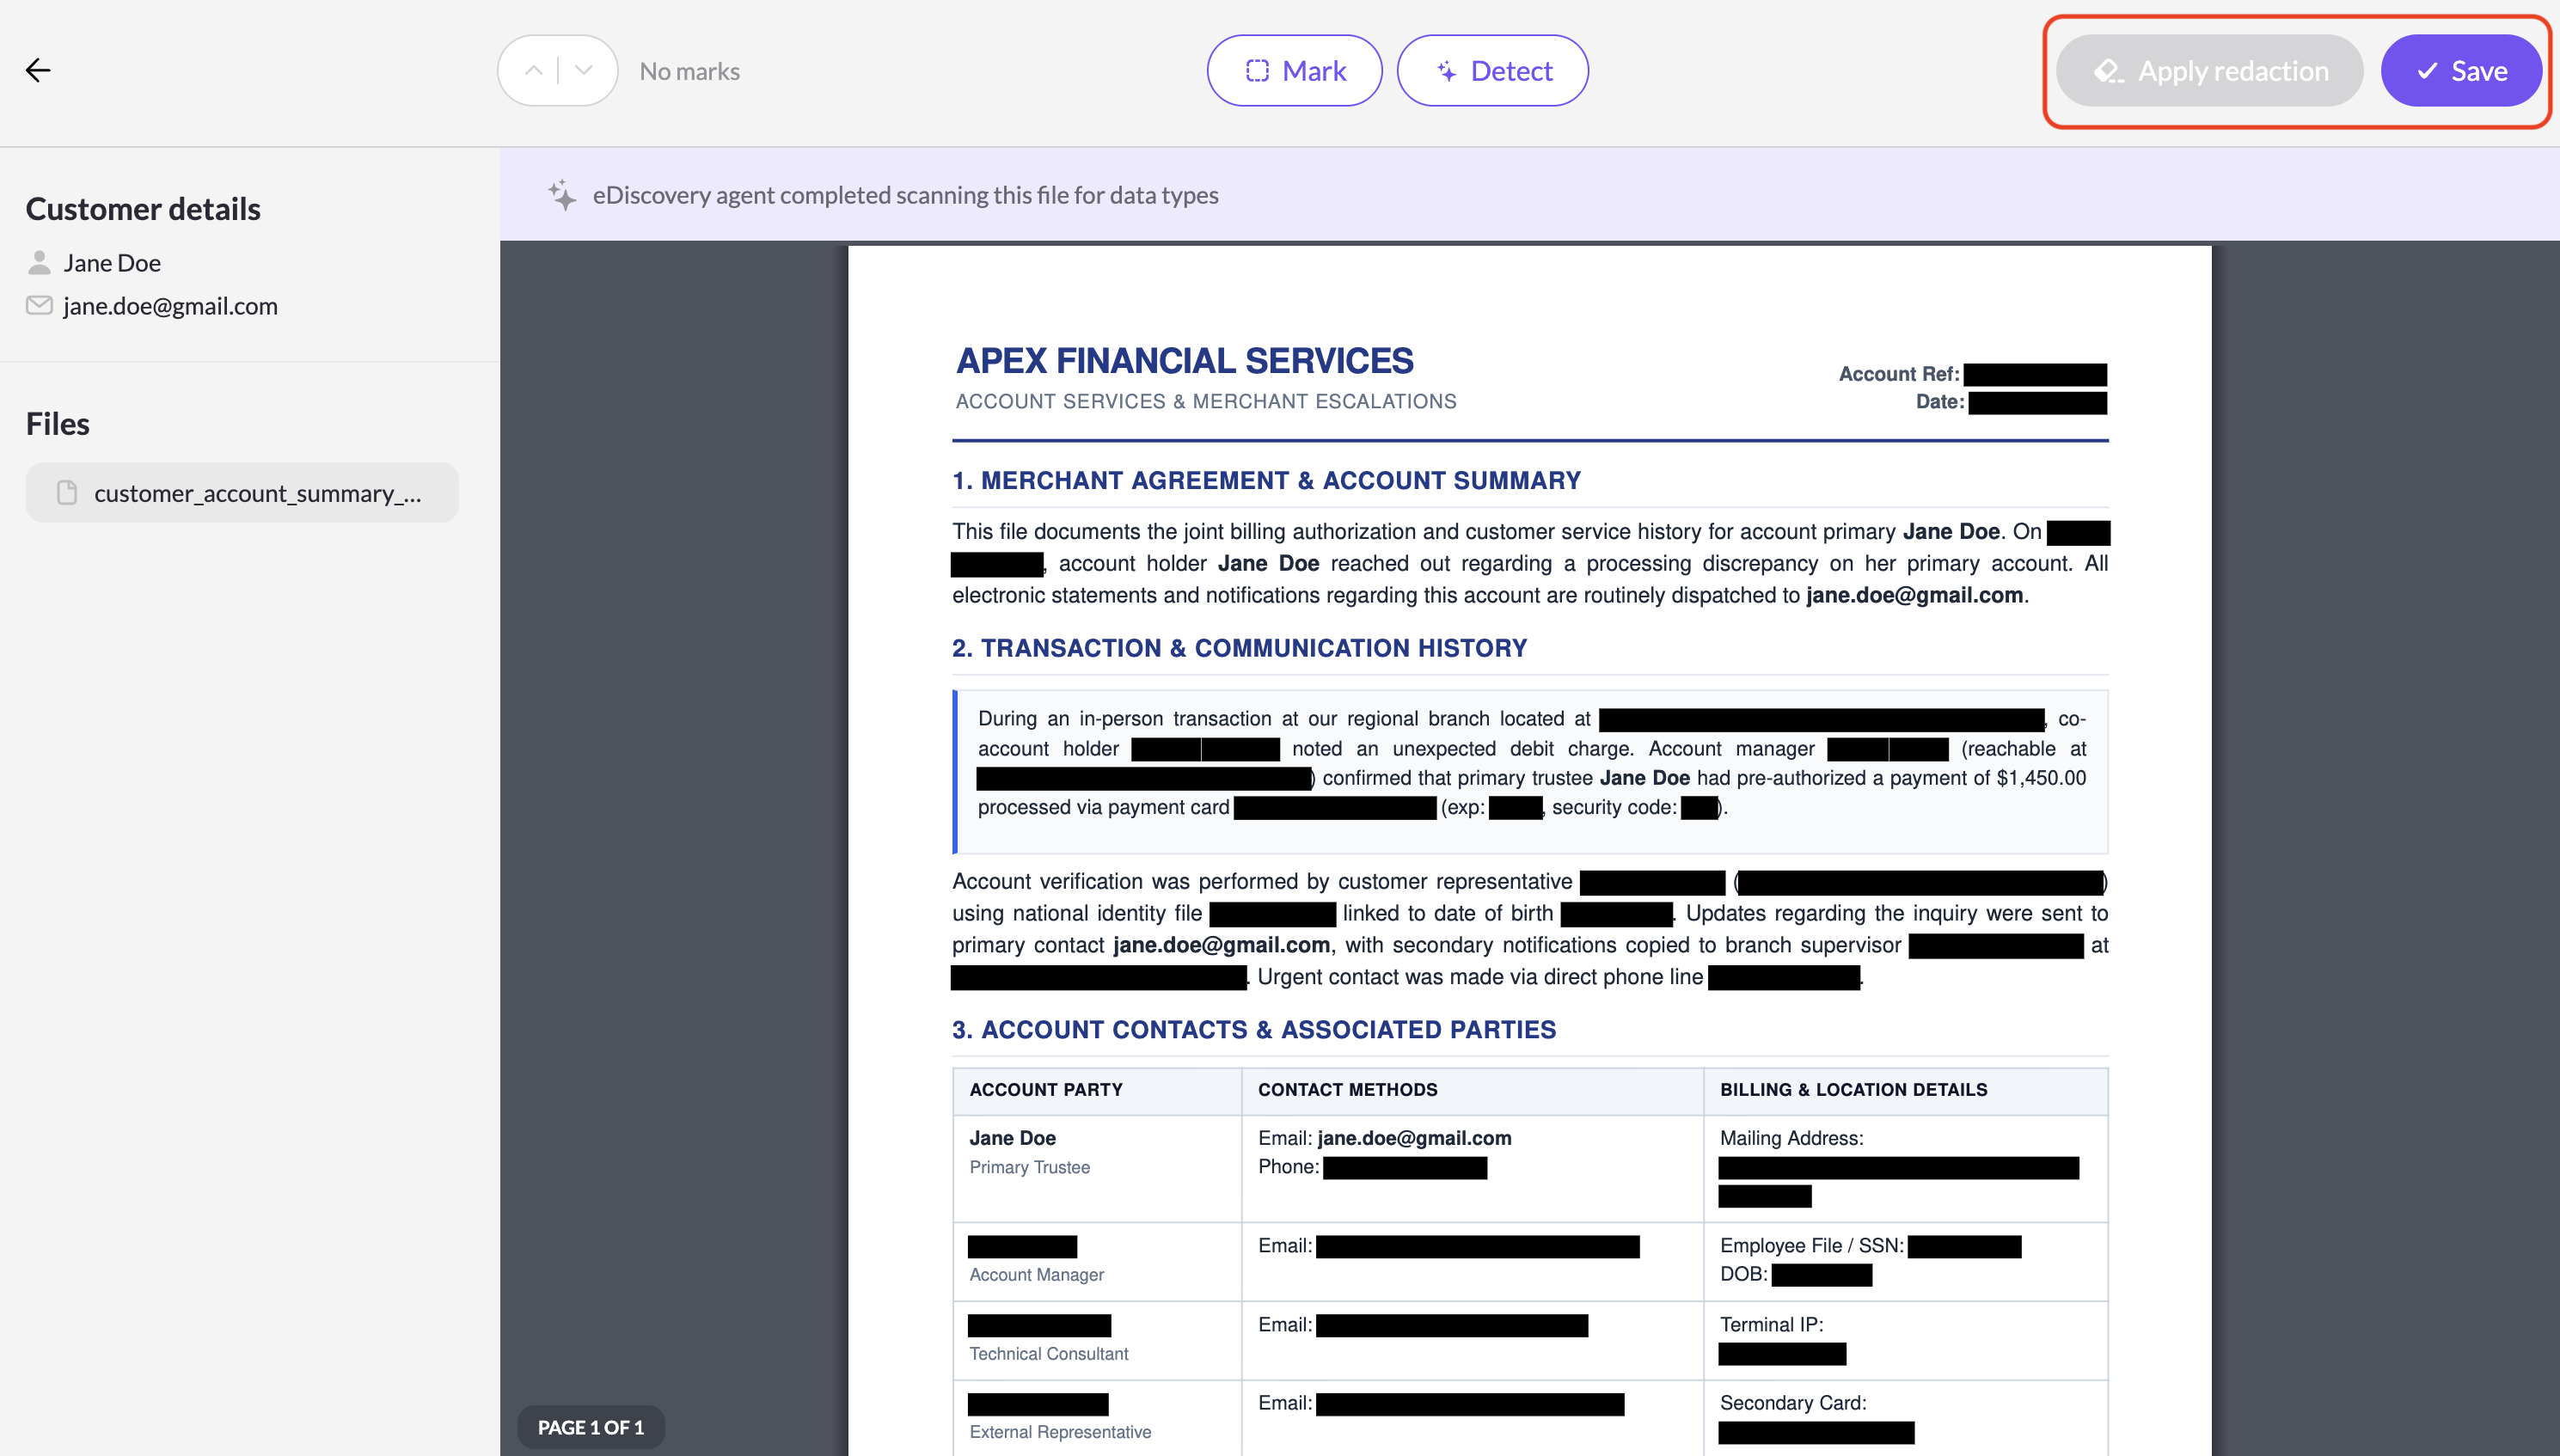
- Click Apply redaction to turn the marked boxes into actual redactions (they become solid black).
- Click Save to save the redacted file. Saved files are treated as complete.
Supported file types and size limits
Files are limited to 10MB, whether they're uploaded manually or retrieved automatically by an integration.
Supported file types:
- Office — .docx, .doc, .dotx, .docm, .xlsx, .xls, .xlsm, .pptx, .ppt, .pptm, .ppsx, .pps, .rtf, .odt
- CSV — .csv, .tsv
- Text — .txt, .text, .log
- HTML — .html, .htm
- Email — .msg, .eml, .pst, .mbox, .mbx
- Image — .jpg, .jpeg, .png, .gif, .bmp, .tiff, .tif, .svg
Updated about 2 months ago