
Configuring Autopilot Waiting Period
Give requesters a window to cancel before Autopilot begins processing their request
The waiting period gives requesters a window to change their mind before Autopilot starts working on their request. It's configured separately for each privacy right, so you can, for example, give a longer window for deletion requests than for copy requests. See Autopilot Overview for how Autopilot processes a request once it starts.
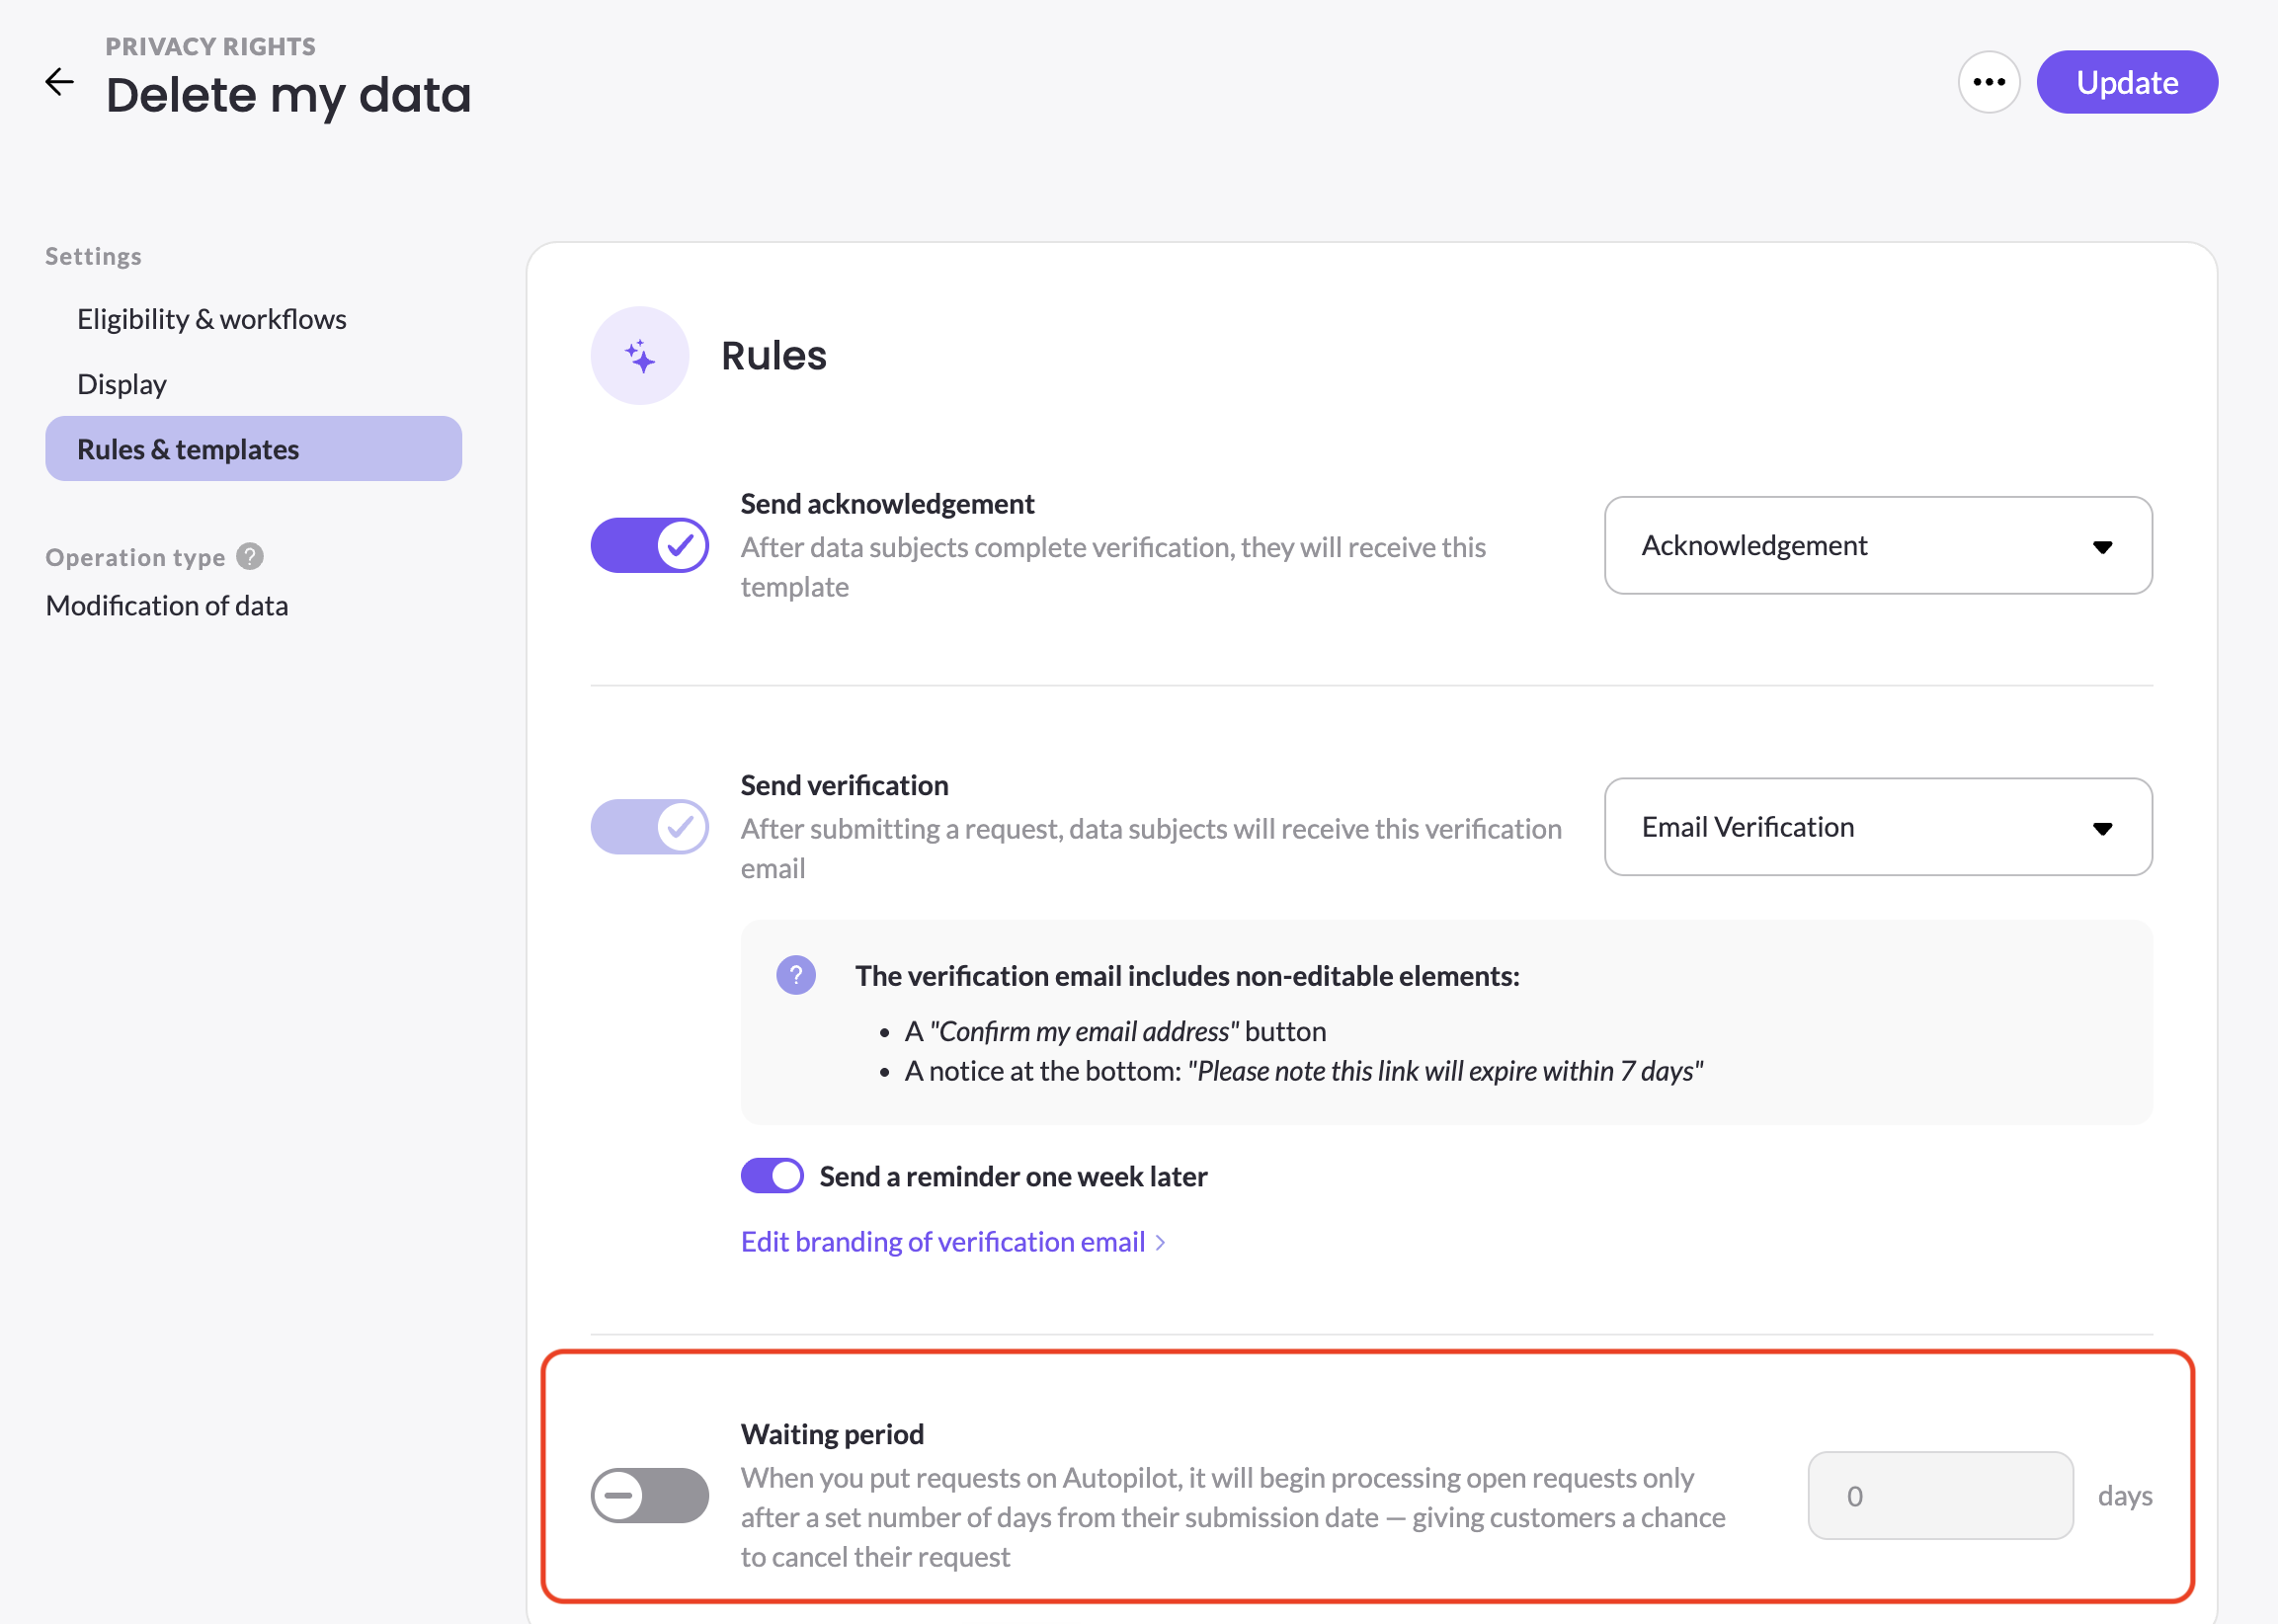
Where to configure it
- Open the privacy right you want to configure (for example, Delete my data).
- Go to Settings > Rules & templates.
- Under Rules, find Waiting period.
- Toggle it on and enter the number of days to wait after a request is submitted before Autopilot begins processing it.
- Click Update to save.
How it behaves
When the waiting period is enabled and a ticket is assigned to Autopilot, the ticket enters a Pending state instead of starting to process right away. While pending, it shows a countdown to when processing will begin, and you can cancel Autopilot at any point during that window, which returns the ticket to its previous state.
If a ticket has already been open longer than the configured waiting period by the time it's assigned to Autopilot, it skips the Pending state entirely and moves straight into processing — the waiting period only applies to requests that haven't yet cleared it.
If the waiting period is turned off (or set to 0 days) for a right, Autopilot begins processing tickets for that right immediately upon assignment, with no Pending step.
Why use it
For rights like deletion, where the outcome can't be undone, a waiting period gives requesters a built-in grace period to cancel before any processing starts. You can leave it off for rights where an immediate start makes more sense, and set a different number of days for each right independently.
Updated 3 months ago