Building Templates
How to build a custom assessment template or use Mine's pre-built catalog — covering the unified gallery, labels, field types, and conditional logic.
Building and Managing Assessment Templates
Every assessment in MineOS starts from a template. A template defines the sections, questions, and field types that make up an assessment — before you can run a Transfer Impact Assessment, a vendor security review, or an AI risk evaluation, you need a template that defines what to ask. Templates keep assessments consistent across your organization and make it easy to compare responses across systems, vendors, or time.
If you're an existing MineOS user: Templates previously grouped under separate modules (Compliance, Vendor management, AI governance) are now in a single unified gallery. Your existing templates are unchanged — they've been tagged with labels that correspond to their use case so they appear in the right filtered views. See Labels below.
The template gallery
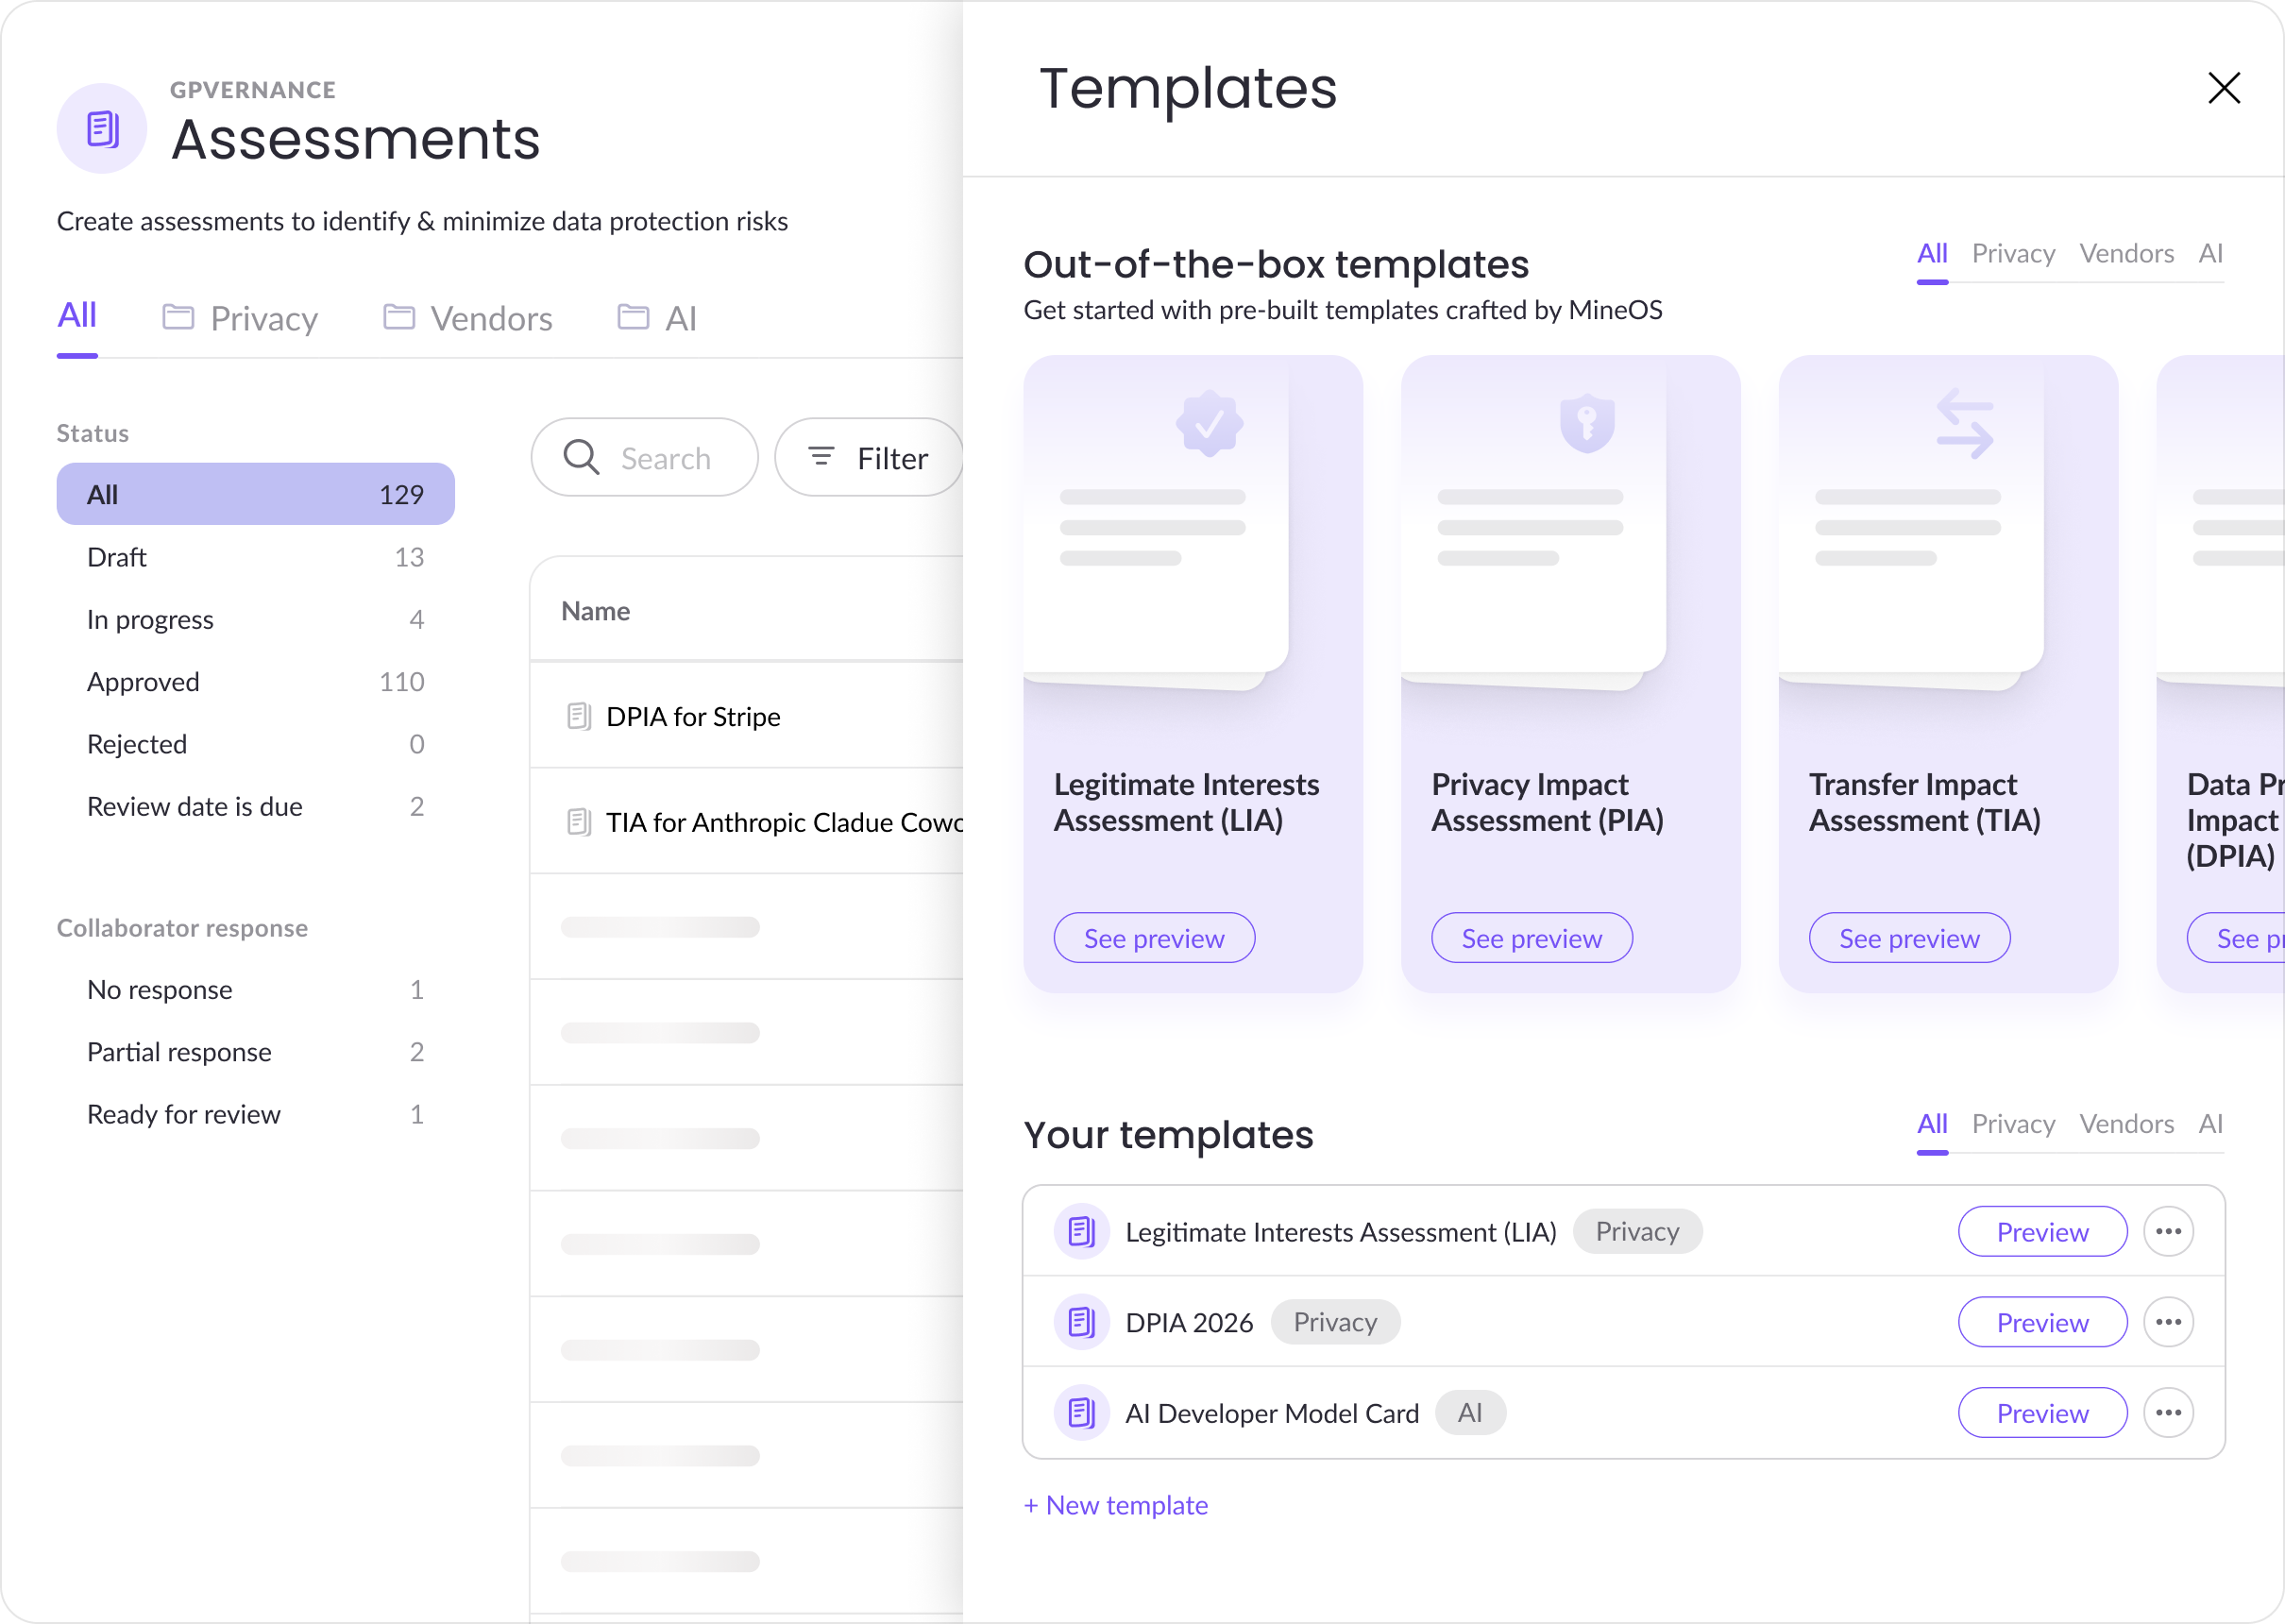
All templates — Mine's out-of-the-box templates and any your team has created — live in a single gallery. You can browse all templates at once, or filter by label to focus on a specific use case.
Mine's out-of-the-box templates are pre-built around specific regulations and regions. Examples include:
- Privacy — Privacy Impact Assessment (PIA), Legitimate Interests Assessment (LIA), Transfer Impact Assessment (TIA), Data Protection Impact Assessment (DPIA), including regional variants, COPPA, HIPAA
- Vendor risk — vendor security and risk reviews, DORA ICT criticality, NIST CSF Risk, ROI assessments
- AI governance — EU AI Act, OECD AI Risk Assessment, Model Risk Assessment, ADMT (CCPA)
Starting from an out-of-the-box template is usually faster than building from scratch — the structure, question order, and regulatory framing are already in place.
Three ways to create a template
- Use a template from the gallery — pick an out-of-the-box template as-is or as a starting point to customize.
- Start from scratch — build a new template with no preset structure.
- Duplicate an existing template — copy any template and adjust from there.
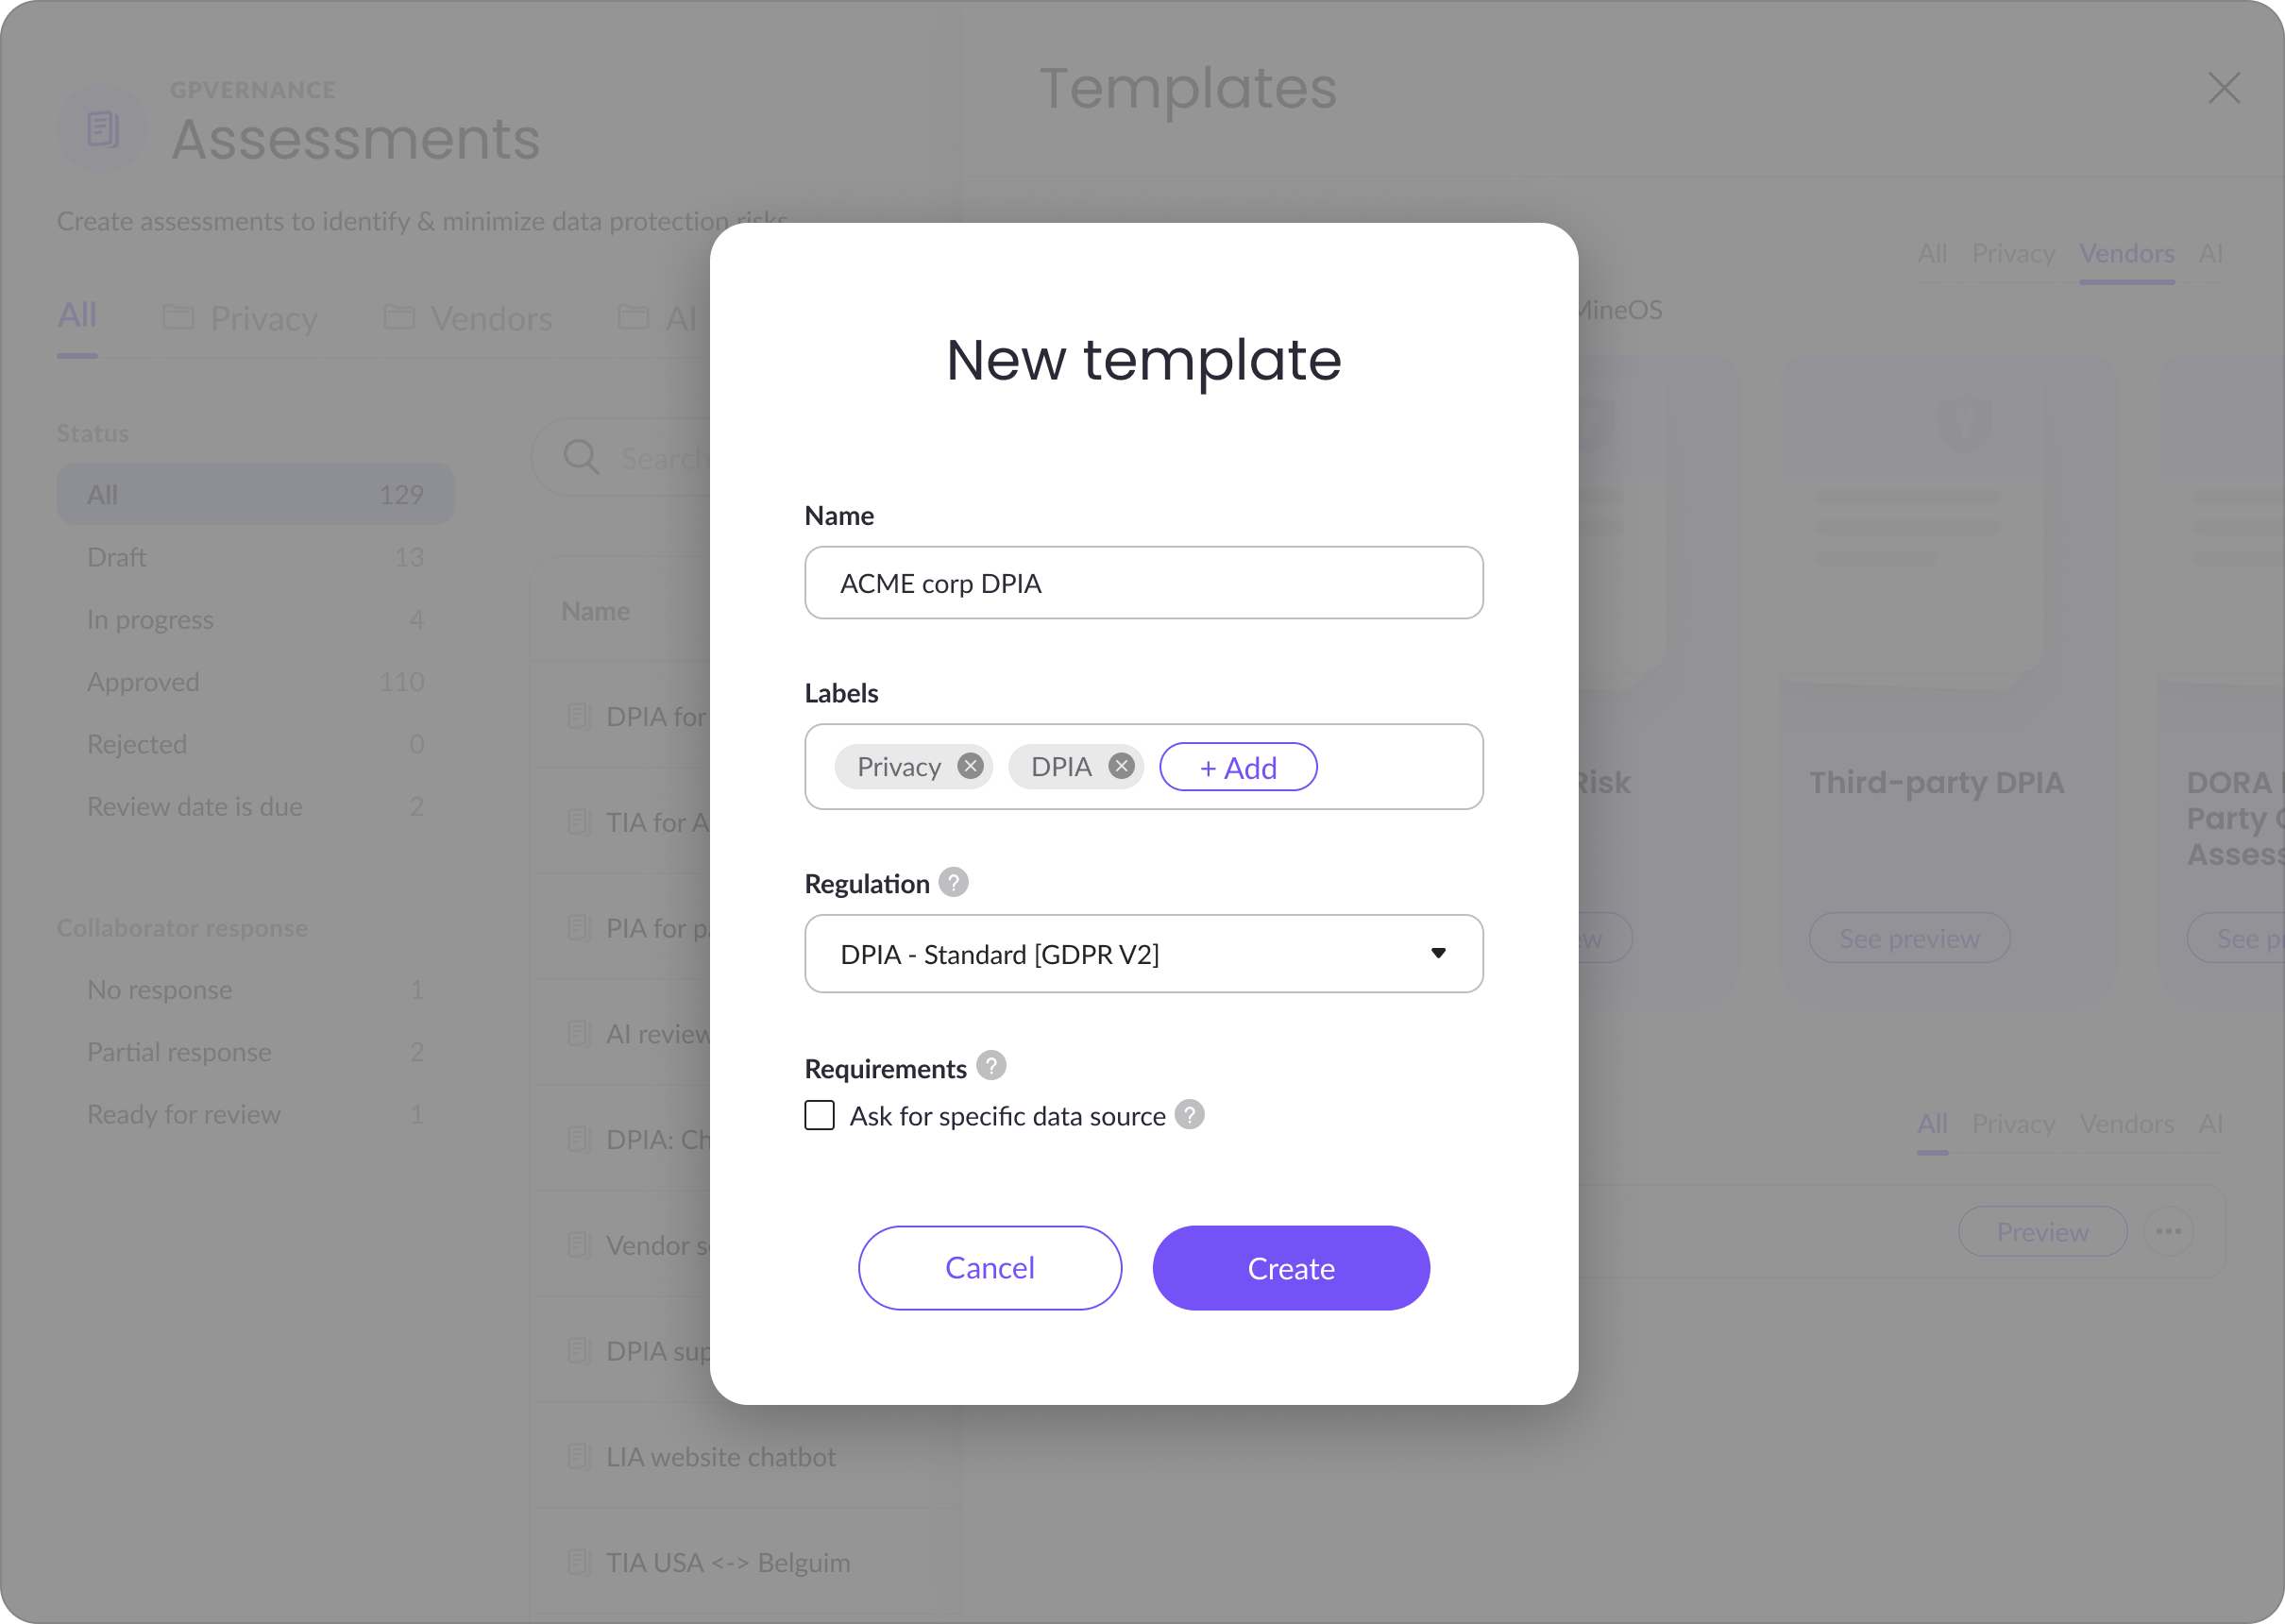
For all three paths, you'll give the template a name, optionally add labels, and decide whether it should be vendor-specific. A vendor-specific template (the "Ask for specific data source" toggle) ties each resulting assessment to a particular vendor or system — useful for anything like a vendor security review that should always be linked to the system being assessed.
Labels
Labels are the way to categorize and find assessments and templates. They're free-form tags you can create and apply freely, and they're what powers the saved views (Privacy, Vendors, AI) on the Assessments page.
Mine's out-of-the-box templates come with default labels already applied based on their use case and regulation. A few examples:
| Template | Default labels |
|---|---|
| DPIA (standard, ICO, CCPA variants) | Privacy, DPIA |
| Transfer Impact Assessment | Privacy, TIA |
| Legitimate Interests Assessment | Privacy, LIA |
| HIPAA | Privacy, HIPAA |
| EU AI Act | AI, EU AI Act |
| Model Risk Assessment | AI, Model Risk Assessment |
| DORA ICT Third-Party Criticality | Vendor, DORA |
| NIST CSF Risk | Vendor, NIST CSF |
| Basic Vendor | Vendor |
The pattern is consistent: the first label reflects the broad use case (Privacy, AI, or Vendor) and any additional labels reflect the specific regulation or framework. This is what determines which saved view an assessment appears in.
When you create an assessment from a template, it inherits the template's default labels. You can add, remove, or change labels on any individual assessment at any time.
Templates you create from scratch have no default labels — set them when you create the template, or on each assessment after it's created.
Labels are case-insensitive for filtering but display exactly as entered. A single assessment can have up to 20 labels; each label can be up to 50 characters.
Sections, questions, and field types
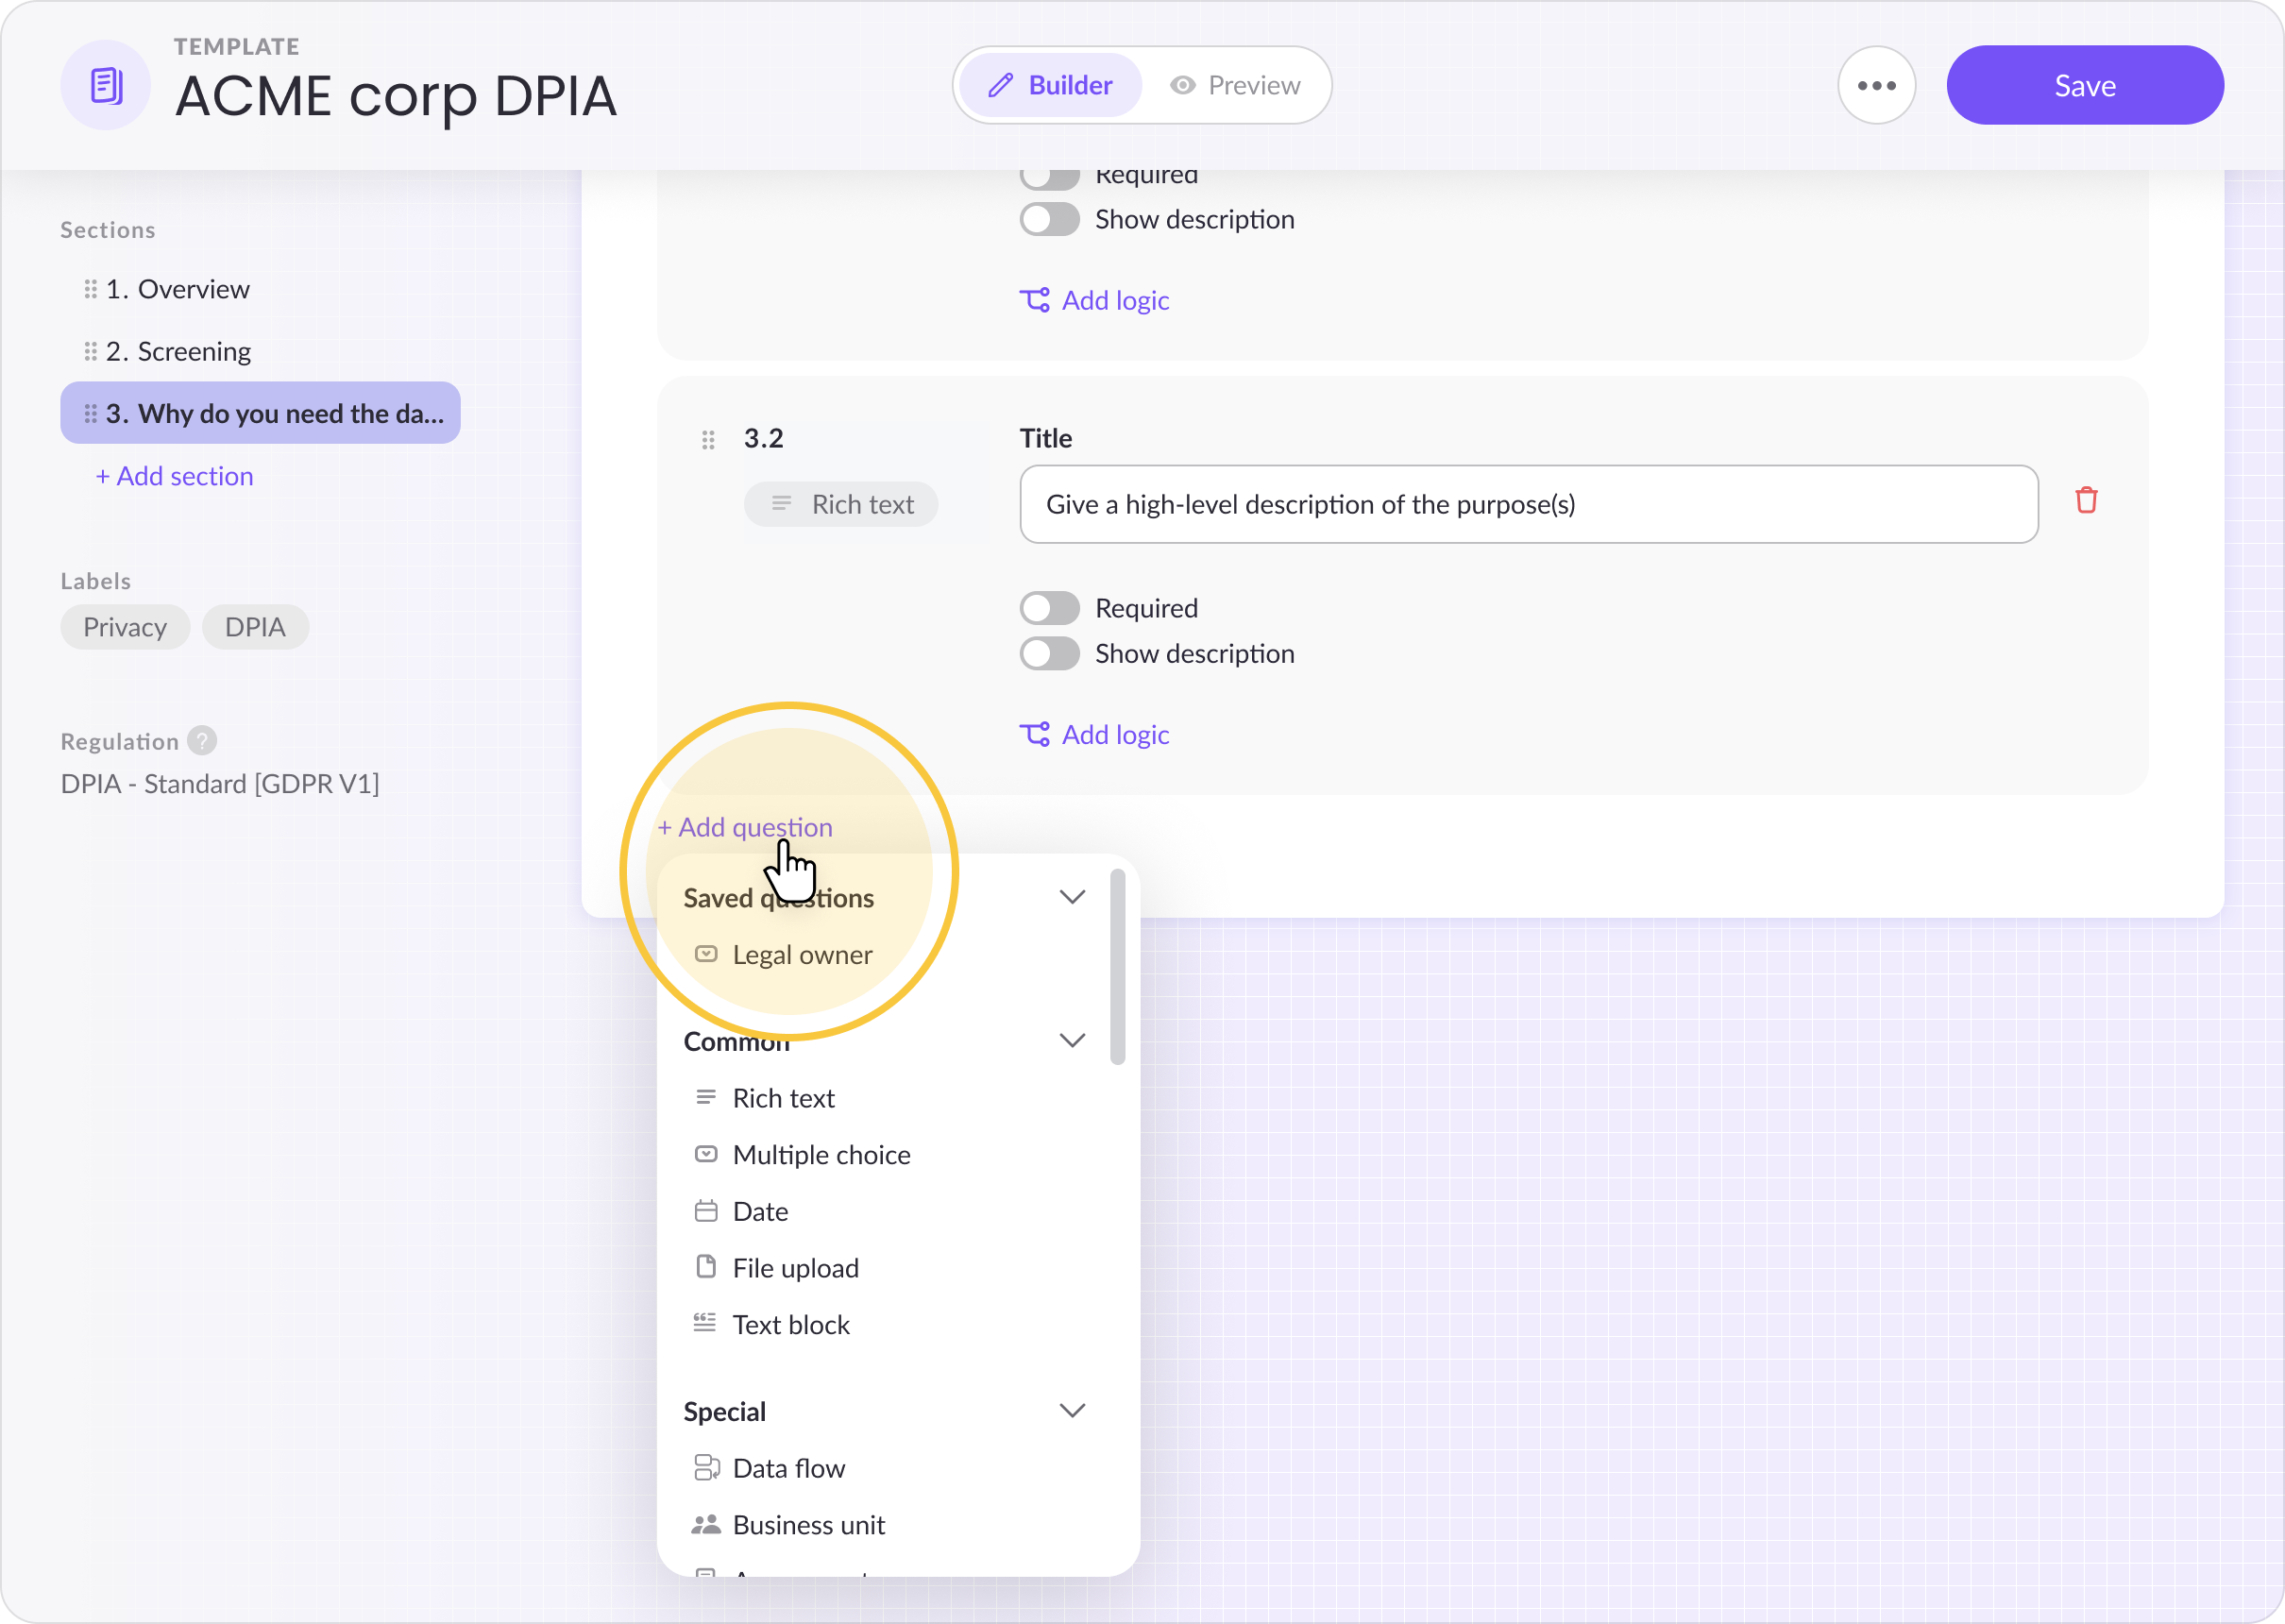
Templates are made up of sections, and sections contain questions. When building a template, you can choose from three categories of field types:
- Common field types — short answer, rich text, multiple choice, date, file upload, and text block.
- Special field types — built-in fields like business unit, data flow, data role, data types, and legal basis. These connect directly to structured data elsewhere in MineOS rather than collecting freeform text, which makes them useful for assessments that need to link back to your inventory.
- Custom fields — your organization's own reusable fields (for example, "AI Act Risk Tier" or "Countries Involved"). Once created, custom fields are available in any template and stay consistent across your assessments table for filtering and reporting.
Required fields and descriptions
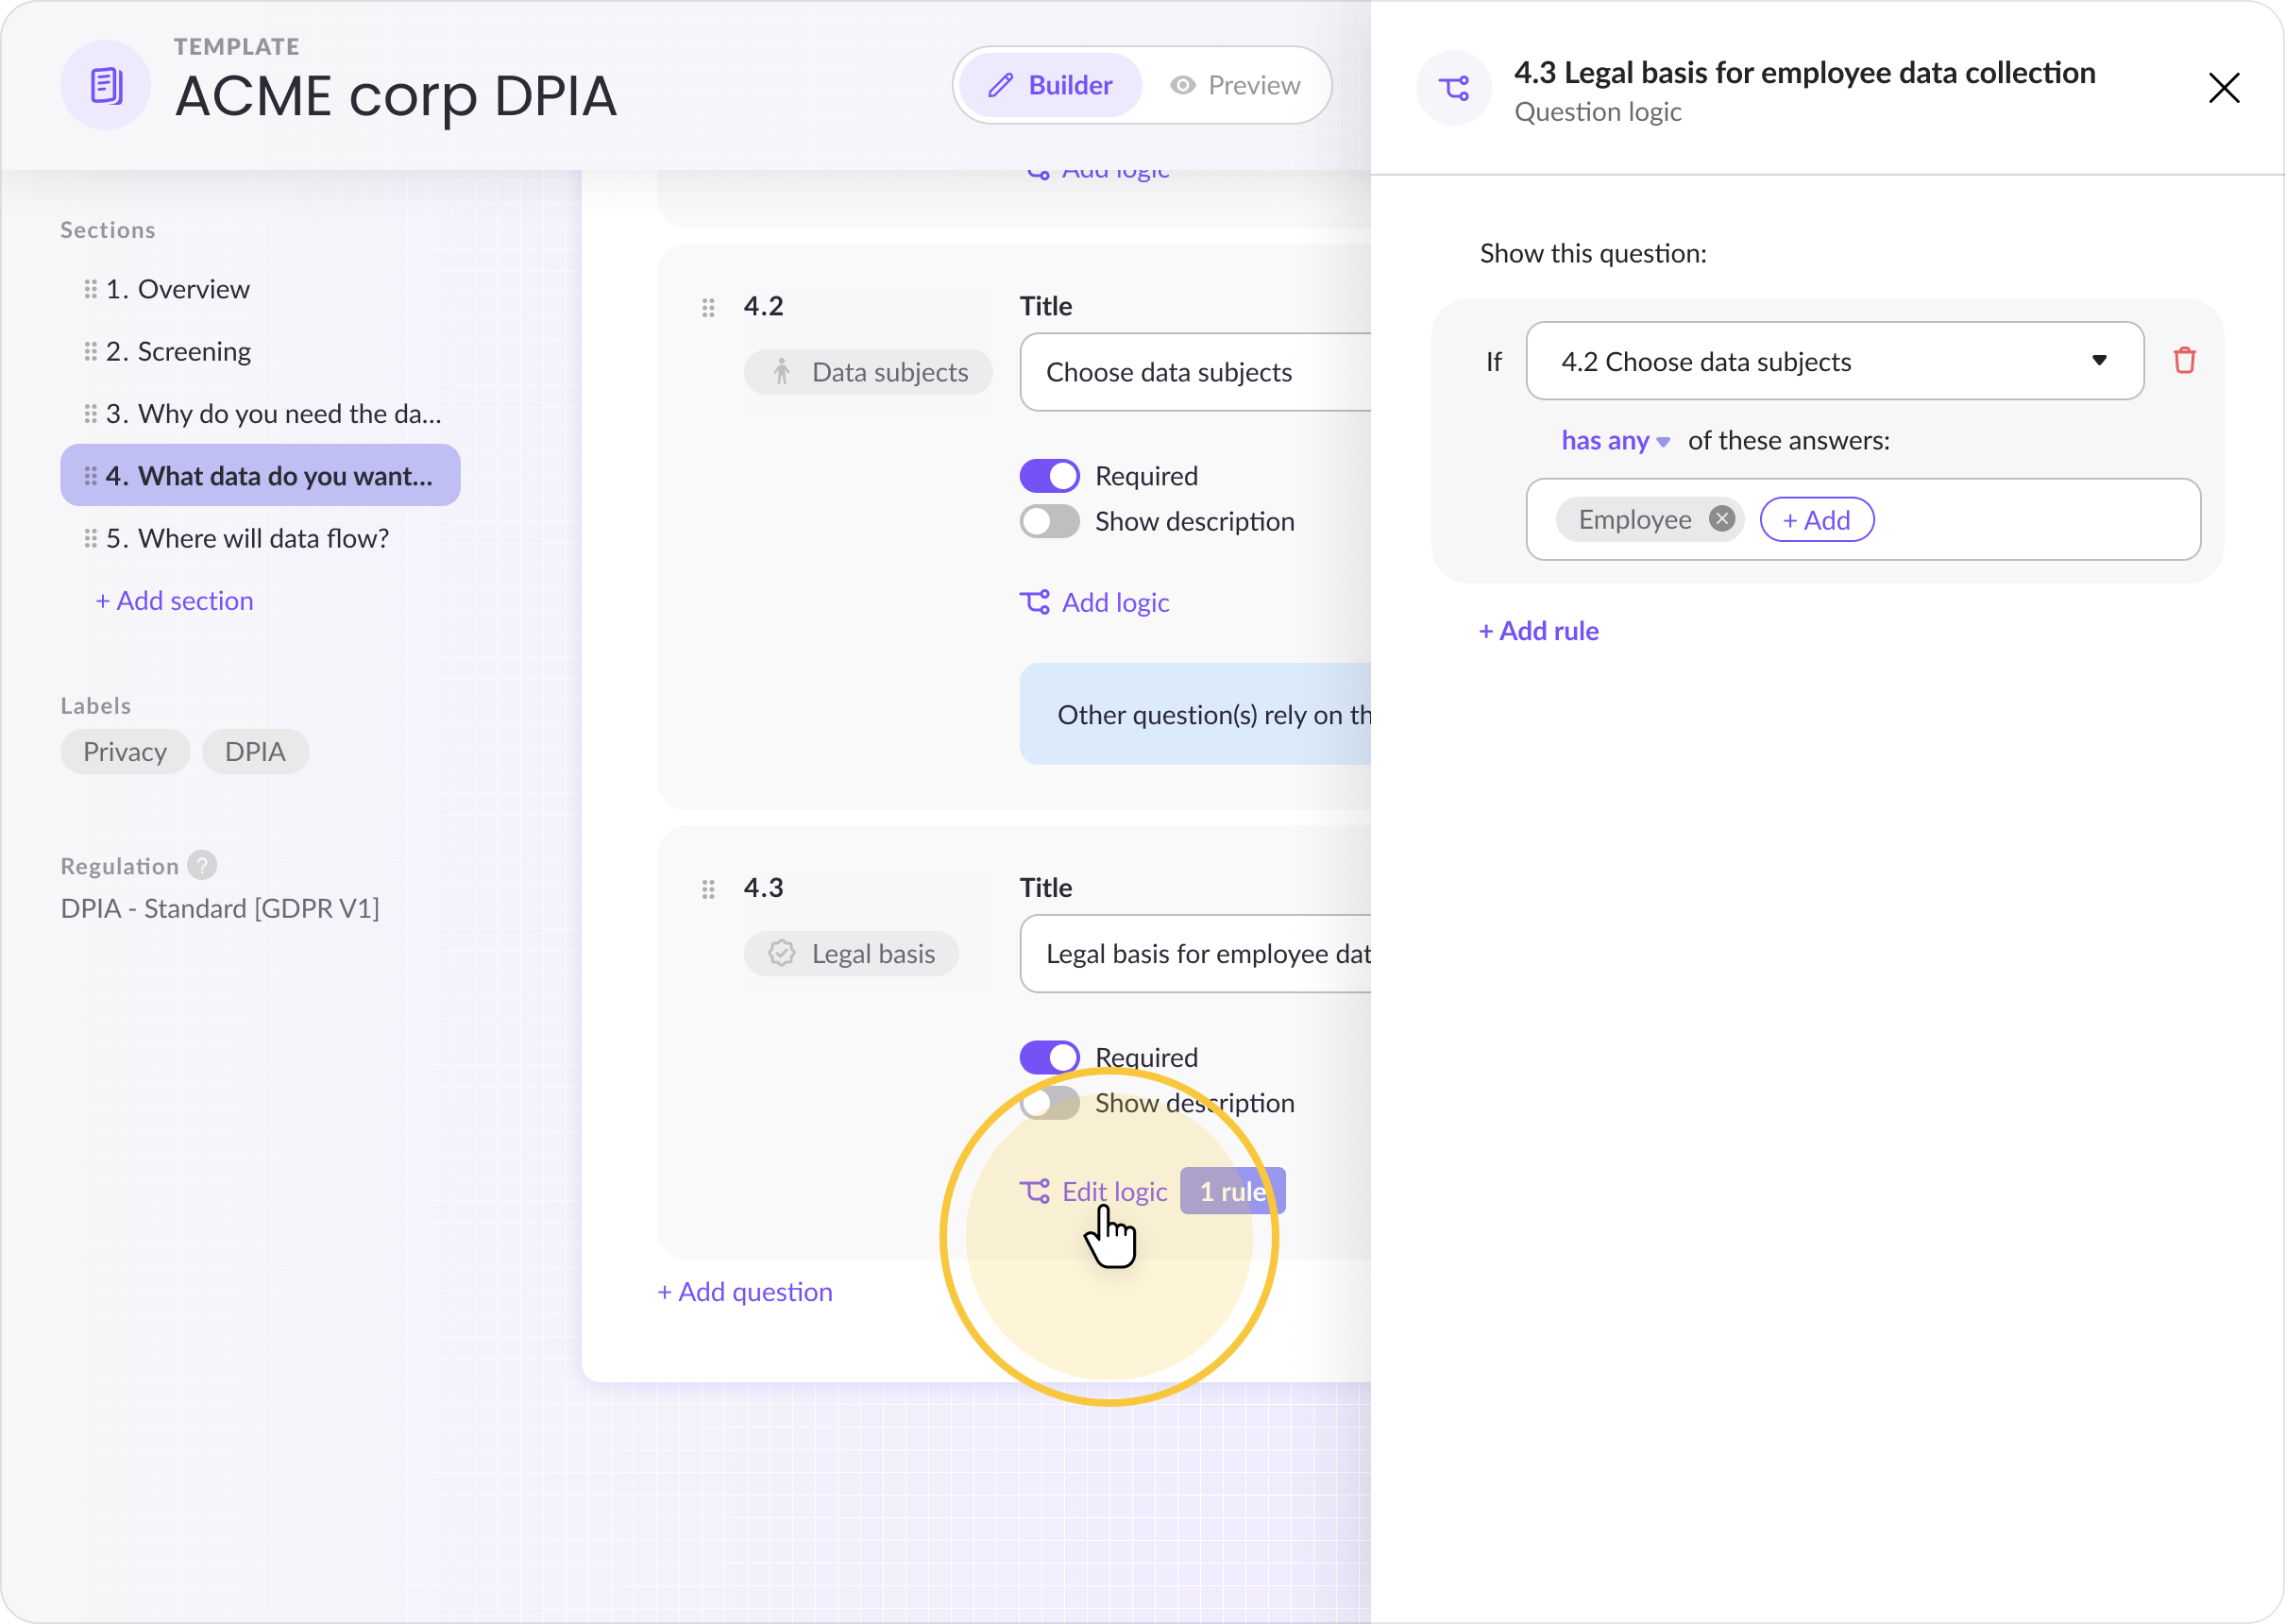
Each question can be toggled as Required, preventing an assessment from being submitted as complete until it's answered. Show description adds explanatory text beneath a question — useful context for collaborators, and also read by Mira AI when suggesting or autofilling answers. A clear description improves the quality of Mira's suggestions.
Conditional logic
Questions can be set to appear only when specific conditions are met. Using Add logic, you define a rule like "show this question when [an earlier question] equals [a specific answer]," with "any" or "all" matching across multiple conditions. Questions that other questions depend on are flagged so you don't accidentally delete them.
Editing, duplicating, and deleting templates
You can return to a template at any time to edit its sections and questions — this does not retroactively change assessments already created from it. From the template builder menu, you can also duplicate a template as a starting point for a new one, or delete one you no longer need.
Tips
- Start from the gallery when you can — out-of-the-box templates are pre-built around specific regulations and are usually faster to adapt than starting from scratch.
- Use labels to make templates easy to find and to control which saved view the resulting assessments appear in.
- Use custom fields for data you want to filter and report on across different assessment types.
- Write clear question descriptions — they shape Mira AI's suggestions, not just what collaborators see.
- Editing a template is not retroactive — if you need to update existing assessments, do so separately.
Updated 5 days ago