Creating Assessments
A guide to the unified Assessments page — creating assessments, managing statuses and owners, using labels and saved views, filtering, and exporting.
Working with Assessments
Assessments are how your organization conducts structured compliance reviews — a DPIA before launching a new product, a Transfer Impact Assessment before sharing data across borders, a vendor security questionnaire before onboarding a supplier, or an AI impact assessment under the EU AI Act. All assessments, regardless of use case, live in one place: Governance > Assessments.
If you're an existing MineOS user: Assessments previously spread across three separate modules (Compliance, Vendor management, AI governance) are now unified on a single page. Your existing assessments are unchanged and accessible from the unified view. Use the saved views — Privacy, Vendors, AI — or filter by label to find them quickly.
The Assessments page
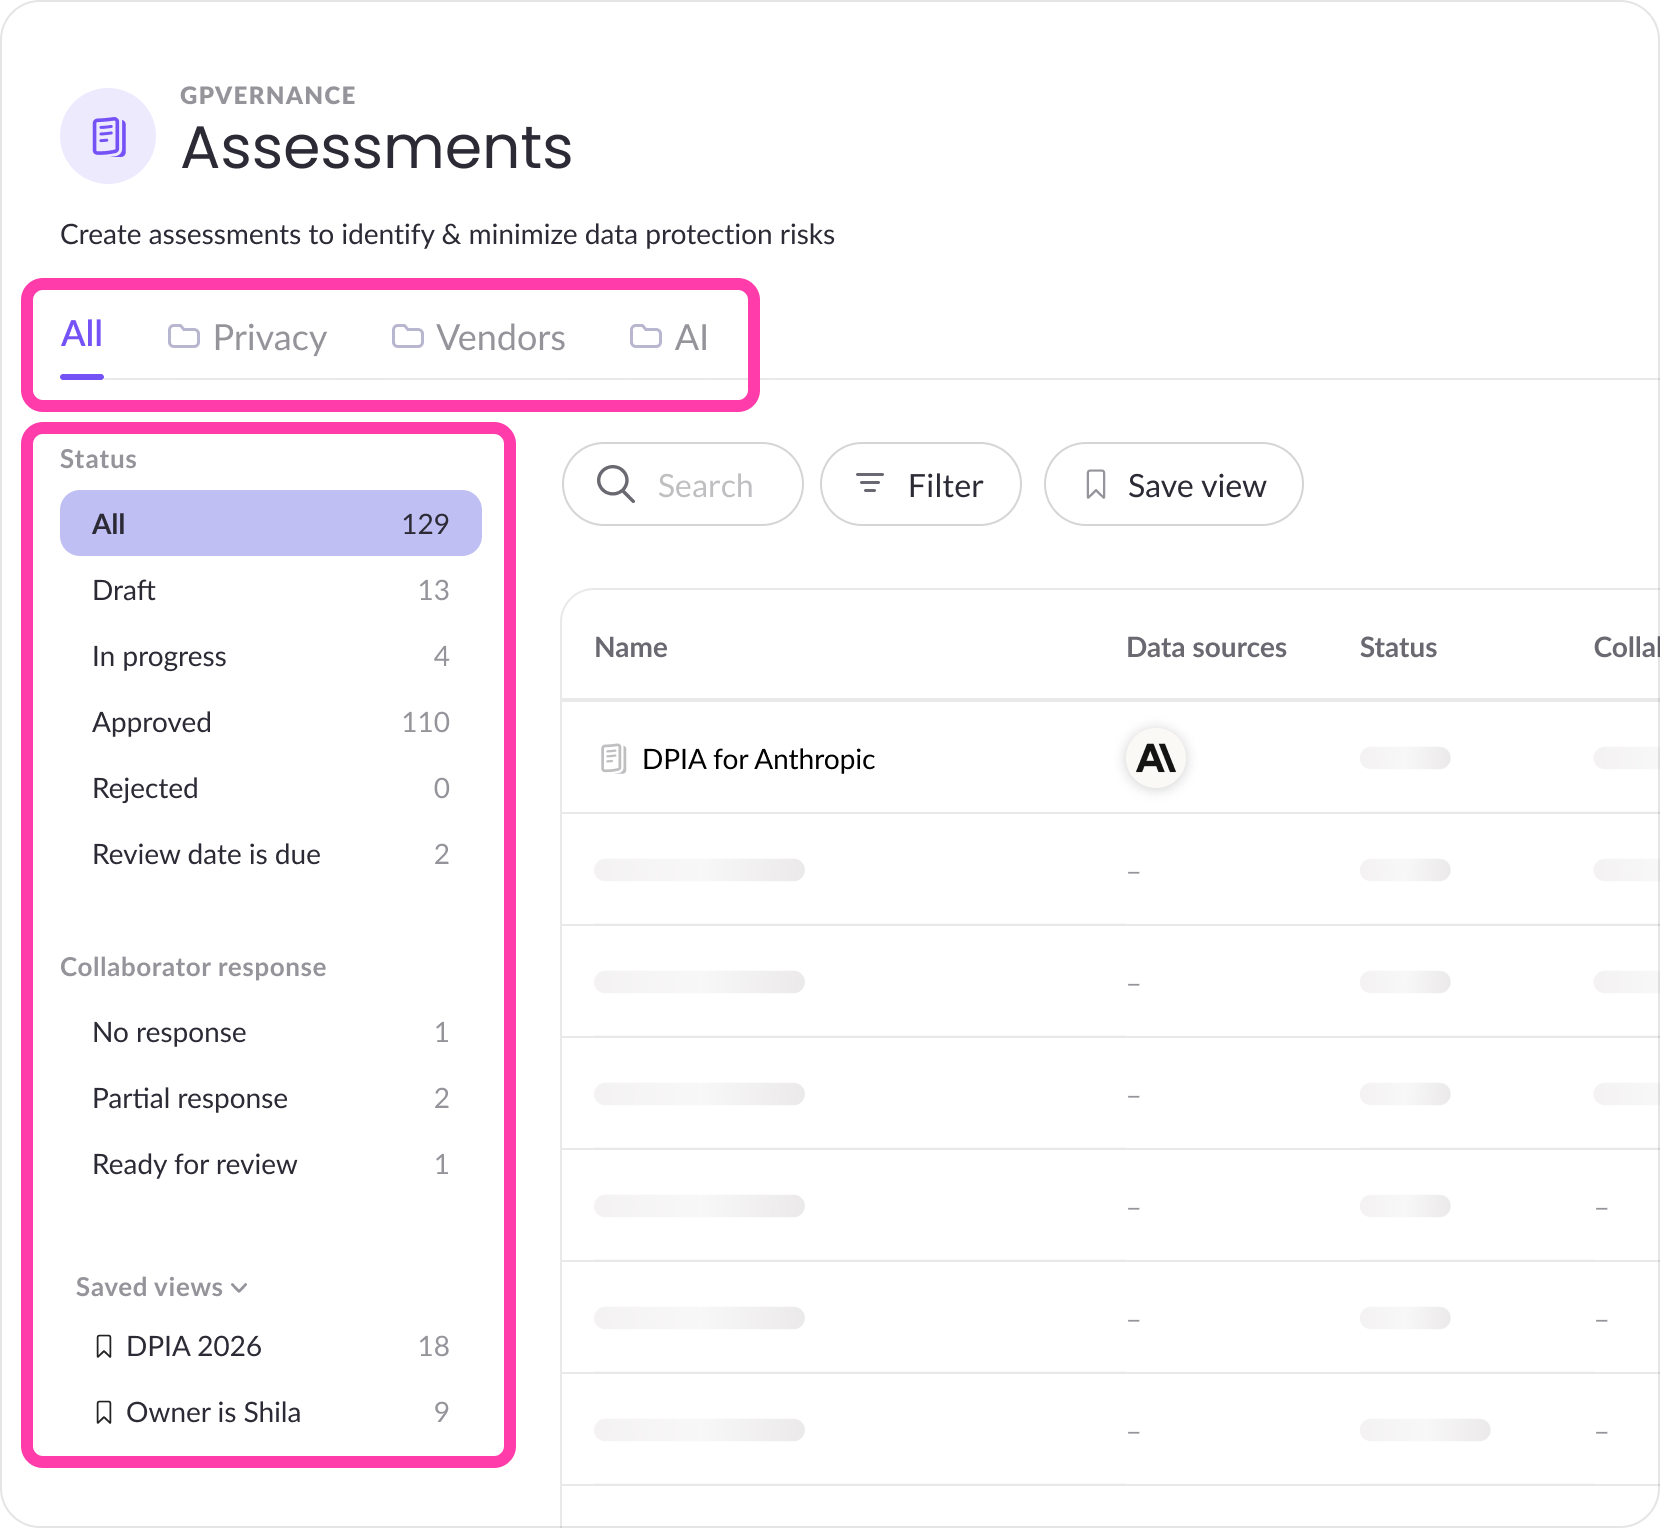
Navigate to Governance > Assessments in the left sidebar. The page has three main areas:
- Use case tabs (at the top) — switch between All, Privacy, Vendors, and AI to filter assessments by use case
- Filter panel (left column) — narrow by Status, Collaborator response, Saved views, or Labels
- Assessments table (main area) — shows all assessments matching the current view, with columns for Name, Labels, Data source, Status, Collaborator response, Owner, and last Updated date
Tabs (use cases) are pre-filtered perspectives on your assessments. MineOS ships with three defaults:
- Privacy — assessments labeled "Privacy"
- Vendors — assessments labeled "Vendor"
- AI — assessments labeled "AI"
The All tab shows every assessment with no filter applied and is the default when you first navigate to the page. You can create your own saved views using the Save view button — see Filtering and saved views below.
Creating an assessment
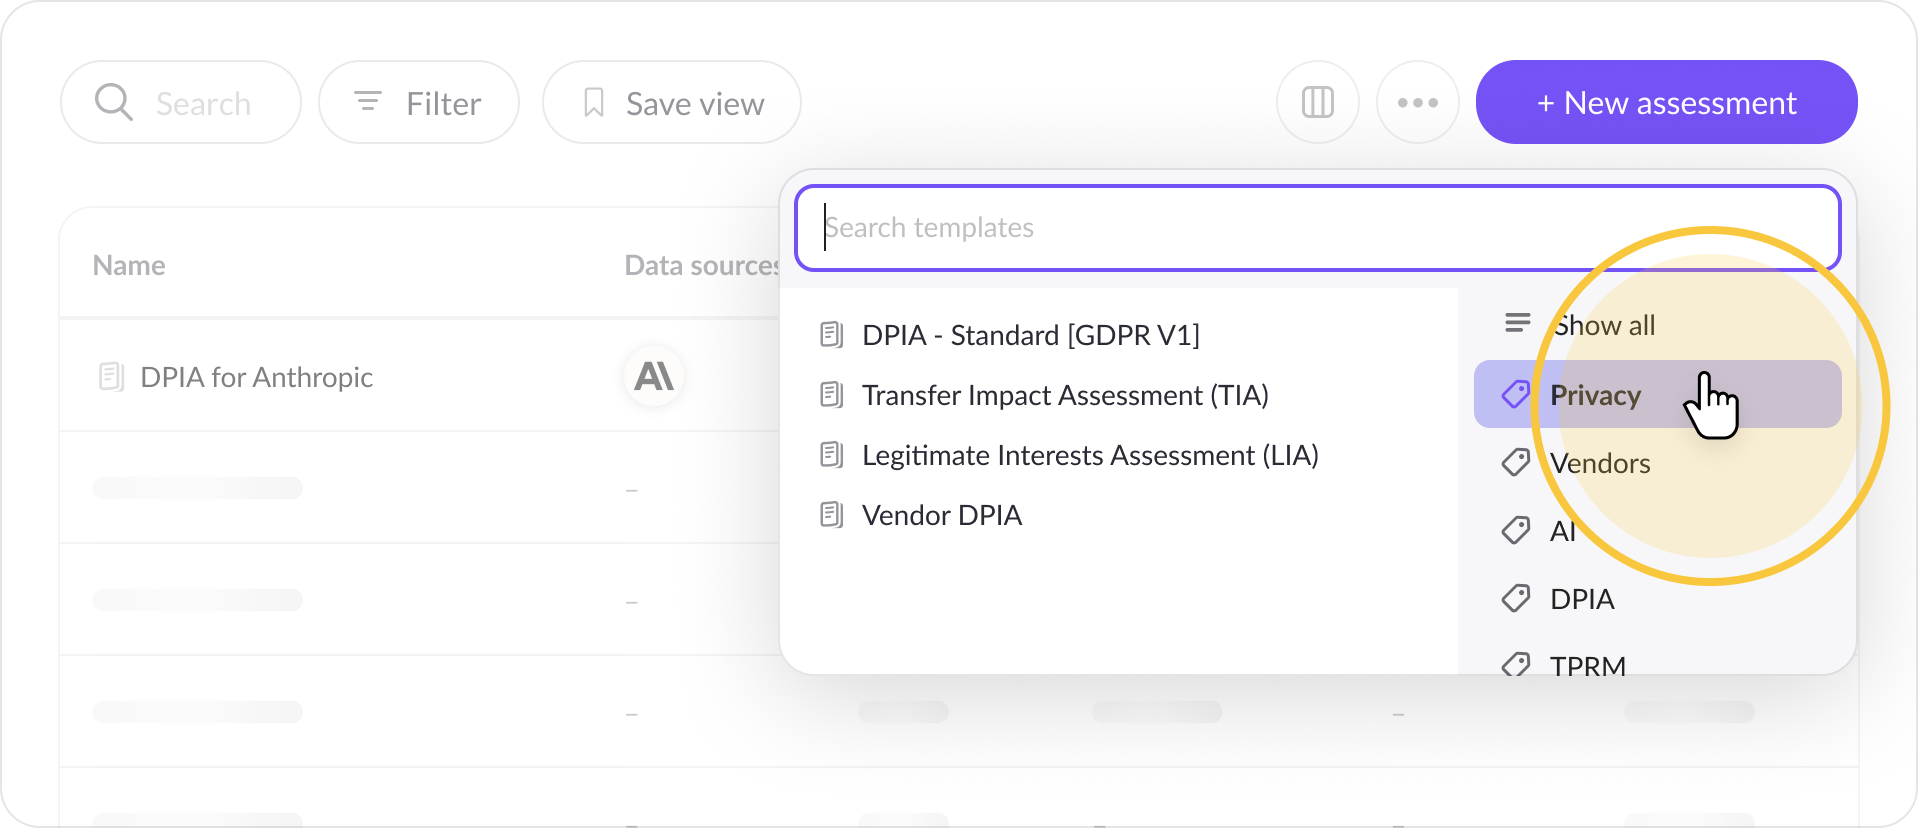
- Click + New assessment in the top right of the Assessments page.
- A template picker appears. If you're in a saved view (Privacy, Vendors, or AI), the picker is pre-filtered to show relevant templates — you can switch to Show all to see every template, or search by name.
- Select a template. A "New assessment" modal appears asking you to give it a name.
- Enter a name and click Create.
The assessment opens immediately in edit mode. Fill in the sections and questions, or use Mira AI to draft answers based on context from your inventory. Read more about Mira AI here.
Inside an assessment
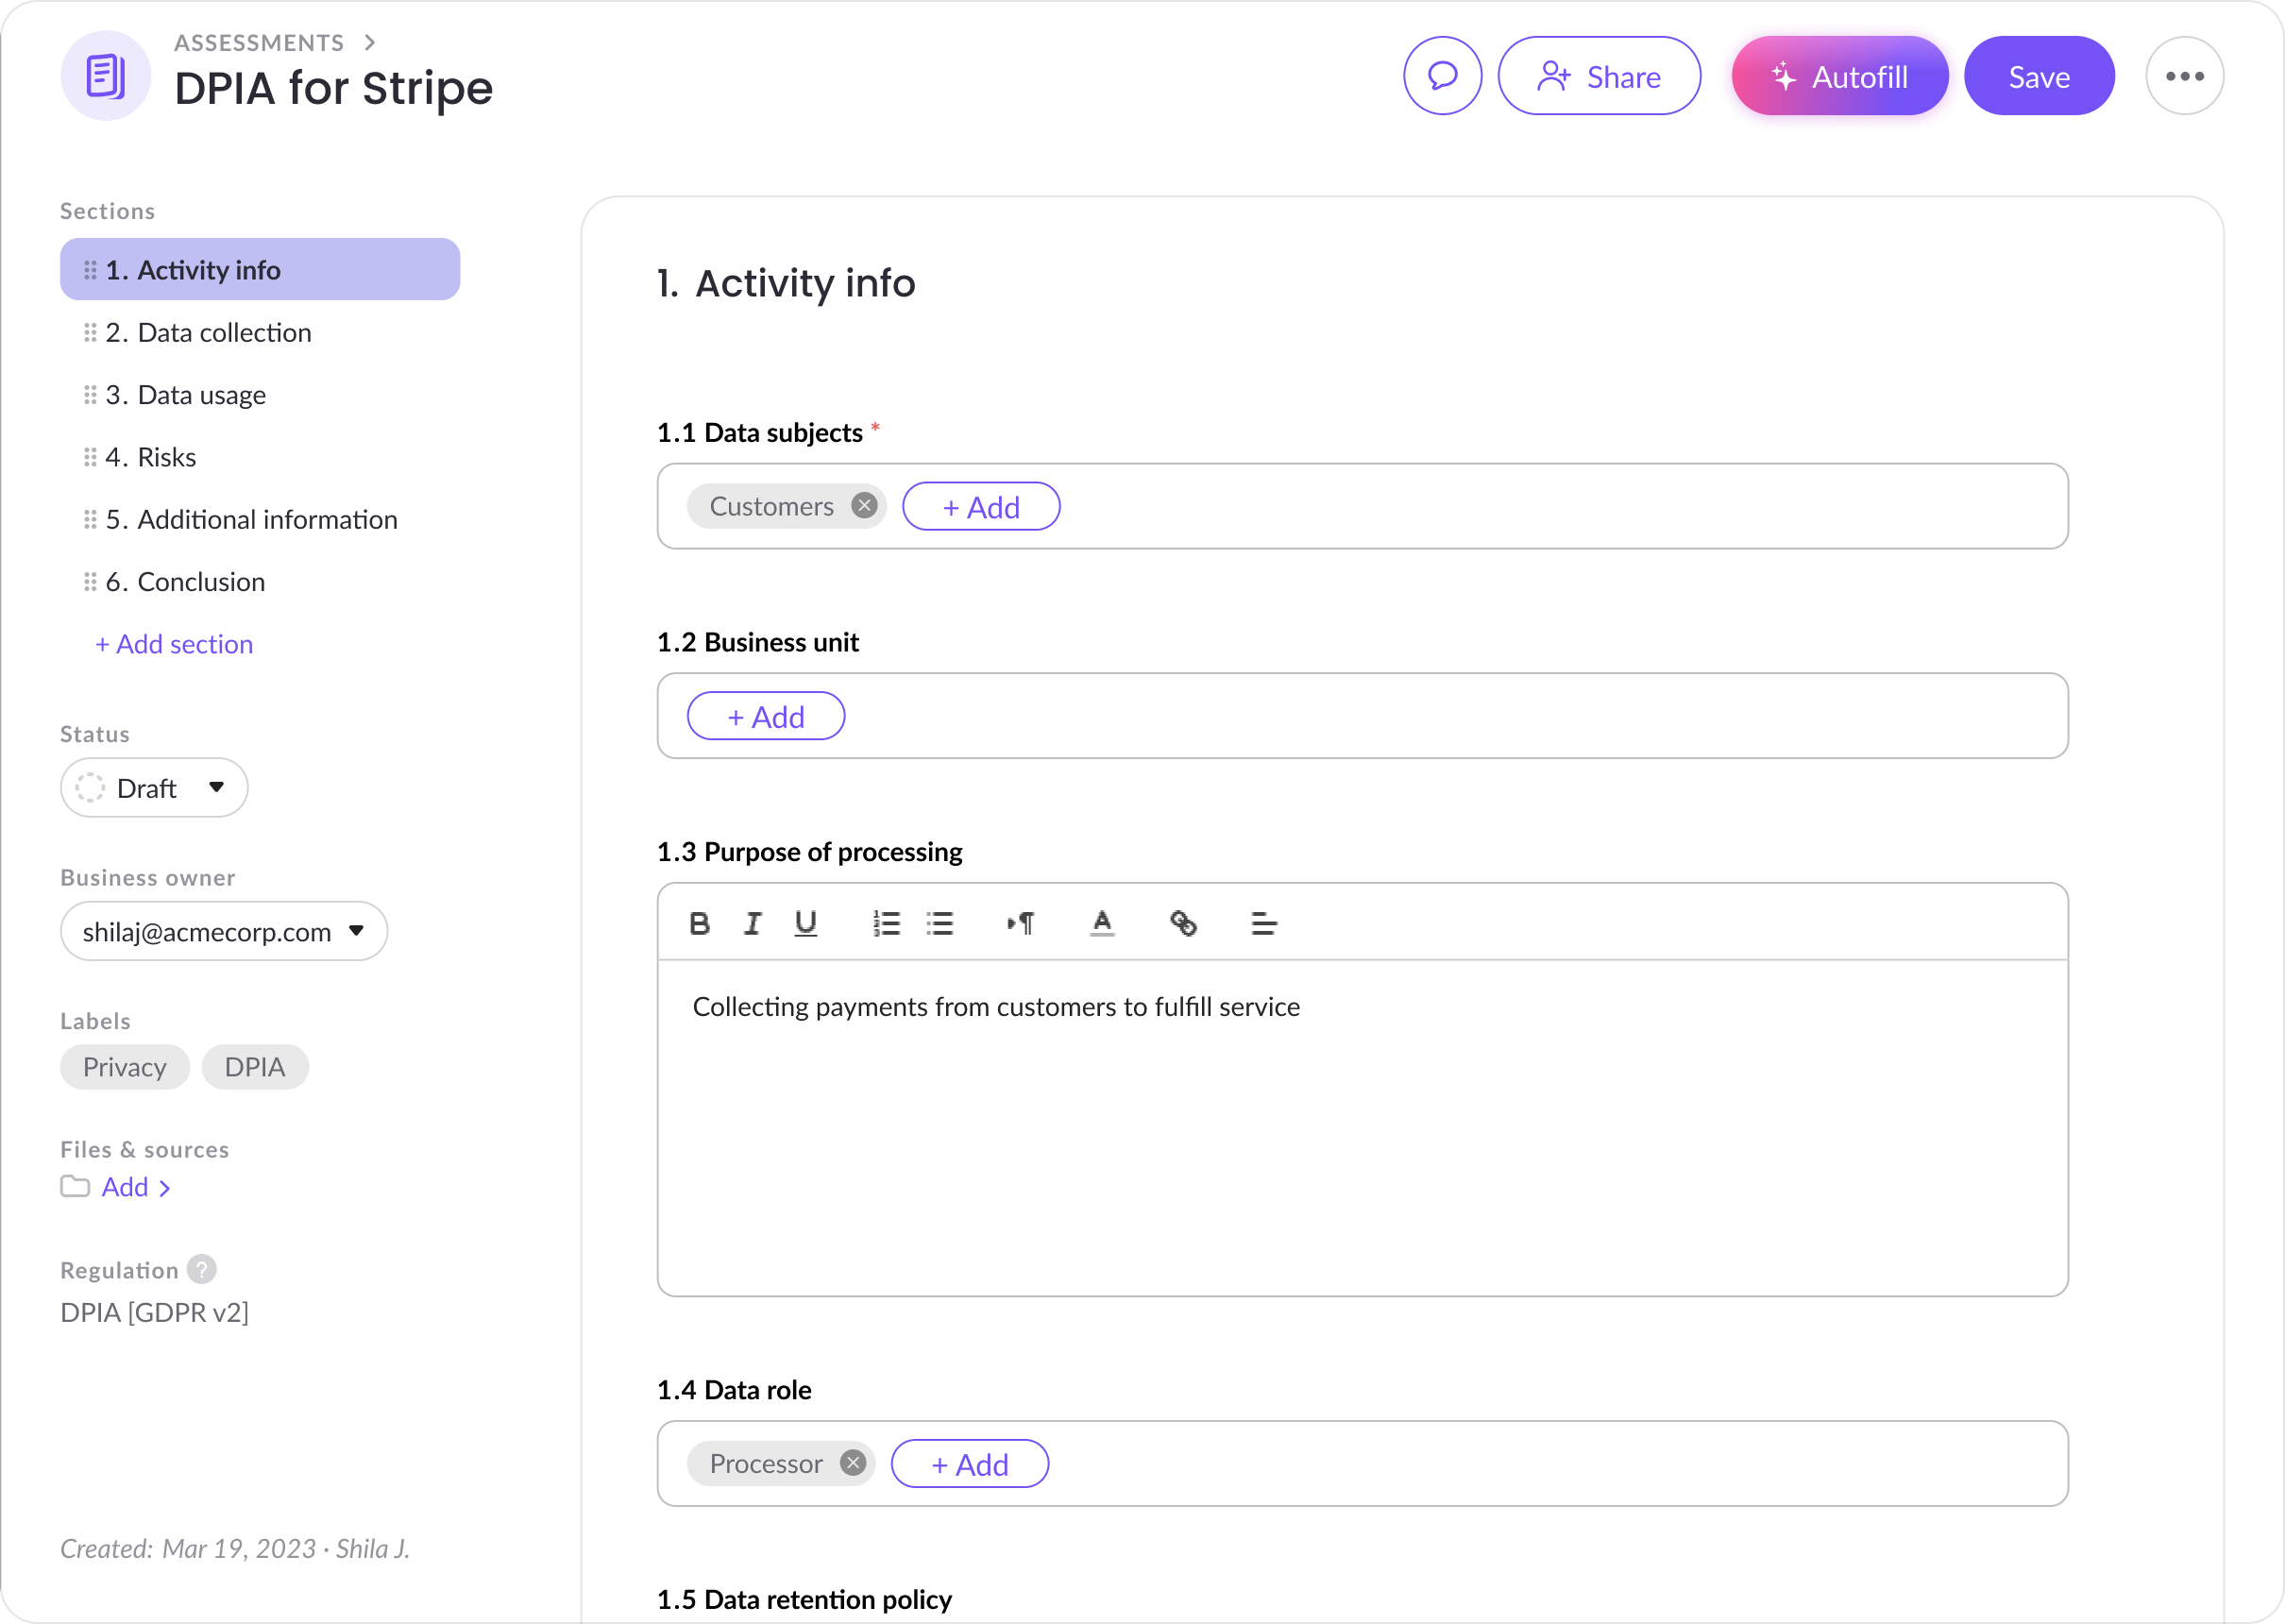
The left sidebar of an open assessment shows everything you need to manage it:
Sections — the template's sections are listed here. Click any section to jump to it in the main panel.
Status — every assessment has a status that reflects where it is in its lifecycle:
| Status | Meaning |
|---|---|
| Draft | Created but not yet edited |
| In progress | Active — questions are being answered or a collaborator has been invited |
| Approved | Reviewed and marked complete |
| Rejected | Reviewed and rejected |
Update the status by clicking the dropdown in the left sidebar.
Business owner — the team member responsible for the assessment. Set or change this from the left sidebar. The owner receives notifications when the assessment status changes, a collaborator responds or Mira is ready with new suggestions.
Labels — the labels inherited from the template are shown here. You can add or remove labels at any time. Labels control which saved view the assessment appears in, so changing them here updates the table accordingly.
Regulation/FW — a read-only field that shows which regulation or framework is associated with this assessment (for example, "DPIA GDPR"). This field is set on the template and is used by Mira AI to give context-aware suggestions — it is not a label and does not affect filtering.
Filtering and saved views
The filter panel on the left of the Assessments page lets you narrow by:
- Status — Draft, In progress, Approved, Rejected, Review date is due
- Collaborator response — No response, Partial response, Ready for review
- Labels — any label that exists in your organization
To save a filtered view for future use, set your filters and columns and click Save view. Give it a name — saved views are shared across your organization, so name them clearly. You can edit or delete any saved view you've created.
Note on built-in labels: The labels Privacy, Vendor, and AI are built into MineOS and cannot be renamed or deleted. Labels you create yourself can be renamed or deleted at any time from the Labels management panel (accessible via the ··· menu on the Assessments page).
Exporting assessments
To export all assessments in the current view, click Export in the top right of the Assessments page. The export includes assessment names, labels, statuses, owners, and last updated dates.
To export a single assessment in full — including all questions, answers, and metadata — open the assessment and use the ··· menu in the top right.
Updated 5 days ago