
Phone Verification
Choose how each brand handles the phone number on Privacy Center requests: leave it unverified, trust it, or verify it with a one-time SMS code.
Phone verification controls how MineOS treats the mobile number a data subject enters on your Privacy Center form. This matters because some integrations use the phone number, alongside or instead of the email, to find the data subject's records. Verifying the number first helps make sure you act on the right person's data.
Phone verification is the optional second step of identity verification, and it runs after email verification.
Choosing a method
Phone verification is set per brand. In DSR setup, open the brand and scroll down to the Phone verification section (the last section). If you run several brands, each can use a different method. See Understanding Multibrand in DSR.
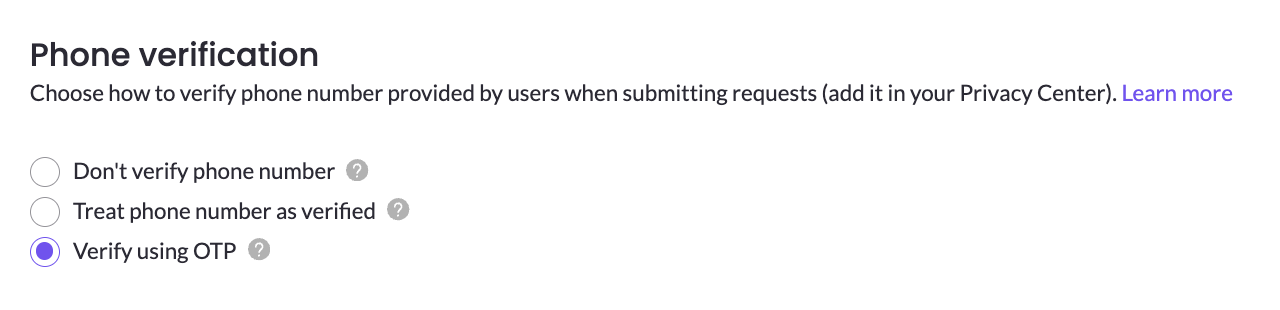
Choose one of three methods:
| Method | What happens to the phone number |
|---|---|
| Don't verify phone number (default) | The number is saved on the request but not marked as verified, so integrations don't use it. If the request's workflow includes an integration that needs a phone number, that integration doesn't run and moves to the Needs action section with a Missing identifier error. To continue, a DSR agent checks the number and adds it to the request manually with Edit identifiers. |
| Treat phone number as verified | Any number submitted in the Privacy Center is trusted without verification and used by your integrations. |
| Verify using OTP | After email verification, the data subject receives a one-time code by SMS and must enter it before the request can be processed. |
Verify using OTP experience
When the brand uses Verify using OTP, the data subject goes through these steps:
-
They submit a request through your Privacy Center form, including their mobile number. The request is created in MineOS with the status Unverified.
-
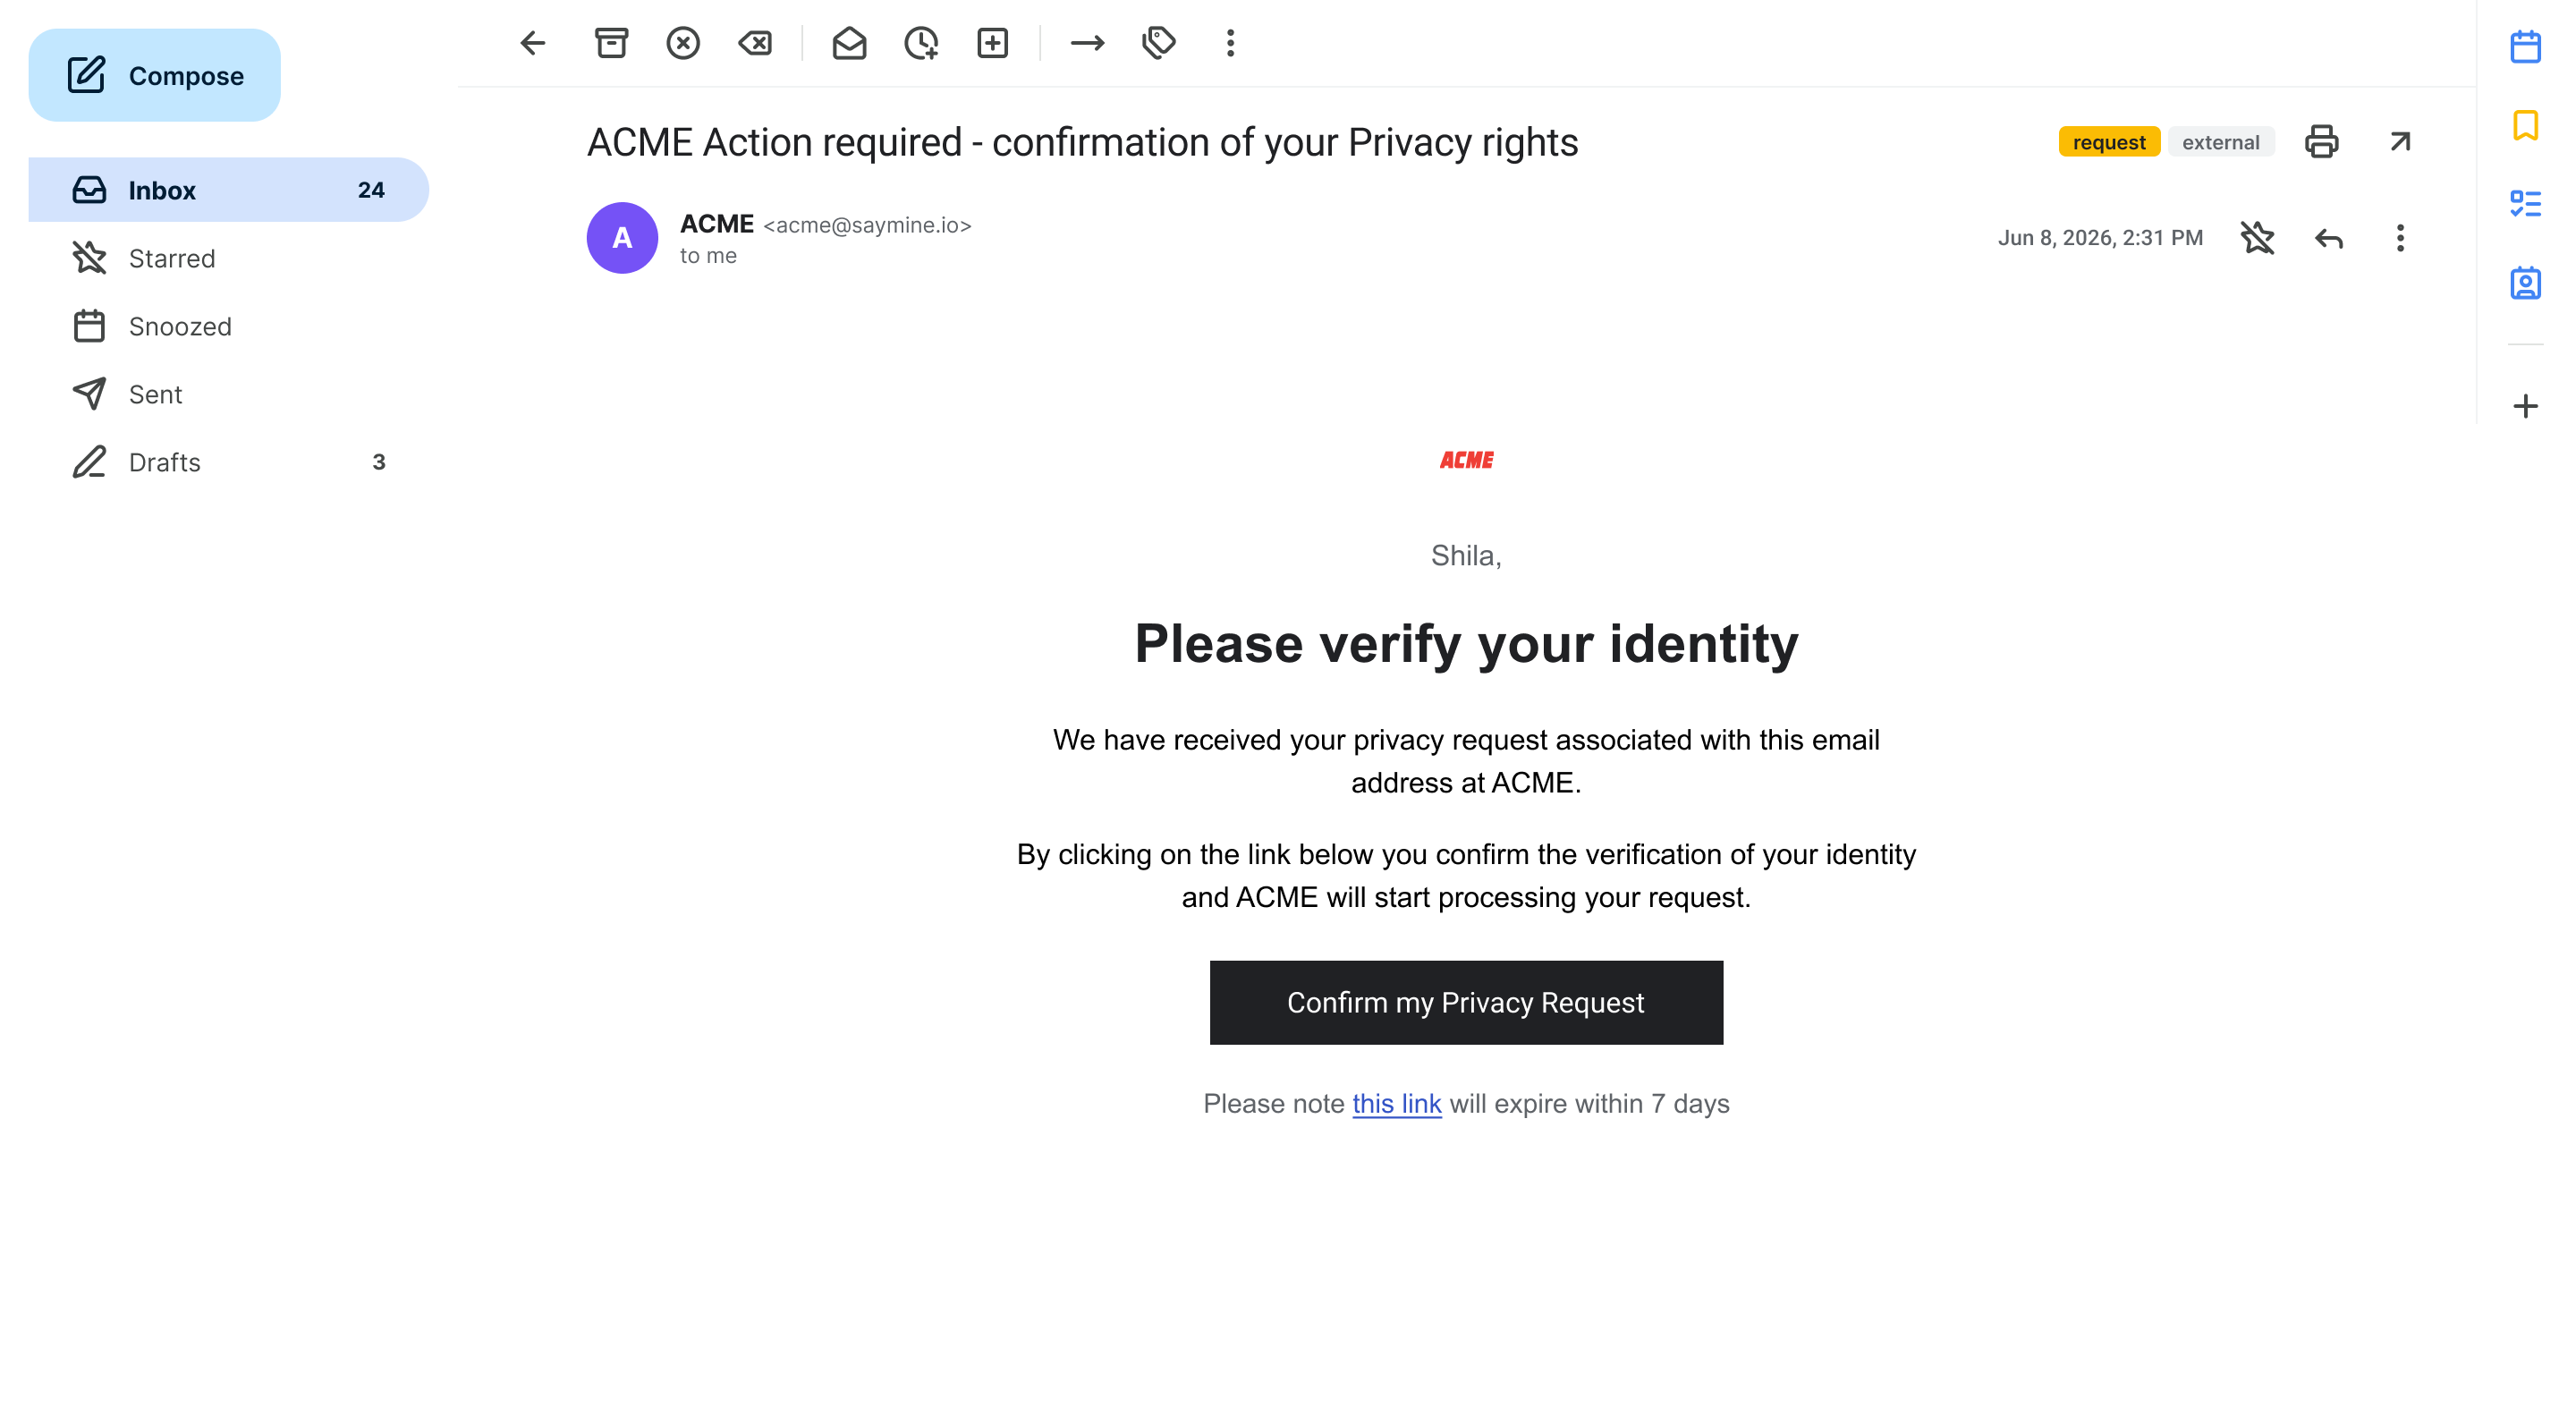
They receive a verification email.
-
They click Confirm my email address in the email. Their email is now verified.
-
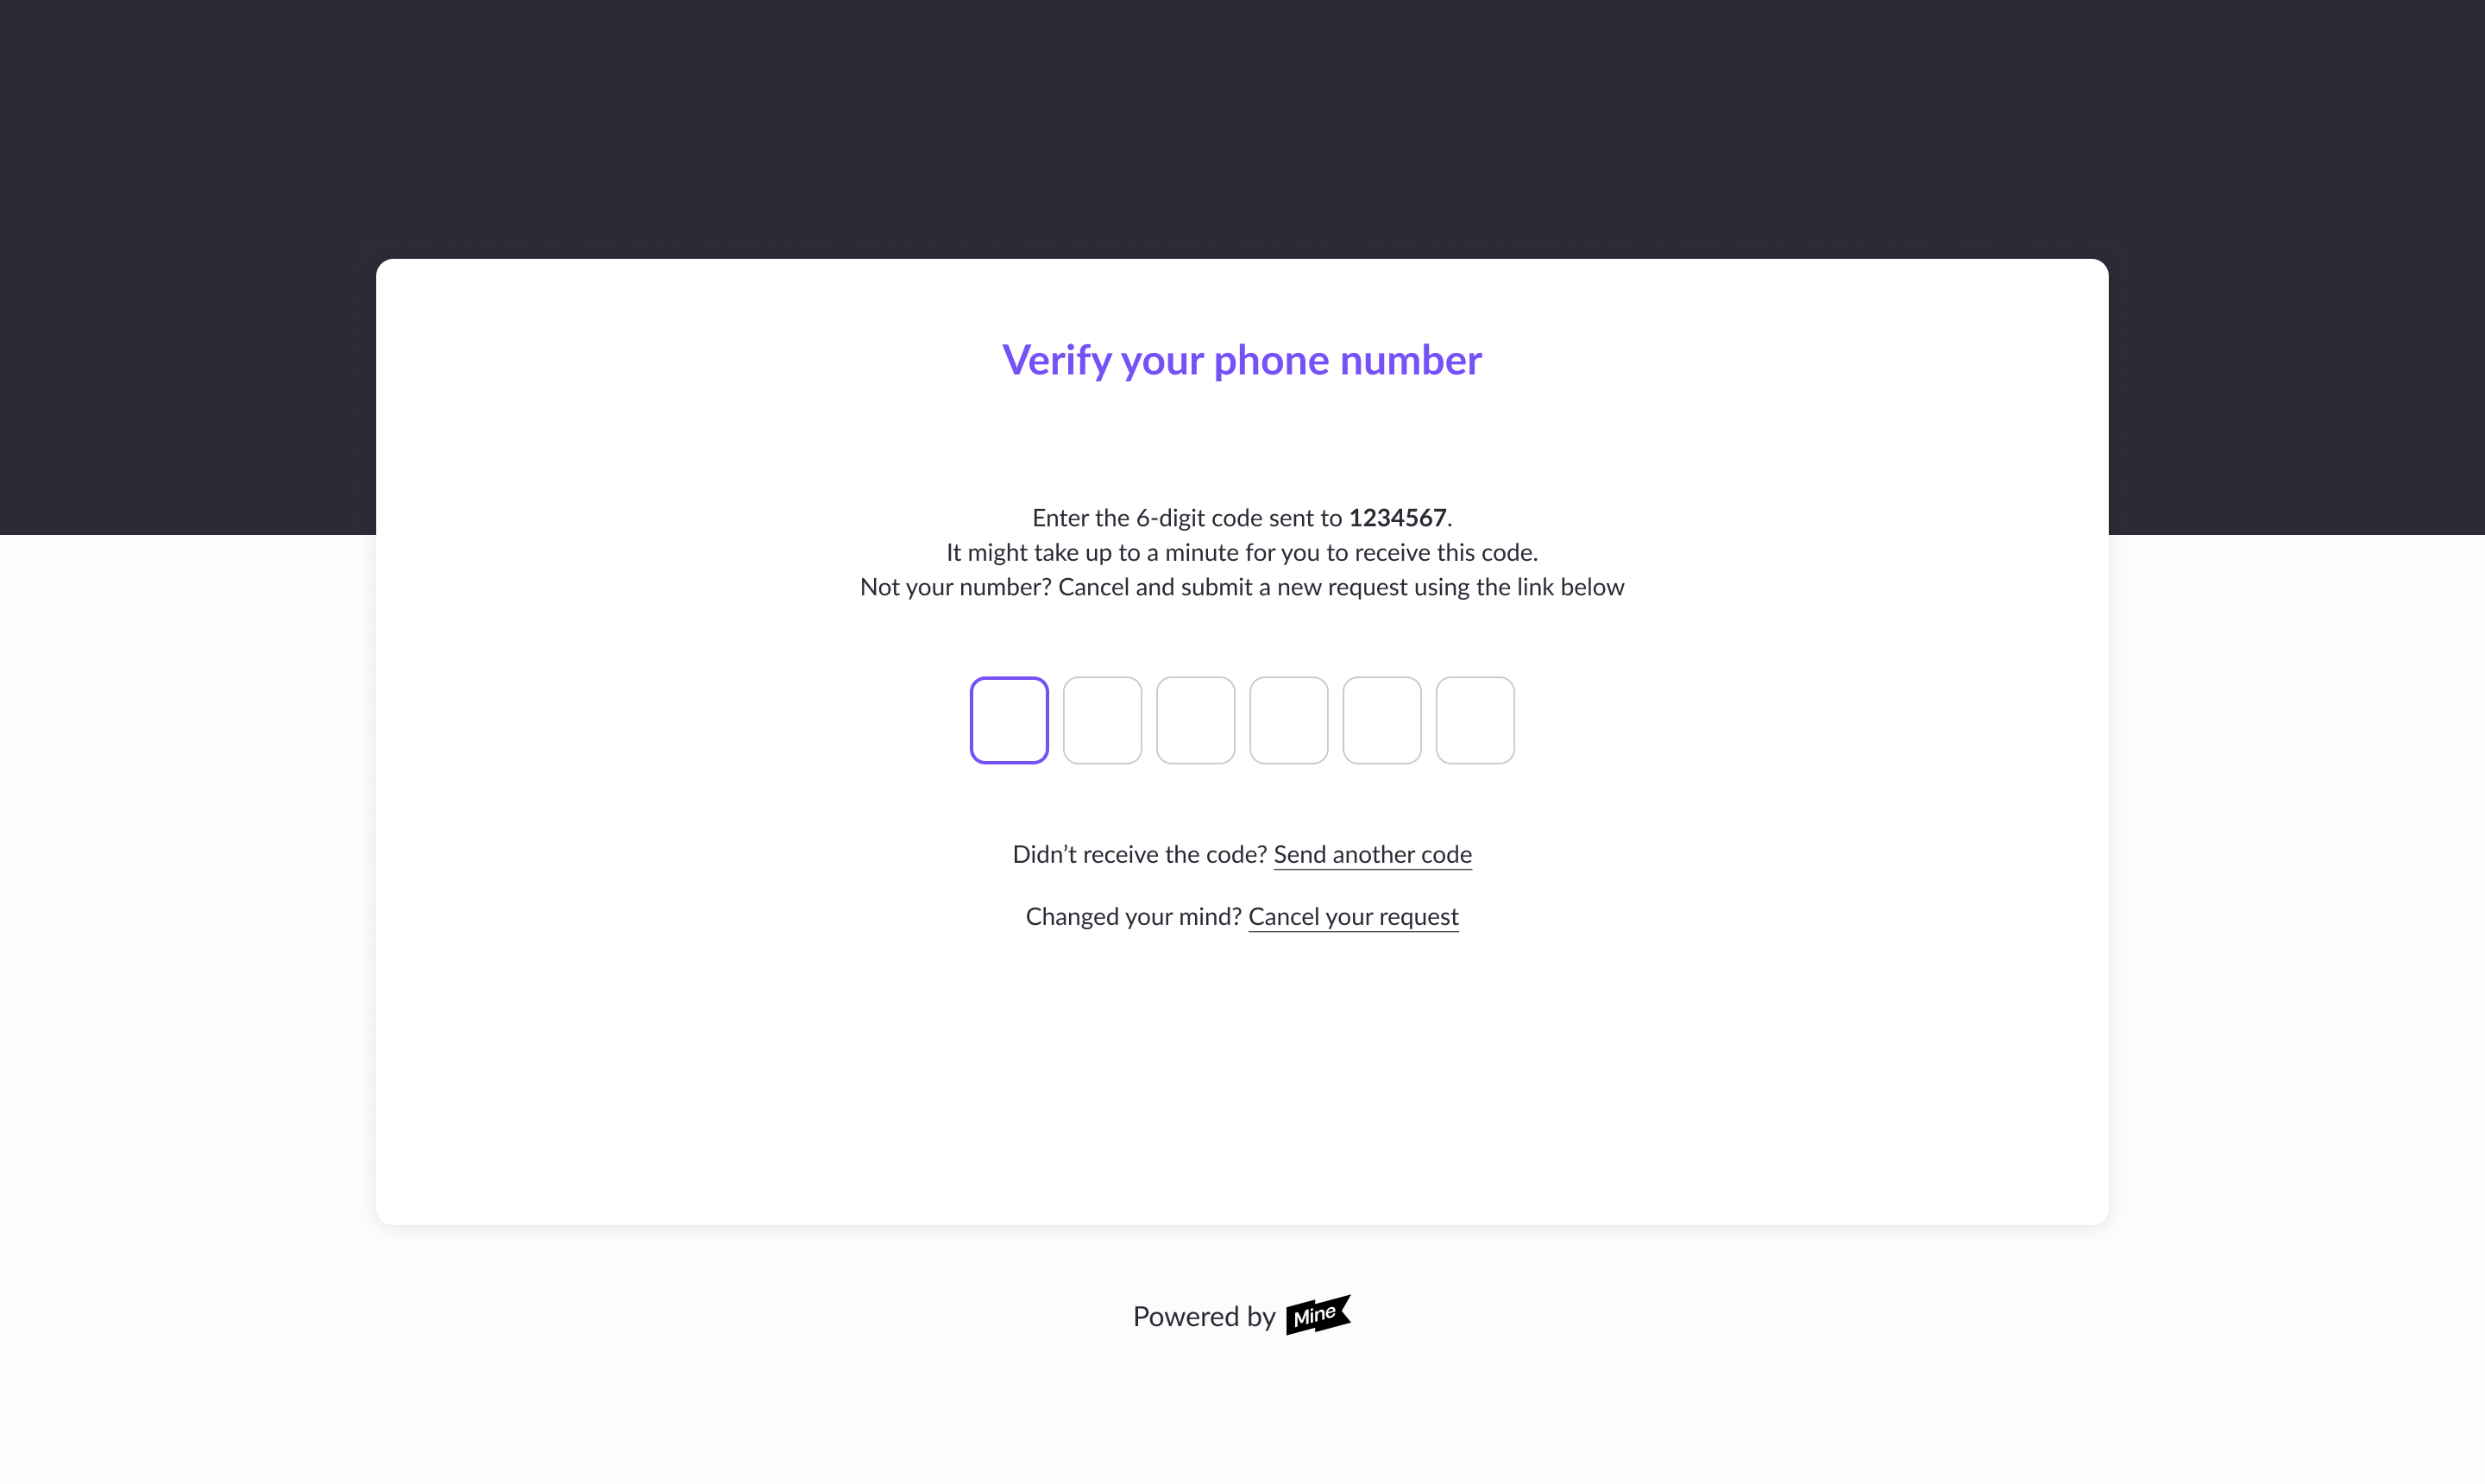
They're taken to the Verify your phone number page, and a 6-digit code is sent to the number they entered.
-
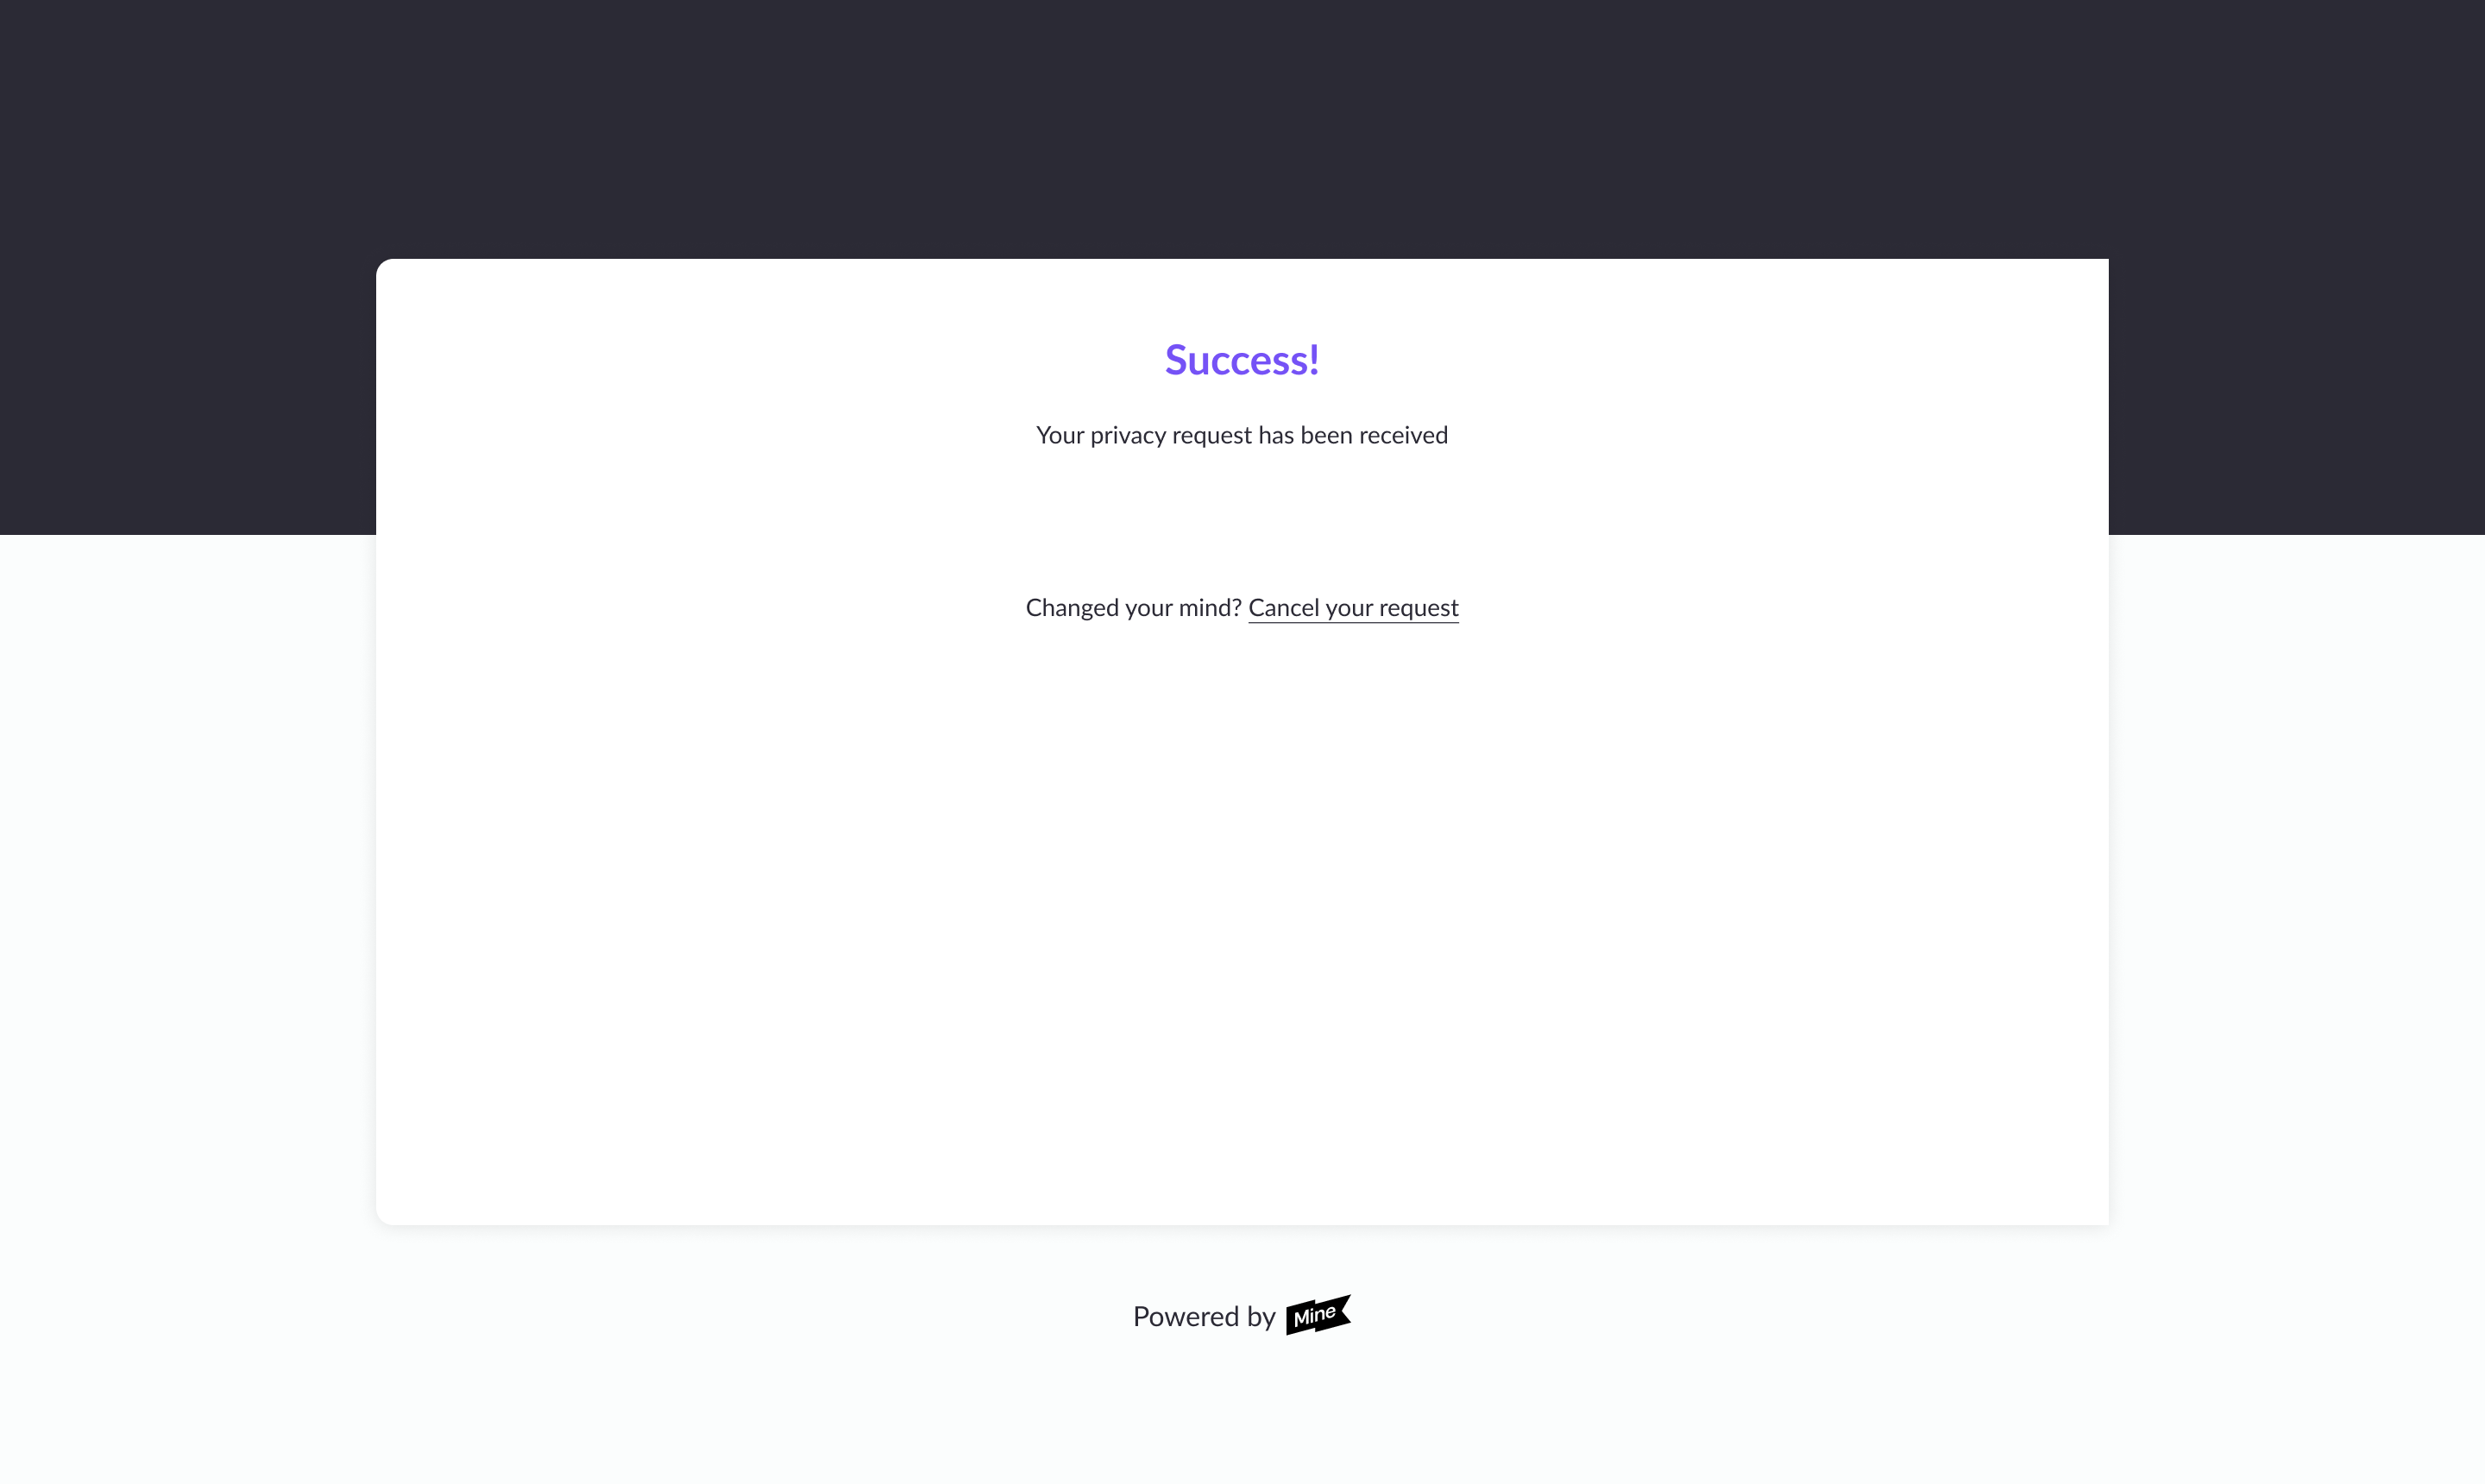
They enter the code. If it's correct, they see a confirmation page, and the request moves to Open, ready to be processed.
-
If the code doesn't arrive, they can select Send another code after a short countdown.
The page also handles common situations:
- Wrong code: they're asked to try again.
- Expired code, or too many incorrect attempts: they're asked to request a new code.
- Too many codes requested in a short time: they're asked to wait a few minutes.
- Wrong number: they can cancel the request and submit a new one with the correct number.
If phone verification can't be completed after repeated attempts, the data subject is told your team will review the request and contact them by email.
Before you switch to Verify using OTP
-
Test the flow first. We recommend testing phone verification before you turn it on for your live Privacy Center.
-
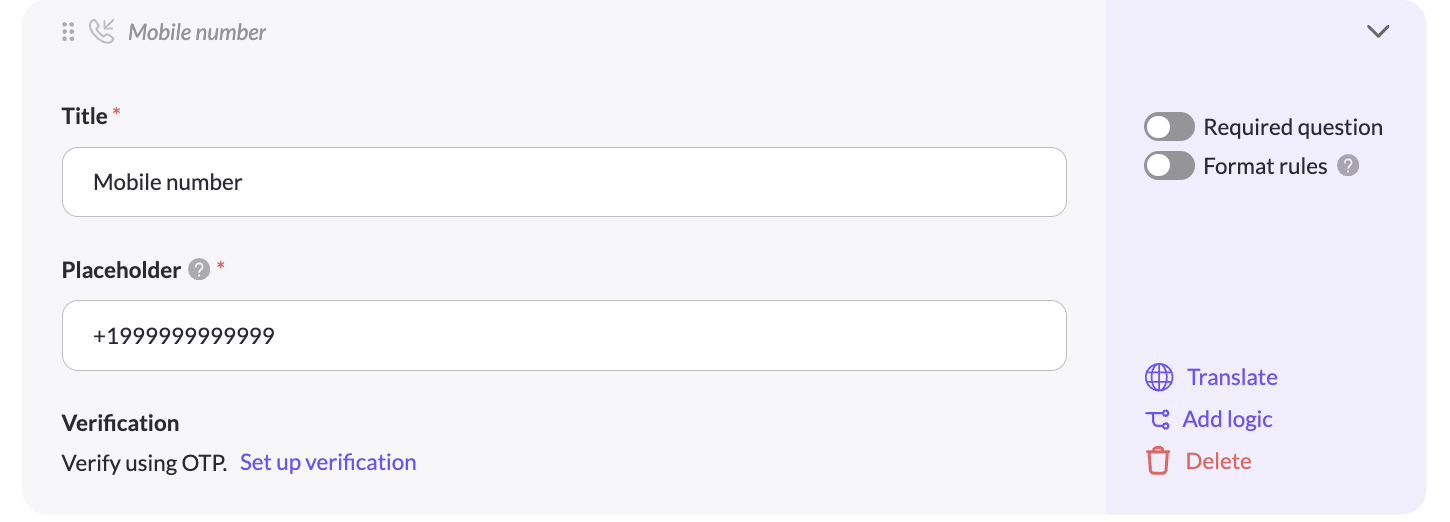
Add a required Mobile number field to your Privacy Center form. MineOS only accepts numbers in this field in international format, including the country code (for example, +16505555555 for the US). The form builder also shows which phone verification method the brand uses, with a shortcut to the brand's settings. See Customizing Your Privacy Center Form.
-
Process open requests if you can. Requests submitted before you switch keep the old rules: they only go through email verification, and their phone numbers stay unverified. Integrations that need a phone number show a Missing identifier error for those requests. Processing open requests before you switch avoids this.
Setting up Verify using OTP
The one-time codes are sent through your own account with Prelude, an SMS verification provider. You'll need your Prelude account details before you start.
-
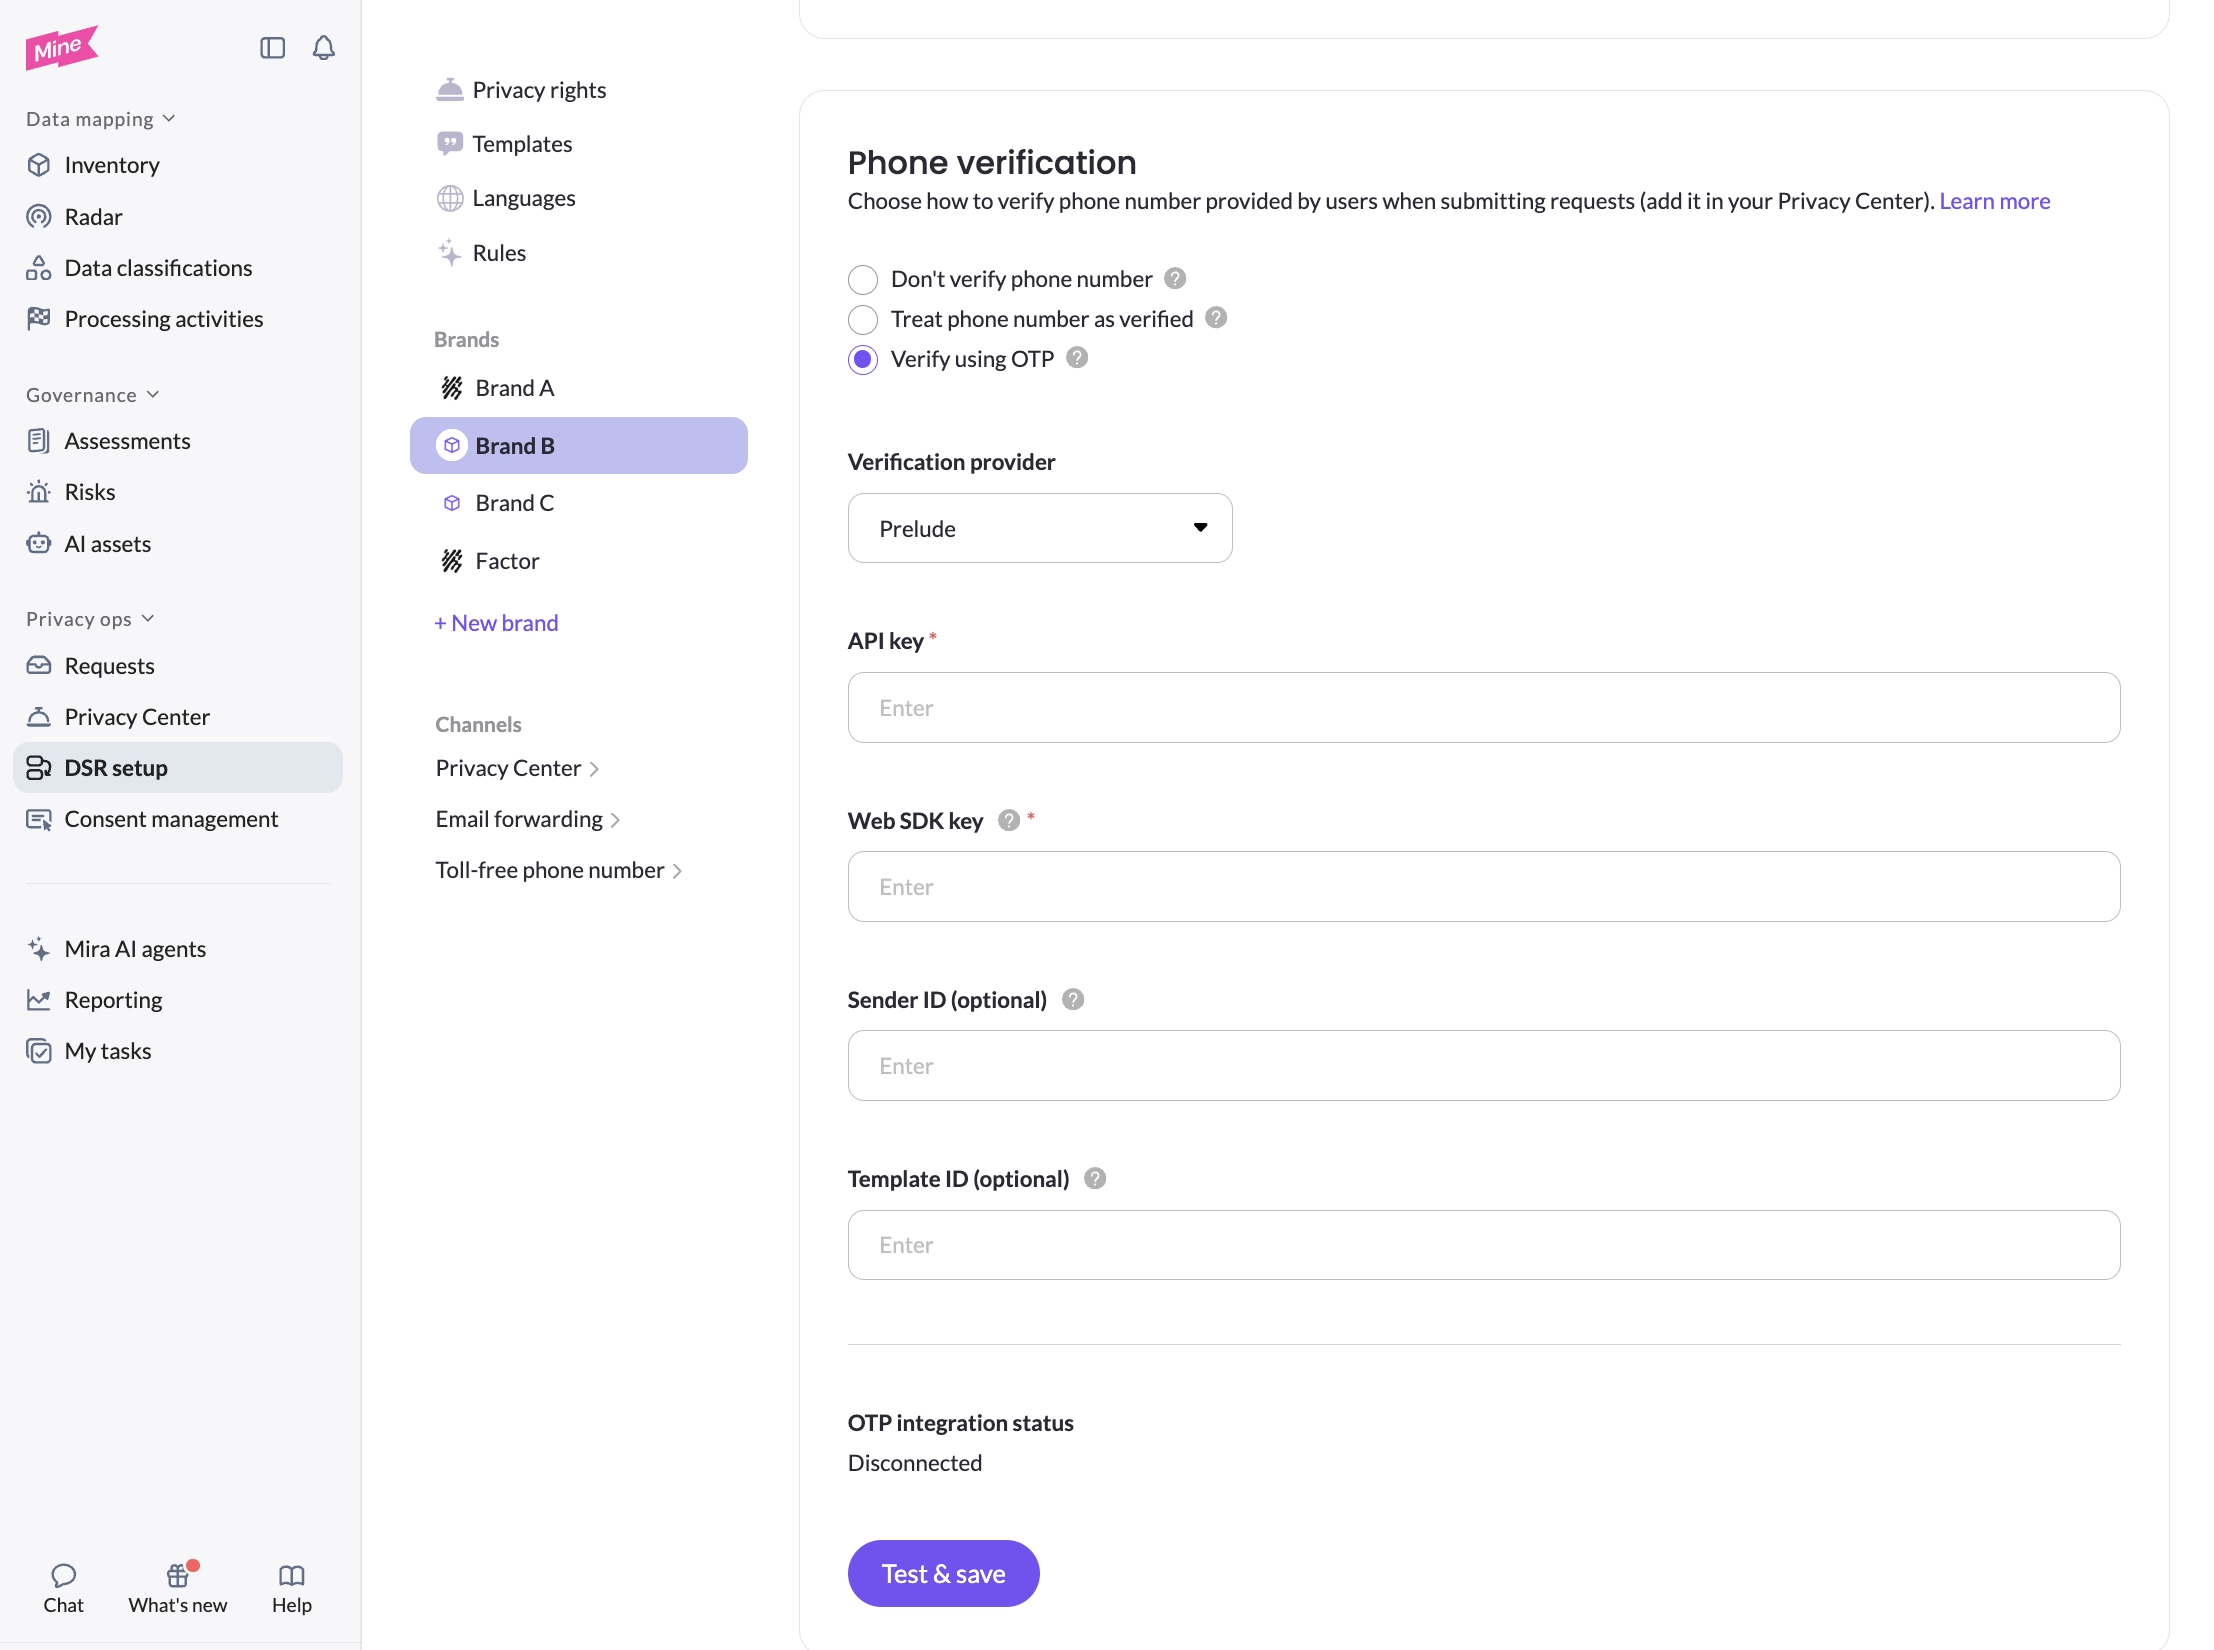
In DSR setup, open the brand and, in the Phone verification section, select Verify using OTP.
-
Under Verification provider, select Prelude.
-
Fill in your Prelude details:
- API key (required): in Prelude, go to Organization > Application > Configure > API keys, generate a new API key, and copy it into MineOS.
- Web SDK key (required): the publishable key the Privacy Center uses to sign code requests and send device signals to Prelude for fraud detection. See Enforce the Web SDK signature. In Prelude, go to Organization > Application > Configure > SDK key, generate a web SDK key, give it a name, and copy it into MineOS.
- Sender ID (optional): an approved sender ID from your Prelude account. Leave it empty to use your account default.
- Template ID (optional): leave this empty to use your Prelude account's default template. You don't need to create a template. Enter a template ID only if you've created a custom OTP template in Prelude and want data subjects to receive that message instead. See Check your message template.
-
Click Test & save. MineOS checks the connection before saving, and OTP integration status changes to Connected. If the key can't be validated, nothing is saved.
Then complete these steps in your Prelude dashboard:
- Enforce the Web SDK signature (required)
- Check your message template (recommended)
- Enable trusted users in your Prelude account (recommended)
- Set retries and rate limits (optional)
- Open the countries your data subjects are in (optional)
- Adjust fraud protection settings (optional)
Enforce the Web SDK signature
This step is required. The Web SDK key you entered in MineOS lets the Privacy Center sign every code request it sends to Prelude. Turning on enforcement tells Prelude to accept only signed requests, so anyone who tries to trigger codes from outside your Privacy Center is blocked. Without enforcement, your Prelude account accepts unsigned requests too, which leaves it open to SMS-pumping fraud and unexpected SMS costs.
Turn on enforcement once you've confirmed the Privacy Center is sending signed requests:
- Make sure the Web SDK key is saved in MineOS, and submit at least one request from your Privacy Center so Prelude receives signed traffic. See Testing phone verification.
- In your Prelude dashboard, go to Verify > Phone and open the Configure tab.
- Under Anti-Fraud, select SDK Signature Enforcement.
- Under Enforcement by Platform, find Web. Check that it shows 100% signed and that Unsigned · 30D is 0.
- Turn on the Enforce toggle for Web.
- In the Enforce Signature for Web dialog, check that Would be blocked is 0 (0%), then click Enforce.
Once enforcement is on, only requests with a valid SDK signature go through. You can turn enforcement off at any time without losing any data.
Don't enforce without the Web SDK keyIf the Web SDK key is missing from the brand's settings in MineOS, the Privacy Center can't sign requests, and Prelude blocks every code once enforcement is on. If Would be blocked in the dialog is above 0%, find the cause before you click Enforce.
Check your message template
Out of the box, MineOS uses your Prelude account's default template to send codes. If you're happy with the default message, you don't need to create or configure a new template. Leave Template ID empty in MineOS, and just check the two settings below on your default template.
If you want data subjects to receive a different message, create a custom template in Prelude, enter its ID in Template ID in MineOS, and check the same two settings on that template.
Two template settings must match how the Privacy Center works:
- Code Size must be 6. The Verify your phone number page always asks for a 6-digit code. Prelude sets a 6-digit code by default for all templates, including the default template, but check it to make sure it's actually set to 6. If it's set to a different length, data subjects receive a code they can't enter.
- Invalidate previous codes on resend should be on. With this setting on, only the most recently sent code is valid, and requesting a new code invalidates all previous ones. This way, when a data subject selects Send another code, or your team resends a code from the Portal, an older code can no longer be used.
To check them:
- In your Prelude dashboard, go to Verify > Phone and open the Configure tab.
- In the template selector at the top left, select the template MineOS uses: your default template if you left Template ID empty, or the custom template whose ID you entered.
- Under Template, select Message.
- Under Content, make sure Code Size is 6.
- Turn on Invalidate previous codes on resend.
- Click Save.
When you turn on Invalidate previous codes on resend, Prelude warns that it can affect your conversion rate, because a data subject who enters the code from an earlier message has to wait for a new one. The Verify your phone number page tells data subjects when a code isn't right, so they can enter the code from the latest message instead.
Enable trusted users in your Prelude account
When your team resends a code from the Portal, MineOS tells Prelude the request comes from a trusted user. Prelude then skips its fraud checks and sends the second code, even if the first one was blocked.
Prelude must turn this option on for your account. Contact Prelude support and ask them to enable the is trusted user signal on your account. Prelude enables it free of charge.
If you don't enable it, Resend phone verification code in the Portal still works, but the resent code goes through the same fraud checks as any other request. If Prelude blocked the first code (for example, because of the data subject's VPN or location), it will most likely block the resent code too. Your team then can't get a code to that data subject from the Portal, and the request stays Unverified until you change your fraud settings or the data subject submits a new request.
Set retries and rate limits
Each Prelude template also controls how many codes a phone number can request, and how long codes stay valid. Prelude's defaults work for most Privacy Centers, but you can adjust them per template.
-
In the same Configure tab, with your template selected, select Retries & Rate Limits under Template.
-
Under Verification Cycle, set:
Setting What it controls Duration (minutes) How long a phone number is temporarily blocked after it uses up its attempts. Maximum Retries (attempts) How many codes a phone number can request before it's temporarily blocked. Retry Delay (seconds) The minimum wait between one code request and the next. Automatic Retries (retries) How many times Prelude resends a message that couldn't be delivered, without the data subject asking. Each resend is billed as a separate message. -
Under Rate Limit, review the limits for the template.
-
Click Save.
Prelude shows a summary of your settings under Verification Cycle. For example, with the defaults, each phone number can make up to 3 attempts, with a 10-second delay between each attempt, before being temporarily blocked for 5 minutes.
When a data subject reaches the limit, the Verify your phone number page asks them to wait a few minutes before requesting another code. Keep Maximum Retries high enough for a data subject who needs a second or third code, but low enough to limit abuse.
Open the countries your data subjects are in
Prelude doesn't send codes to every country by default. Some countries start out Closed, and no codes are sent to phone numbers there until you open them.
-
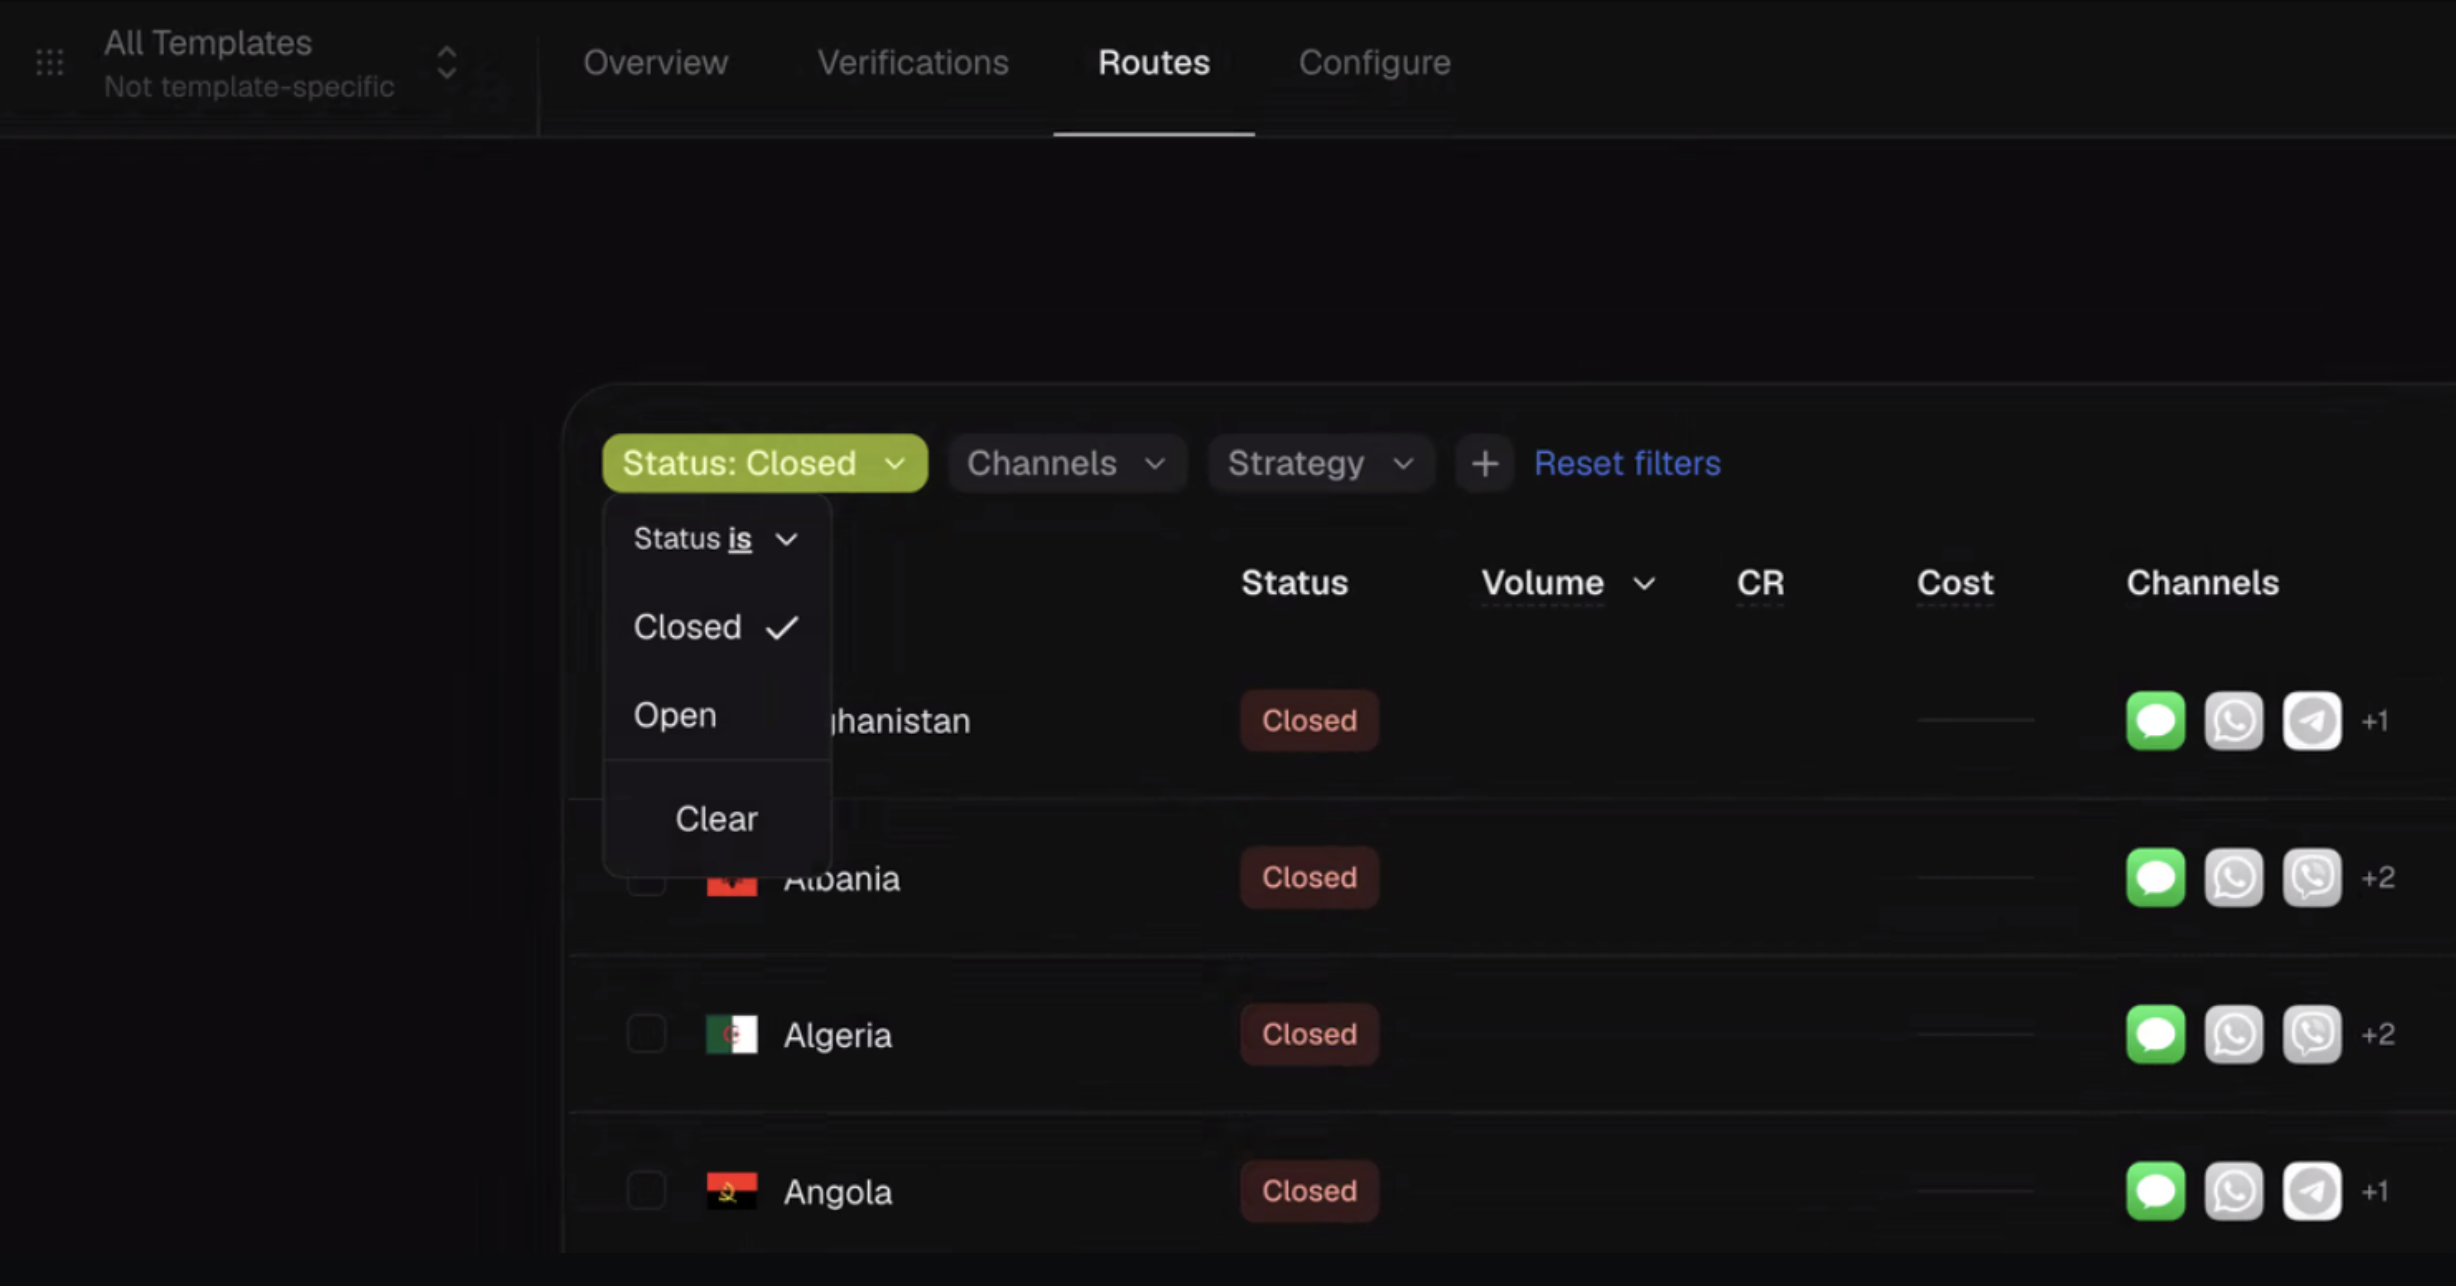
In your Prelude dashboard, go to Verify and open the Routes tab.
-
Filter by Status: Closed to see which countries are closed.
-
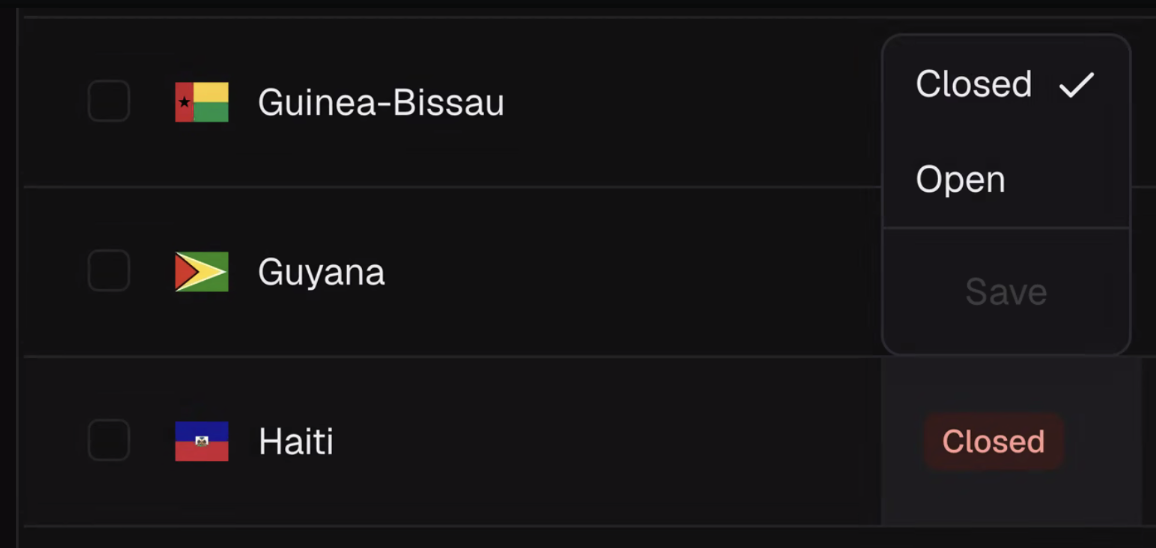
Click a country where you expect data subjects to submit requests.
-
Change the status picker from Closed to Open.
Adjust fraud protection settings
Public forms that send SMS messages are a common target for SMS-pumping fraud, where attackers trigger large numbers of messages to inflate costs. Prelude screens every code request before it's sent, using the device signals the Privacy Center collects through your Web SDK key. If Prelude judges a request risky, it blocks it and no code is sent.
You manage these settings in your Prelude dashboard, not in MineOS. Open Verify, select a country in the country selector, and click Risk Level to open the Fraud Protection panel. Save Changes applies your settings right away to new code requests, and Restore Defaults returns the country to Prelude's recommended settings. For full details, see Prelude's fraud protection settings.
Fraud protection settings are set per country and apply to your whole Prelude application, not to a single template. Every template in the application, and every MineOS brand connected to it, uses the same risk level and detection rules for that country.
Region risk level
| Level | What it does |
|---|---|
| Low | Lightest screening. Prelude's default for countries with little verification fraud. |
| Medium | Adds checks for countries with moderate fraud activity. |
| High | Strictest screening, for countries with a strong history of SMS-pumping fraud. |
Prelude sets a default level for each country based on fraud patterns across its network, and may change it as attack patterns shift. The level in use is marked Current. If you choose a level yourself, it stays until you restore the defaults.
Detection rules
Each country also has two detection rules you can turn on or off:
| Rule | What it blocks (when the toggle is on) |
|---|---|
| VPN & Proxy | Requests coming from commercial VPNs, hosting and data center IP addresses, and anonymizing proxies. |
| Location Discrepancy | Requests where the location inferred from the IP address doesn't match the phone number's country. |
A rule can be on even at the Low risk level, so check both rules for each country you open.
Our recommendation
- Start with Prelude's default risk level for each country, and raise it only for countries where you see fraud.
- Be careful with VPN & Proxy. People who submit privacy requests often use VPNs and privacy tools, so this rule can block real data subjects.
- Be careful with Location Discrepancy in countries where legitimate data subjects often verify foreign numbers. For example, a data subject living or traveling abroad who keeps a phone number from their home country submits a request from an IP address in another country, so Prelude flags the mismatch and blocks the code.
Unverified requests in the Portal
A request waiting for its phone code stays Unverified. Open it from the Unverified view of the Requests page to see the Request isn't verified yet card, which shows the status of each step:
- Email: Verified or Unverified, and when the verification email was sent.
- Phone number: Verified or Unverified, when the code was last sent and how many times.
From the request you can:
- Resend phone verification code: sends a new code to the data subject's phone, as a trusted user. See Enable trusted users in your Prelude account.
- Restart verification: resets the phone step and sends the data subject a new verification email. The request stays unverified.
- Reject the request, if the data subject can't complete verification. Add a note on the request explaining that it was rejected because the data subject never completed verification, so the reason is on record.
Each code sent, failed send, failed check, and successful verification is recorded in the request's audit log.
When Prelude blocks a code
When Prelude blocks a code, the request isn't rejected. It stays Unverified, and the failed send is recorded in the request's audit log.
- The data subject sees an error on the Verify your phone number page and can try again later.
- In the Portal, the request's Phone number row shows Error sending verification code.
- Your team can select Resend phone verification code on the request. The code goes to the phone number on the request, and the request opens once the data subject enters it.
Testing phone verification
Test the full flow before you turn on Verify using OTP for the Privacy Center your data subjects use. You can test in two ways:
- In a Sandbox account. Changes in a Sandbox don't affect your live Privacy Center or requests.
- In your production account, using a test brand. If your plan includes multiple brands, create a brand just for testing and set up phone verification on that brand only. Each brand has its own Privacy Center and its own phone verification method, so your live brands aren't affected. See Understanding Multibrand in DSR.
Use a real email address and a mobile number you can access, so you can complete both steps yourself. Make sure the number's country is open in Prelude. See Open the countries your data subjects are in.
Test steps
- Add a required Mobile number field to your Privacy Center form (for a test brand, that brand's Privacy Center). See Customizing Your Privacy Center Form.
- Publish the Privacy Center. Requests can't be submitted from a draft version. See Save, Preview & Publish.
- Set up Verify using OTP. Complete the setup steps until OTP integration status shows Connected.
- Submit a request from the published Privacy Center, using your test email address and mobile number.
- Check the Requests page. In the Requests page, you should see the new request with the status Unverified and the details you submitted.
- Complete both verification steps. Open the verification email and click Confirm my email address. You're taken to the Verify your phone number page. Enter the 6-digit code sent to your phone.
- Check the Requests page again. The request should now be Open, ready to be processed. Its audit log shows the email confirmation, the code sent, and the phone verification.
- Enforce the Web SDK signature. Your test request gave Prelude signed traffic, so you can now enforce the Web SDK signature. Then submit one more test request to confirm codes still arrive.
If the code doesn't arrive, see Troubleshooting. When you're done, close the test requests so they don't stay in your request list. To test more thoroughly, try entering a wrong code, requesting a second code, and canceling from the phone page.
Troubleshooting
Data subjects in a specific country don't receive the code
If requests from one country keep showing Error sending verification code, or data subjects there report that no code arrives, check that country's settings in your Prelude dashboard:
- Make sure the country is open. On the Routes tab, filter by Status: Closed. If the country is listed, open it. See Open the countries your data subjects are in.
- Lower the risk level. Select the country, open Risk Level, and try a lower Region Risk Level, such as Medium instead of High. This changes the level for the whole Prelude application.
- Review the detection rules. In the same panel, consider turning off VPN & Proxy for that country, especially if many of your data subjects there use VPNs. If data subjects there often verify foreign numbers, consider turning off Location Discrepancy too.
- Click Save Changes. The new settings apply right away to new code requests.
For requests that are already waiting, select Resend phone verification code on the request in the Portal.
Data subjects are asked to wait before requesting another code
The phone number reached the template's Maximum Retries and is temporarily blocked for the Duration you set. The data subject can request a new code once that time passes. If this happens often, review the template's retries and rate limits.
The code is the wrong length
If data subjects receive a code that doesn't fit the 6 boxes on the Verify your phone number page, the Prelude template is set to a different code size. Set Code Size to 6 on the template you use. See Check your message template.
An earlier code doesn't work
If Invalidate previous codes on resend is on, only the most recent code is valid. A data subject who requested more than one code should enter the code from the latest message.
No codes are sent after enforcing the Web SDK signature
If codes stopped going out for every country right after you turned on enforcement, Prelude is probably receiving unsigned requests. Check that the Web SDK key is saved in the brand's Phone verification settings in MineOS and matches the key in your Prelude dashboard. In Prelude, open Configure > SDK Signature Enforcement and check the Unsigned · 30D count for Web. To restore sending right away while you investigate, turn off Enforce for Web.
The OTP integration status shows Disconnected
The API key wasn't saved or can't be validated. Check the key in your Prelude dashboard, enter it again, and click Test & save. If the error says Prelude isn't responding, wait a few moments and try again.
A data subject entered the wrong phone number
The code can only go to the number on the request. Ask the data subject to cancel the request from the Verify your phone number page and submit a new one with the correct number. If they don't, reject the request and add a note that the data subject never completed verification.
Getting help from Prelude
For help with your Prelude account, message templates, retries and rate limits, routes, fraud protection, or SDK signature enforcement, contact Prelude support at [email protected]. You can also browse the Prelude documentation.
For anything in the MineOS Portal or Privacy Center, contact MineOS support.
Good to know
- Authorized agents skip the phone step. Requests submitted by an authorized agent open after email verification.
- Requests from other channels (manual, import, API) aren't sent a code.
- Regulatory context. Matching a second identifier, such as a phone number, gives you a higher degree of certainty, which the CCPA regulations expect for more sensitive requests like deletion and access to specific pieces of information. It also supports the identity checks GDPR Article 12(6) permits.
Updated about 2 hours ago