Custom Storage for Copy Reports
Store Copy report data in your own cloud storage instead of MineOS's default temporary storage.
When you process a Copy (access) request, MineOS generates a Copy report containing the data subject's data. By default this report is stored temporarily in MineOS (in a private Google Cloud bucket). Setting custom storage lets you use your own cloud storage instead, giving you full control over where that data lives and how long it's retained.
This setting applies to Copy requests only — other request types (such as Delete or Do Not Sell) aren't affected.
Default storage vs. your own
| MineOS default storage | Your own storage | |
|---|---|---|
| Location | EU or US | Managed by you |
| Retention | 45 days | Managed by you |
| Managed by | MineOS | Managed by you |
What's stored
When a Copy request is processed, MineOS saves to the configured storage:
- Uploaded files attached to the request.
- Copies of files found by unstructured integrations (e.g. Google Drive, OneDrive).
- A JSON data file from structured integrations — the data retrieved from each integration, plus the integration metadata used to build the report (integration ID, display name, data types, and description).
On MineOS default storage, uploaded and unstructured integration files are kept 90 days from collection, and the JSON data report 45 days from when the report was compiled.
Switching between storages
You can switch from MineOS default storage to a custom storage, between custom storages, or back to default at any time. After you switch:
- New or edited exports are saved to the newly configured storage.
- Existing files stay where they are. MineOS doesn't move or delete them.
- Older requests keep working. MineOS tracks where each file was saved and retrieves it from that storage, so download links for earlier requests still work. Keep MineOS's access to the previous bucket for as long as you need those files to be downloadable.
- Your previous bucket configuration is saved, so switching back to the same role doesn't require editing its trust policy.
Use your own Google Cloud Storage
Step 1: Create and set up the bucket
Whether you use an existing bucket or create a new one, follow these best practices:
- Use multi-region or dual-region for high availability, and the Standard storage class.
- Use uniform bucket-level access.
- Disable versioning (important for compliance).
- Set a retention policy of 45 days or more.
- Configure CORS to allow access from your Privacy Center.
Then grant MineOS access to the bucket: in the Google Cloud Console, open your bucket's Permissions → Grant Access, paste your MineOS principal account ID (shown on the DSR Storage setup page in MineOS once you select Custom and Google Cloud), and assign the Storage Admin role. MineOS needs Storage Admin to set the bucket's CORS policy; it only manages objects in the bucket and won't change lifecycle, permissions, or other settings.
Step 2: Configure it in MineOS
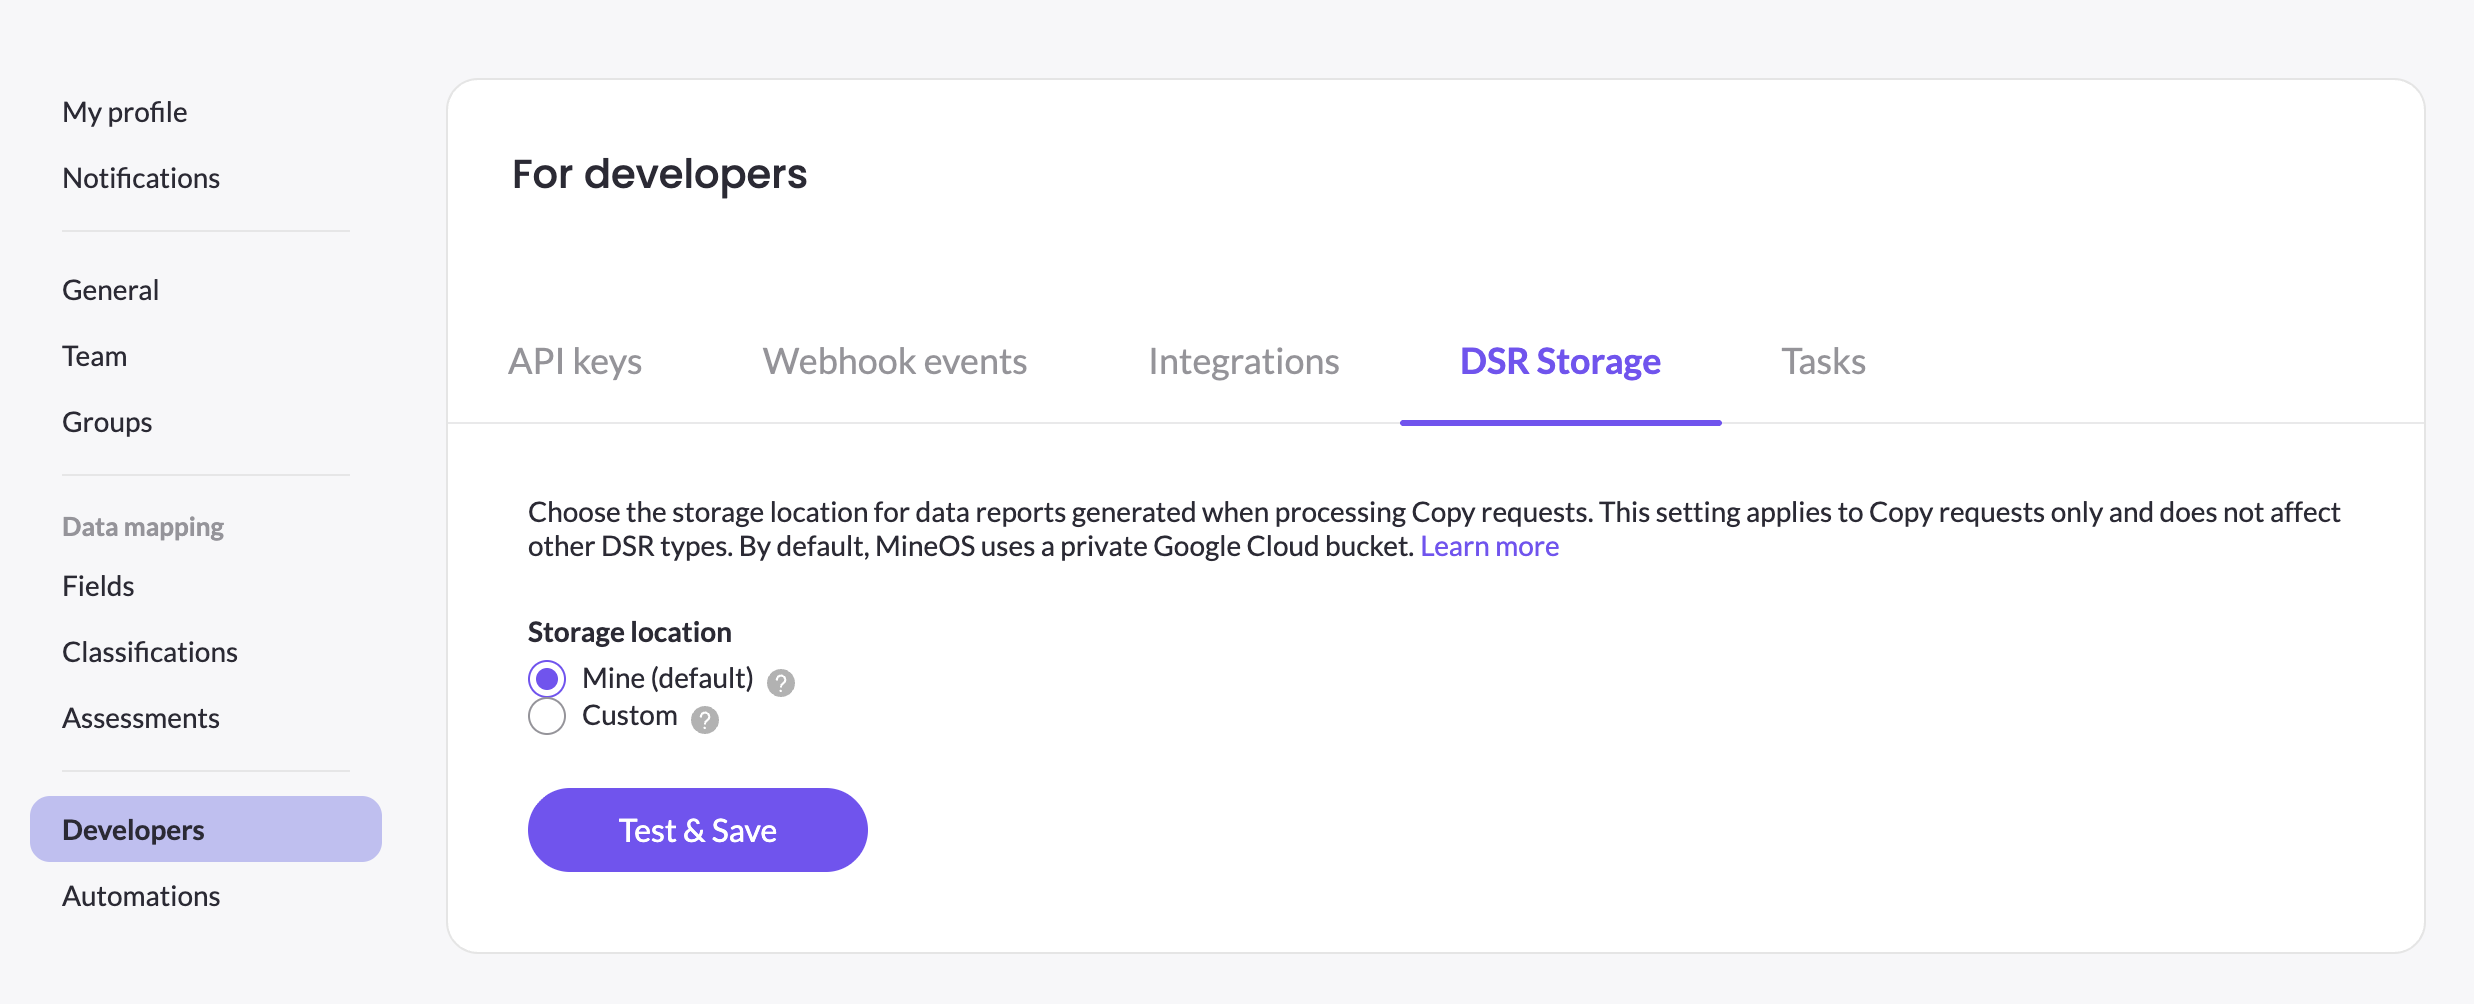
- Go to Settings → Developers → DSR Storage.
- Select Custom, then choose Google Cloud as the provider.
- Enter the project ID and bucket name.
- Click Test & Save — MineOS verifies it can connect to the bucket and has the required permissions.
Caution: Don't edit file or data attachments on existing requests after changing storage — existing attachments follow the new storage configuration.
Use your own Amazon S3 Cloud Storage
Mine can write your DSR copry requests files to an S3 bucket you own instead of Mine's storage. Mine reaches your bucket by assuming a role in your AWS account — no access keys are exchanged. Everything below is done once, in your AWS account.
Before you start
In the Mine portal, navigate to Settings by clicking on the Compnay name at the lower left corner of the screen → Developers → DSR storage → choose Custom → Choose Amazon S3. Two values are shown there that you will need:
- MineOS Principal ARN: the AWS identity that will assume your role.
- External ID: a value unique to your company which is mine-{company-id}. It stops anyone else persuading Mine to use
your role.
Both are generated for you and stay the same. Keep the Mine portal page open.
Step 1: Create a new bucket
Create a new S3 bucket in the region you want your DSR exports stored in.
Two bucket settings Mine does not support:
- Requester Pays must be off: Set the request payer to Bucket owner. Mine's requests fail
outright against a Requester Pays bucket. - Object Lock in compliance mode prevents Mine from ever deleting an export.
If the bucket is encrypted with a customer managed KMS key, the role below also needskms:GenerateDataKey and kms:Decrypt on that key — see the extra statement in step 3.
Step 2: Create the role
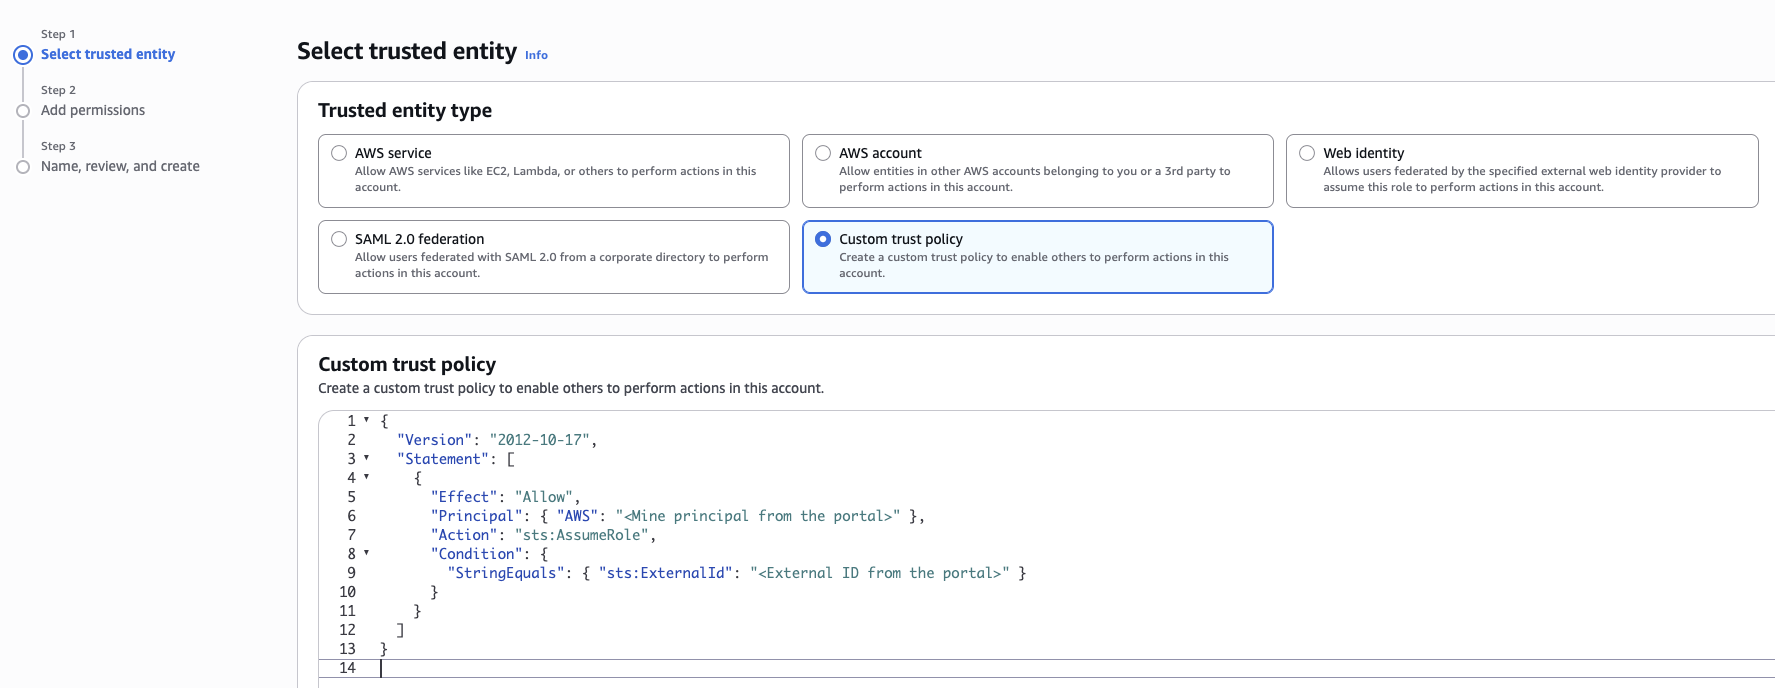
Create an IAM role using the following custom trust policy, substituting the two values from the portal:
{"Version": "2012-10-17", "Statement": [ { "Effect": "Allow", "Principal": { "AWS": "<Mine principal from the portal>" }, "Action": "sts:AssumeRole", "Condition": { "StringEquals": { "sts:ExternalId": "<External ID from the portal>" } } } ]}
Step 3: Attach the permissions
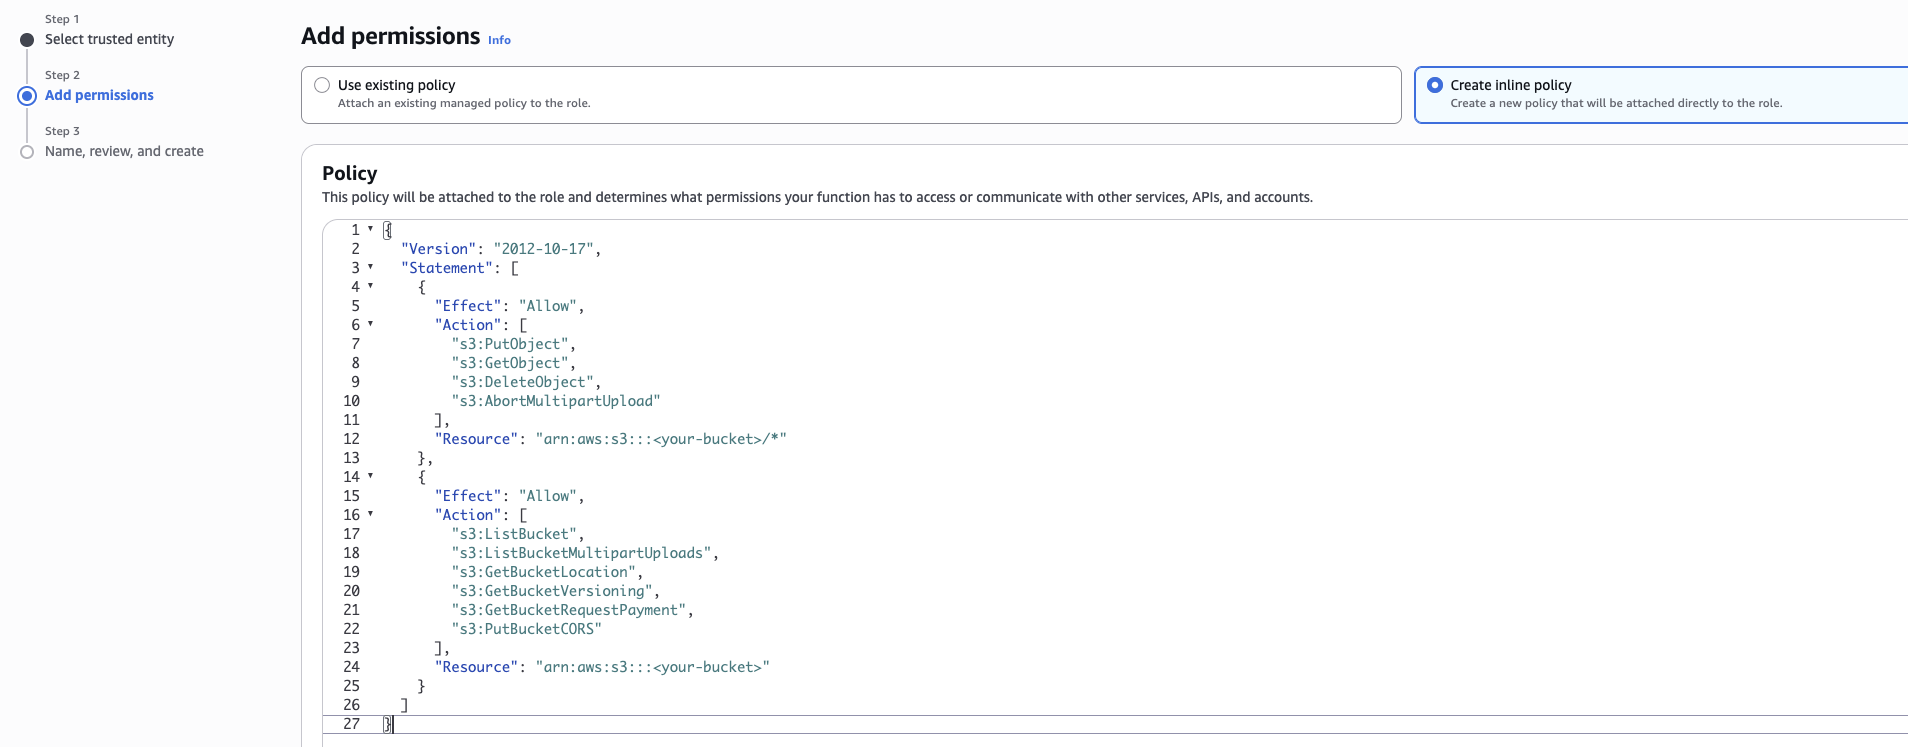
Add the following permissions as an new inline policy
{"Version": "2012-10-17", "Statement": [ { "Effect": "Allow", "Action": [ "s3:PutObject", "s3:GetObject", "s3:DeleteObject", "s3:AbortMultipartUpload" ], "Resource": "arn:aws:s3:::<your-bucket>/*" }, { "Effect": "Allow", "Action": [ "s3:ListBucket", "s3:ListBucketMultipartUploads", "s3:GetBucketLocation", "s3:GetBucketVersioning", "s3:GetBucketRequestPayment", "s3:PutBucketCORS" ], "Resource": "arn:aws:s3:::<your-bucket>" } ]}
If the bucket uses a customer managed KMS key, add this statement to the same policy:
{"Effect": "Allow", "Action": ["kms:GenerateDataKey", "kms:Decrypt"], "Resource": "<ARN of the bucket's KMS key>"}
Grant all of these, including s3:PutObject. Mine's connection test never writes to your bucket,
so it cannot confirm write permission — a missing s3:PutObject passes the test and fails later,
when an export runs. The same is true of the KMS permissions above, and of s3:DeleteObject if your
bucket has versioning enabled.
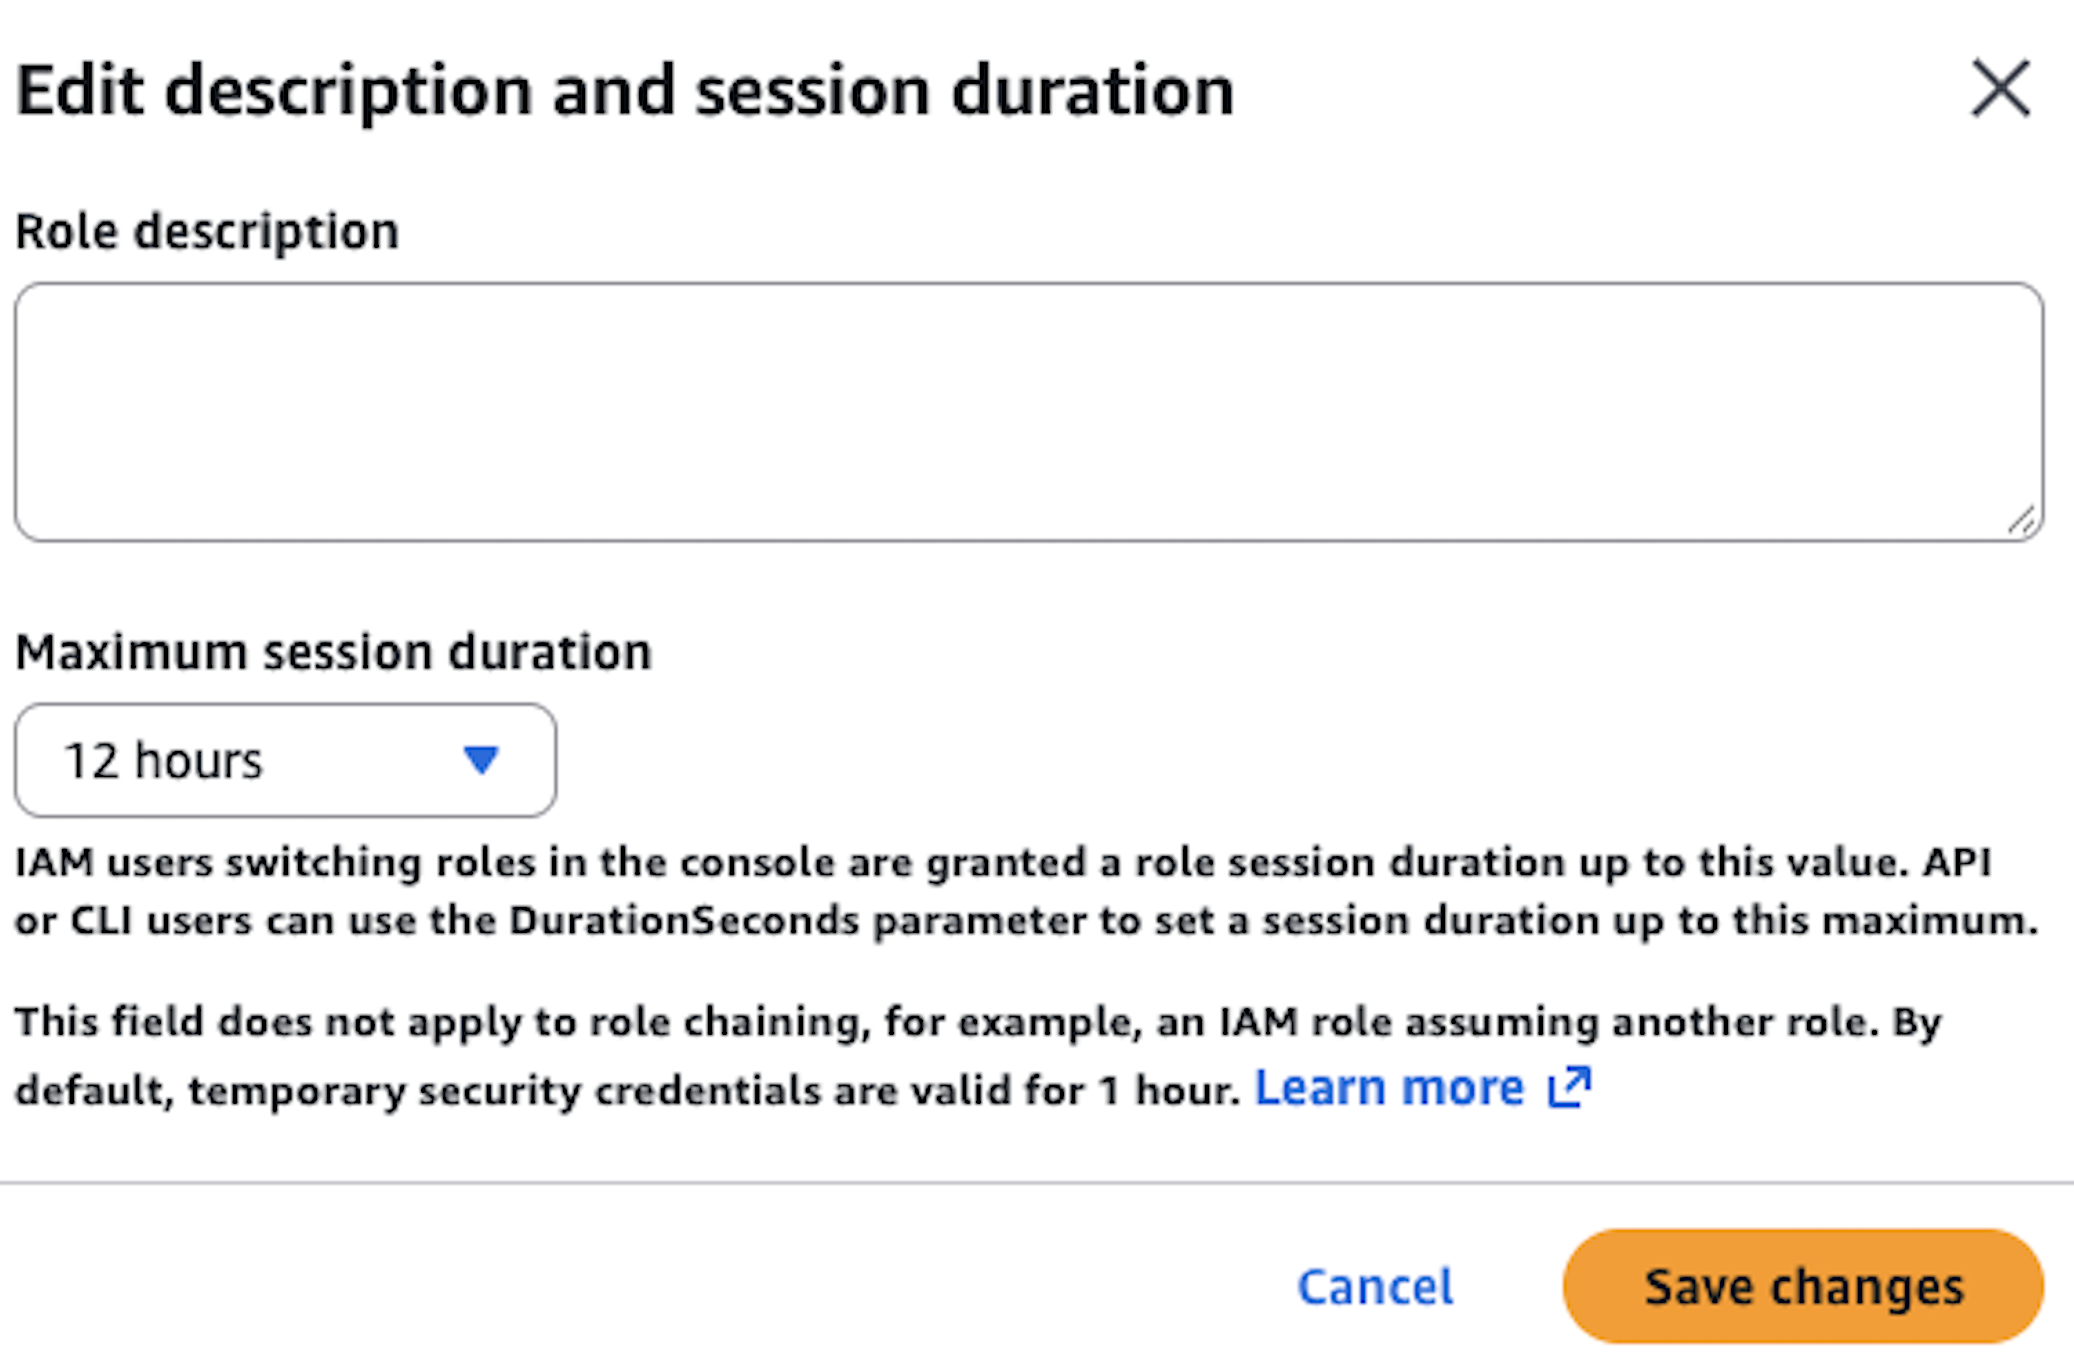
Step 4: Set the role's maximum session duration
After creatng the role, set the role's maximum session duration to 12 hours. Download links cannot outlive the session that signs them, and the default of one hour does not provide users with the maximal session time with their data. Mine will not save a configuration on a role that allows less — and if you lower
it after setup, Mine loses access to the bucket until you restore it.
Step 5: [Optional] Add a cleanup rule
Add an S3 lifecycle rule to your bucket that deletes incomplete multipart uploads after 7 days.
A large export interrupted midway leaves parts behind that you are billed for until something removes
them.
In the console this is Management → Create lifecycle rule → Delete expired object, delete markers or
incomplete multipart uploads. With the AWS CLI, save this as lifecycle.json:
{"Rules": [ { "ID": "mine-abort-incomplete-uploads", "Status": "Enabled", "Filter": {}, "AbortIncompleteMultipartUpload": { "DaysAfterInitiation": 7 } } ]}
and run aws s3api put-bucket-lifecycle-configuration --bucket
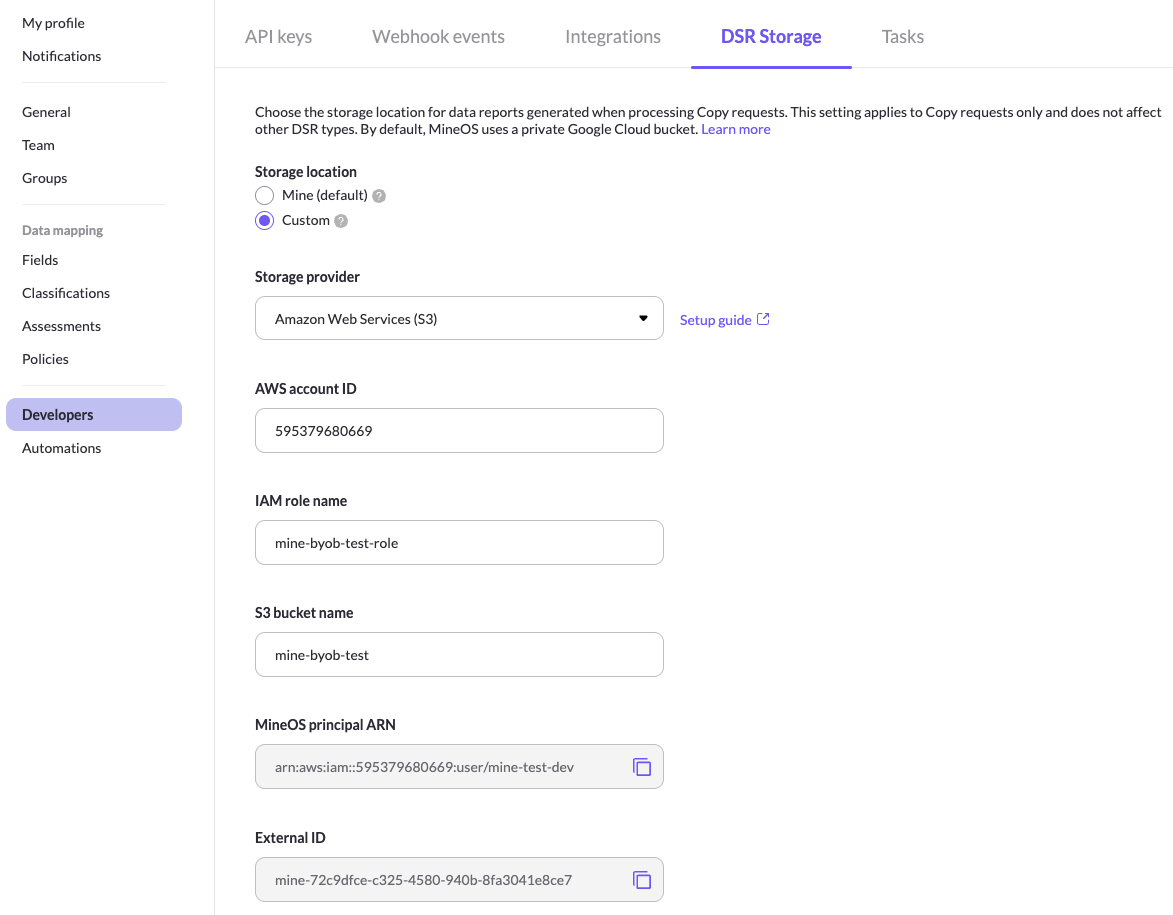
Step 6: Finish configuration in the Mine portal
Enter your AWS account ID, IAM role name (the name, not the full ARN) and S3 bucket name, then test
the connection. A successful test does not confirm every permission — see step 3 for the ones it
cannot verify.
As an example:
What Mine changes in your bucket
Saving the configuration replaces your bucket's CORS configuration with a rule allowing GET and
HEAD from any origin. This is required — the Mine portal and your Privacy Center fetch export files
from the browser, and without it downloads fail. Any CORS rules you already had are removed.
The connection test reads and deletes .mine-connection-test/probe, a key that does not exist, to
check permissions without touching your data. Nothing is written or removed, but the calls appear in
CloudTrail. On a bucket with versioning enabled the delete is skipped, since there it would leave a
delete marker behind.
Mine otherwise only writes, reads and deletes its own export objects. It does not change lifecycle
rules, policies, encryption or any other bucket setting.
Updated 12 days ago